Pika has just released an incredible new video inpainting feature called Pikaswaps. This tool allows you to modify specific regions in a video using text or by creating a mask with a brush.
You can then replace the selected object with something entirely new by typing in a new prompt. If you’re into merging reality with AI, you’re going to have a lot of fun with this.
In this article, I’ll show you how to access this tool, how to use it, and some creative use cases.
What is Pikaswaps?
Pikaswaps is a feature in Pika Labs that allows users to swap or replace specific elements in an image or video using AI. It enables seamless modifications while maintaining visual consistency.
How to Access Pika Swaps and How It Works
To access Pika Swaps, follow these steps:
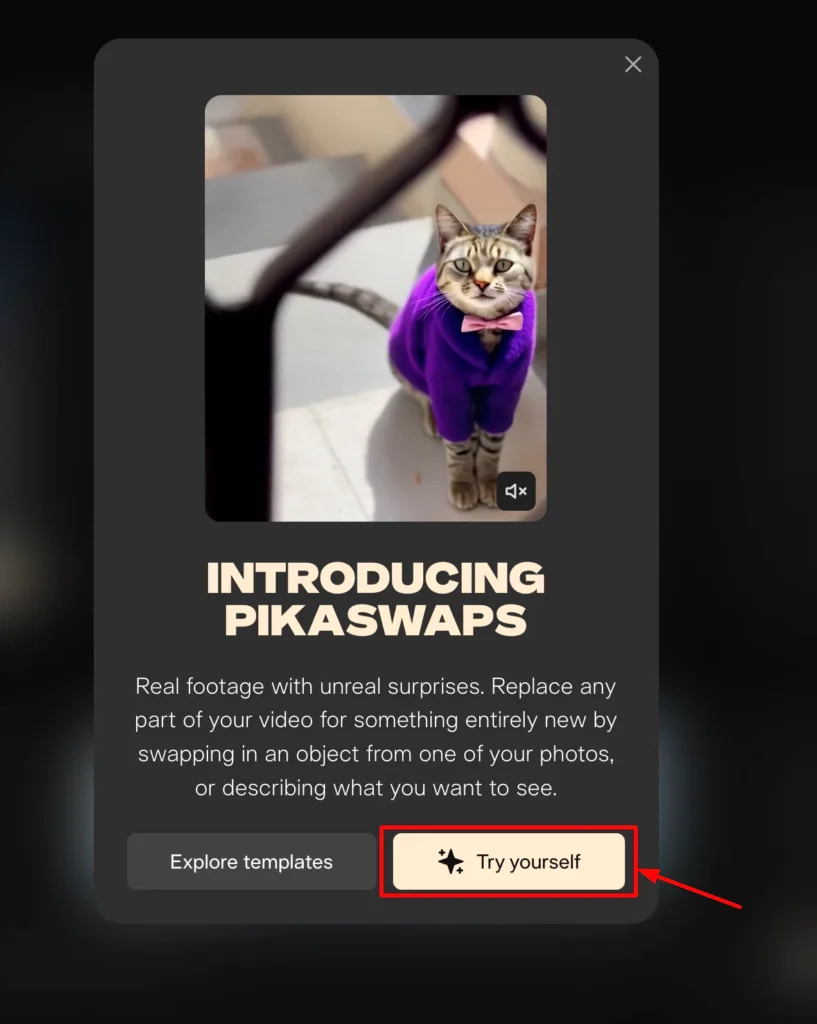
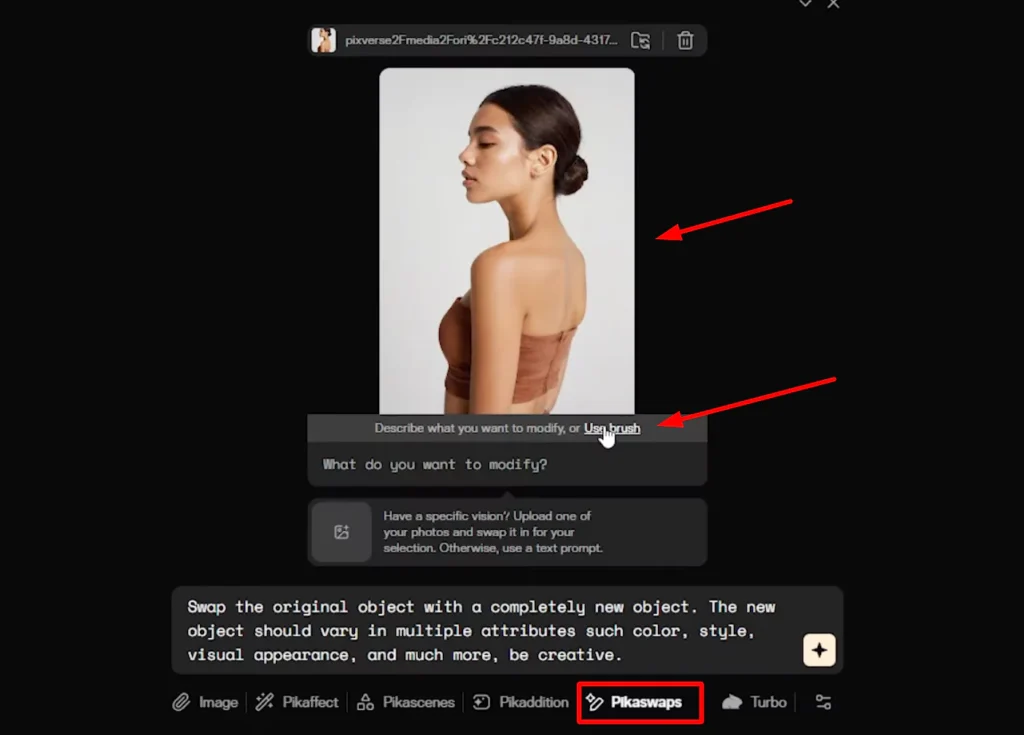
Step 1: Click on the Pika Swaps Icon: On the homepage, you’ll see a brand-new icon labeled Pikaswaps. Click on it to open the tool.
Step 2: Upload Your Video: You’ll be presented with an interface where you can upload a video.
Step 3: Video Length Limit: Pika Swaps processes only the first 5 seconds of a video. If your video is longer, only the initial segment will be used.
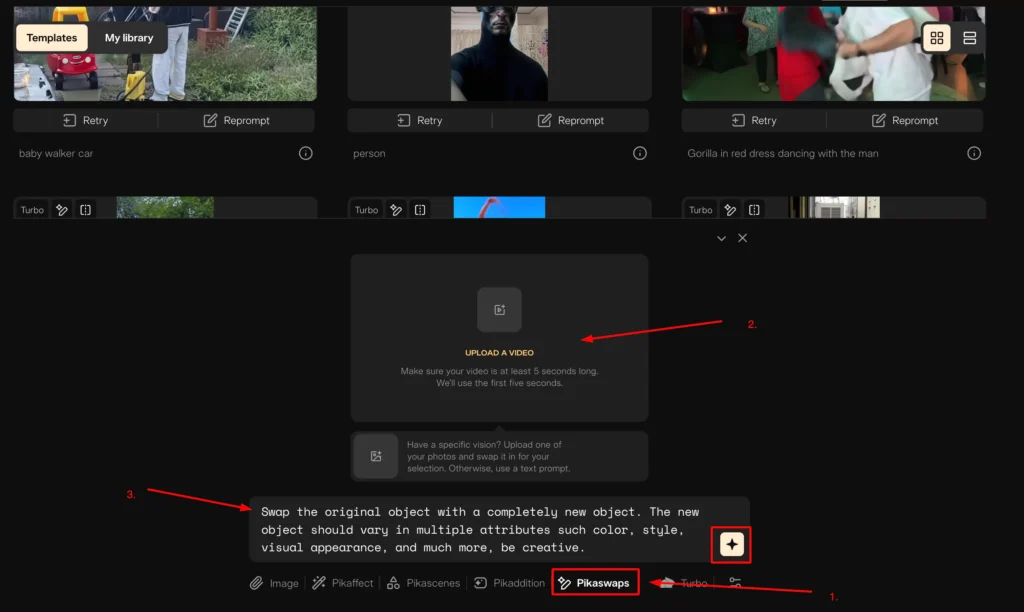
Step 4: Reference Image Option: If you have a specific vision in mind, you can upload an image as a reference. This helps guide the tool to swap objects more accurately.
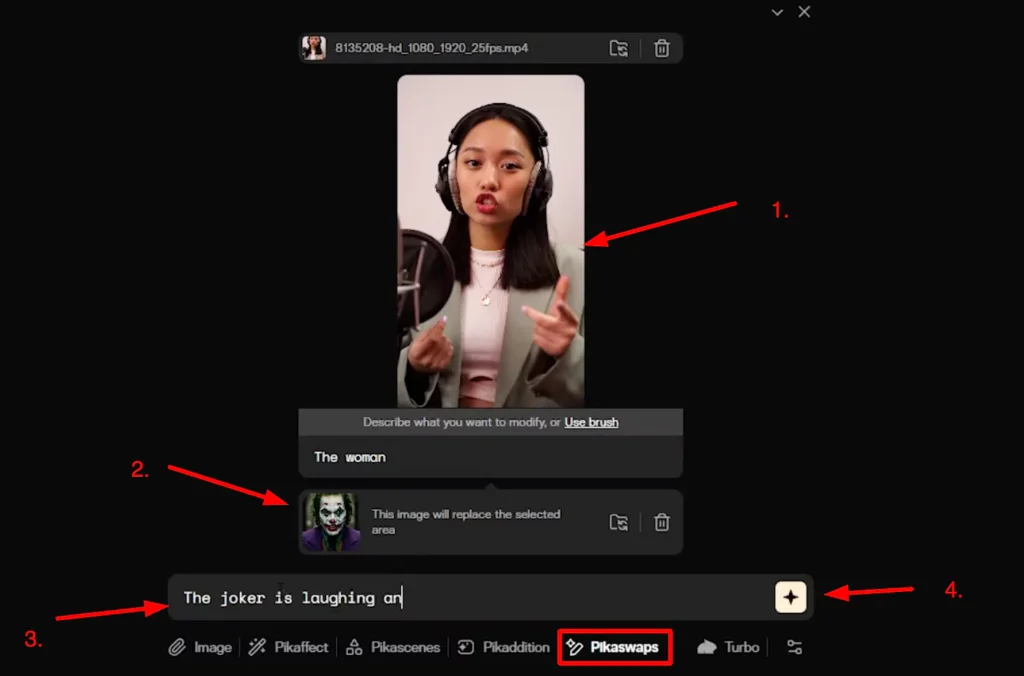
Step 5: Enter Your Prompt: At the bottom of the interface, you’ll find a text box where you can type a prompt describing what you want to replace in the video.
Once you have uploaded your video, you can start making modifications. Now, let’s explore how to use text to modify objects within the video.
How to Use Modify and Prompting to Generate the video?
Uploading a Video
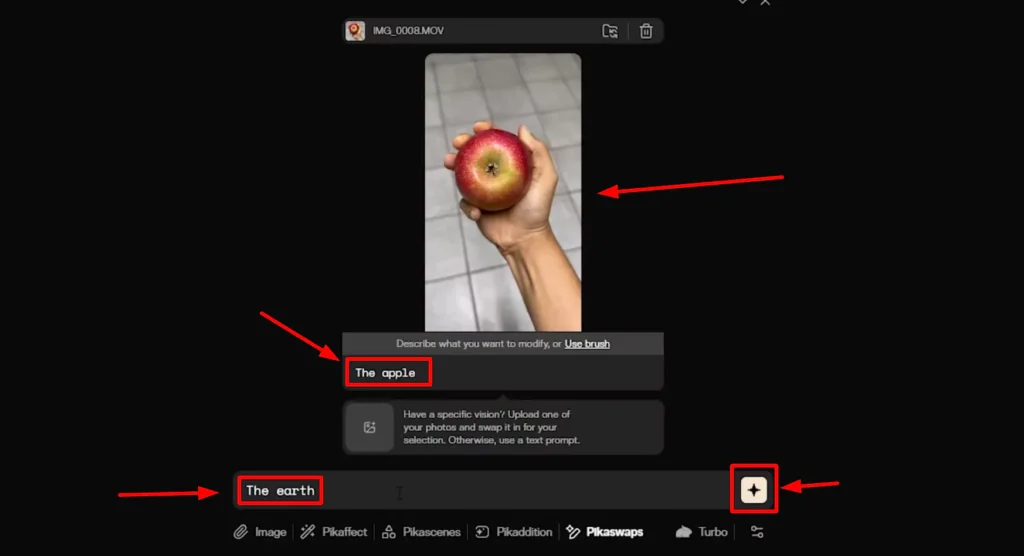
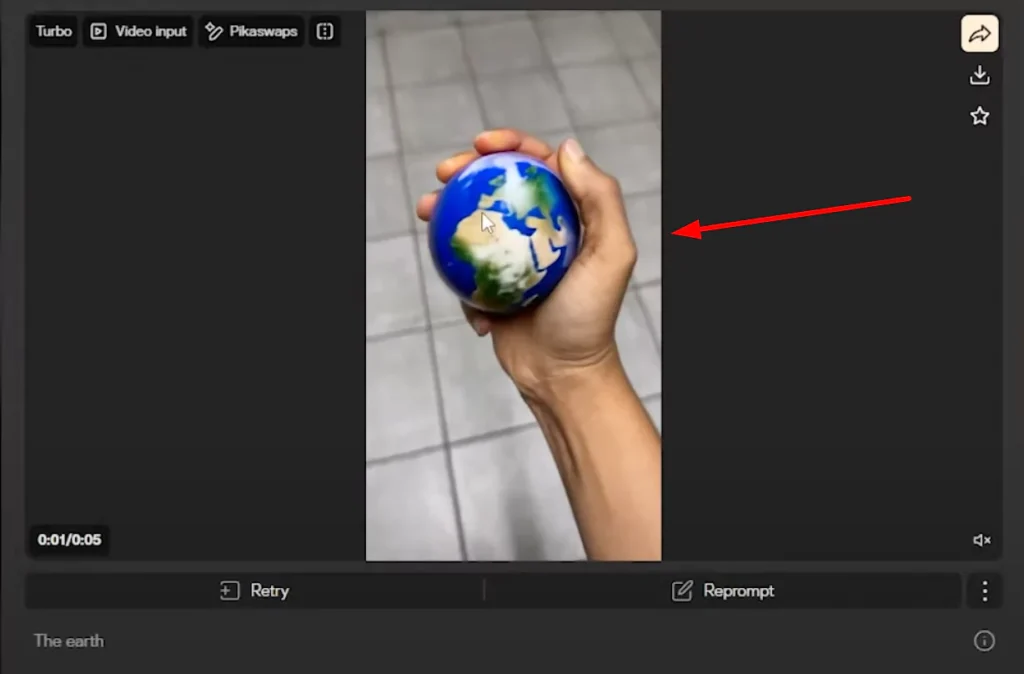
I uploaded a video of myself holding an apple. After uploading, new options appeared on the screen. One of the most important features here is the ability to use natural language to describe a selection in the video.
Automatic Object Selection
Pika swaps does an excellent job of automatically identifying objects, making a selection, and creating a mask for you. For example, if I want to select the apple in the video, I can simply type “apple,” and the AI will identify and select it for me.
Replacing the Selection
At the bottom, I typed in a prompt to describe what I wanted to replace the apple with. I decided to replace it with the Earth because, well, it’s not every day you get to hold the Earth in your hand.
Once you’re ready, click on the generate icon to start creating your video.
How to Use the Brush – A Very Useful Feature
When to Use the Brush
Now, let’s talk about the brush feature, which is extremely useful. Sometimes, the AI might struggle to make a precise selection.
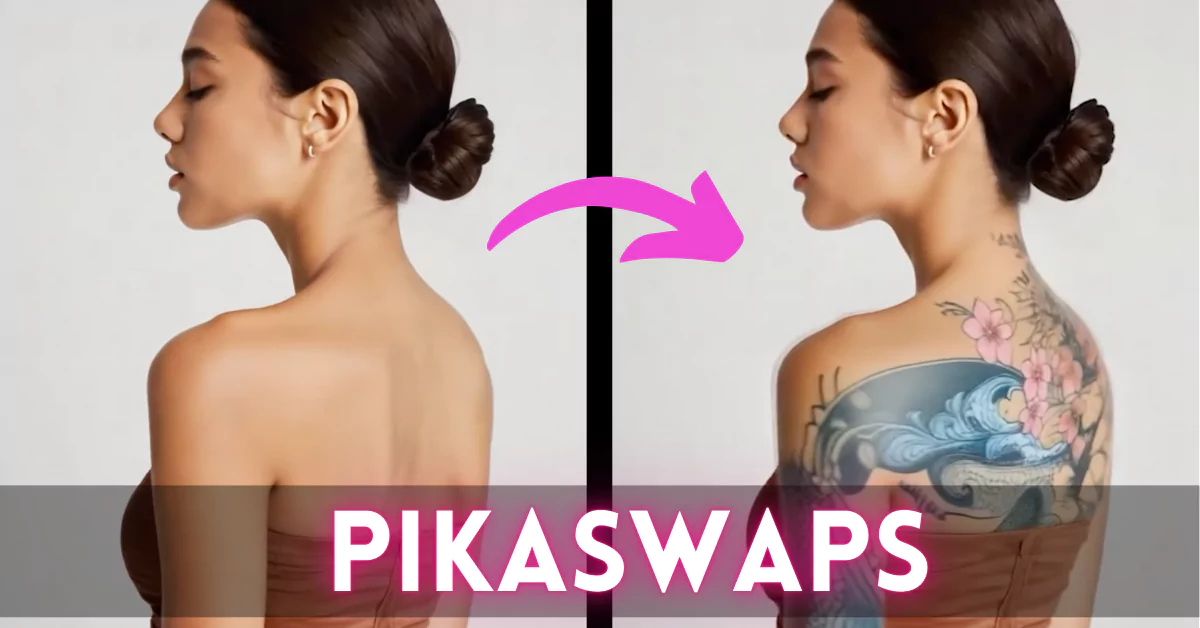
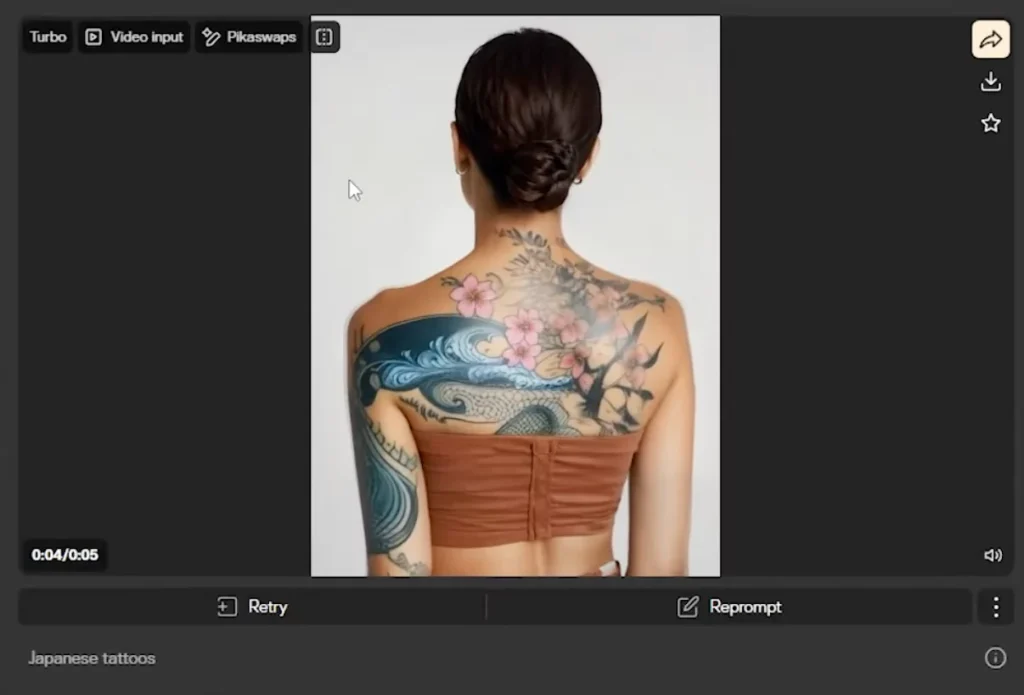
For example, I wanted to place tattoos on a person’s back and arms, but the AI couldn’t identify those areas accurately.
Using the Brush for Precision
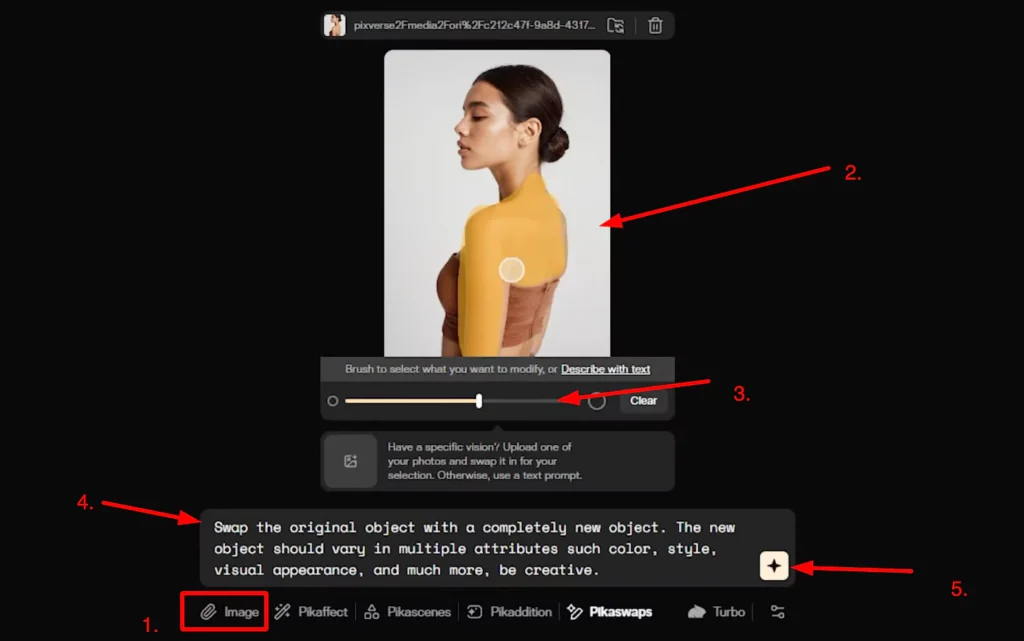
To fix this, I clicked on Use Brush. Here, I could adjust the slider to control the size of the brush. This allowed me to guide the AI by manually selecting the areas where I wanted the tattoos to appear.
Applying the Changes
After making the selection, the AI applied them to the areas I had brushed. If I didn’t like the selection, I could click Clear and start over.
Once satisfied, I clicked Generate, and it appeared exactly where I wanted them.
Steps to Use the Brush Feature:
- Select the Brush Tool: Click on the Use Brush button.
- Adjust the Brush Size: Use the slider to control the brush size.
- Manually Paint Over the Object: Paint over the specific area you want to modify. For example, I painted over the person’s back and arms where I wanted the tattoos.
- Enter a Prompt: Type your prompt.
- Generate the Video: Click on Generate, and the AI will apply the changes only to the selected area.
The brush feature is a lifesaver when you need precise or accurate selections in a video.
How to Use Reference Image – A Very Powerful Feature?
Subject Replacement
Another powerful feature in Pika Swaps is the Reference Image option. This is especially useful when doing subject replacement.
Why Use Reference Images?
If you want to replace a person or object in a video while maintaining the original environment, lighting, and motion, reference images can help.
Steps to Use a Reference Image:
- Upload Your Video: Select the video where you want to replace a subject.
- Upload a Reference Image: Choose an image of the new subject you want to insert into the scene.
- Select the Area: Use the AI’s automatic selection or manually brush over the subject you want to replace.
- Generate the Video: Click on Generate, and the AI will integrate the new subject seamlessly.
Best Use Cases for Reference Images:
- Swapping a character in a video
- Replacing objects with specific designs
- Creating AI-generated animations with consistency
Pikaswaps Extra Features:
Download, Share, and Save
When you hover over a generated video, you’ll see options to:
- Download the video.
- Share it on social media.
- Favorite it, which saves it to a separate section for easy access.
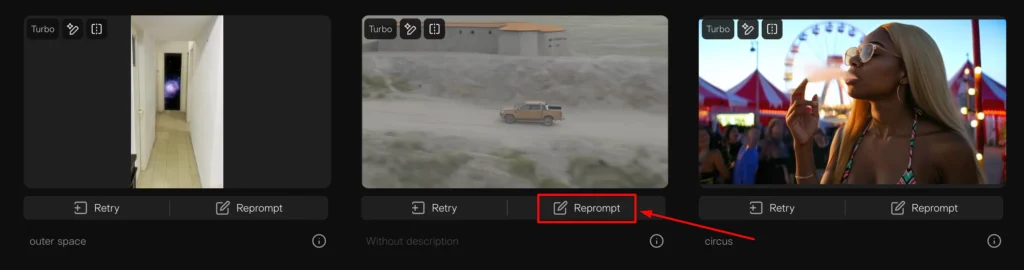
Retry and Reprompt
If you’re not happy with the result, you can click Retry to generate a new version. You can also click Reprompt to reuse all the elements (video, prompts, etc.) from the previous attempt.
Delete
If you don’t like a video, simply click the three dots and select Delete.
Limitations I Encountered
What is Ghosting?
One limitation I noticed is ghosting, where the original object appears transparent or faintly visible in the new video. This happens when the mask isn’t precise enough.
Solution to Ghosting
To reduce ghosting, try uploading a reference image. This often improves the results significantly.
Pikaswaps Creative Use Cases
1. Merge Reality and AI
One of the most fun ways to use Pika swaps is by merging reality with AI. For example, you can turn a simple household item like an apple into something entirely new, like a cluster of eyeballs.
2. Replace Your Pets with New Animals
You can also swap out your pets with different animals. Turn a dog into a white tiger or a cat into a bald eagle.
3. Merge Styles or Replace Them Entirely
Another creative use case is merging styles. For example, you can replace a subject with a black-and-white hand-drawn sketch, creating a fusion of realism and sketched aesthetics.
4. Try Face Swapping
While Pika swaps isn’t the best tool for face swapping, it works well with fictional characters. Simply specify the face as your selection and upload or describe the new face.
5. Fashion Try-On and Replacement
You can also use Pika swaps for fashion try-ons. Replace specific clothing items in stages, starting with the top, then the bottom, and so on.
6. Generate Tattoos
As shown earlier, you can generate tattoos on someone who doesn’t have any. Just remember to use the brush for the best results.
7. Swap Out Buildings with New Objects
You can even swap out buildings with completely different objects, like turning a building into a box of cereal.
8. Easily Change the Color of Someone’s Hair
Changing hair color is another simple yet fun use case.
9. Replace a Background
While Pika swaps isn’t the best for background replacement (it doesn’t relight the subject), you can still experiment with it.
10. Replace Vehicles with Something Strange and Brand New
Swap out vehicles with creative ideas, like a car made of sweets and donuts. Just ensure the vehicle is stationary for the best results.
Pikadditions AI: Insert objects Into Videos
Conclusion
Pika Swaps is an incredibly useful tool that allows you to modify videos with simple text prompts, brush selections, and reference images. If you want to swap objects, add new details, or replace entire subjects, this tool makes it easy and efficient.
Key Takeaways:
- Text-Based Modifications: Quickly swap objects using simple prompts.
- Brush Feature: Manually select areas for precise changes.
- Reference Images: Replace subjects while maintaining the original video’s look and feel.