
Using Pika version 1.0 Text to Video involves a straightforward process, enabling users to generate videos based on their unique prompts. Here’s a step-by-step guide for you to navigating and using the features of Pika 1.0 effectively:
Pika version 1.0 Text To Video Full Guide:
Step 1: Signing In
- Visit the Website: Start by navigating to Pika.art.
- Sign In: Use your Google or Discord account to sign in. This step is essential to access the Pika 1.0 Dashboard and its features.

Step 2: Navigating the Dashboard
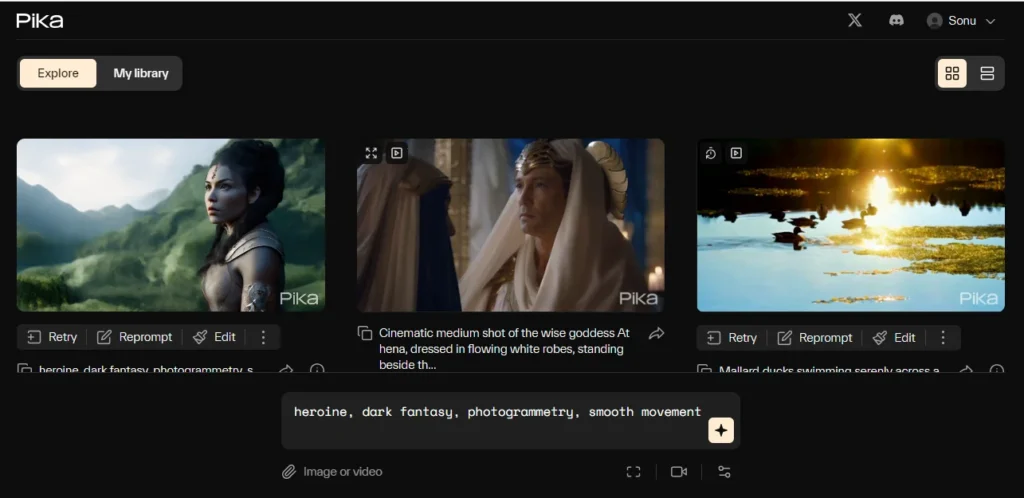
After logging in, you’ll be directed to the Pika 1.0 Dashboard. This is where you’ll manage your video creation process.
Step 3: Creating Your Video
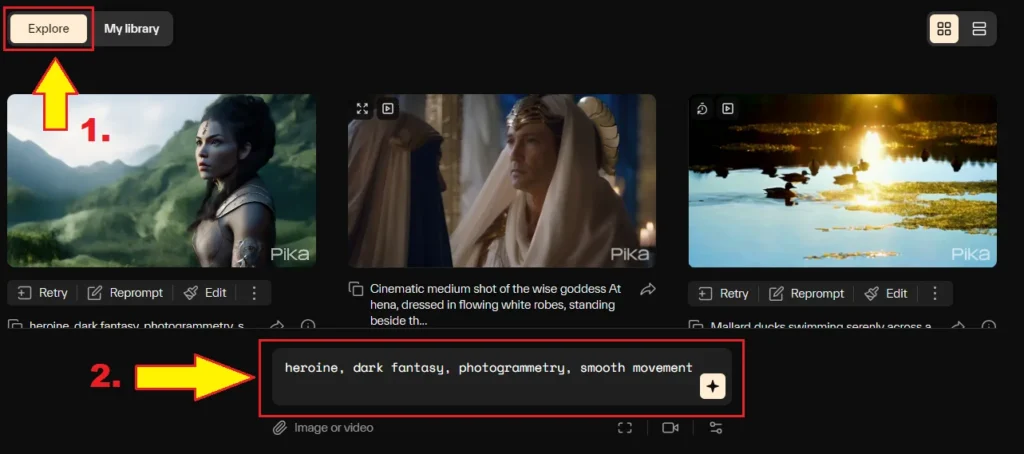
Enter a Prompt: There’s a section where you can type in your prompt. This is where you describe the idea that you want the video to represent. Be as descriptive as possible to ensure the generated video aligns with your vision.
Add Images or Videos (Optional): If you have specific images or video clips you want to include, you can upload them here. This step is optional but helps in customizing the content.
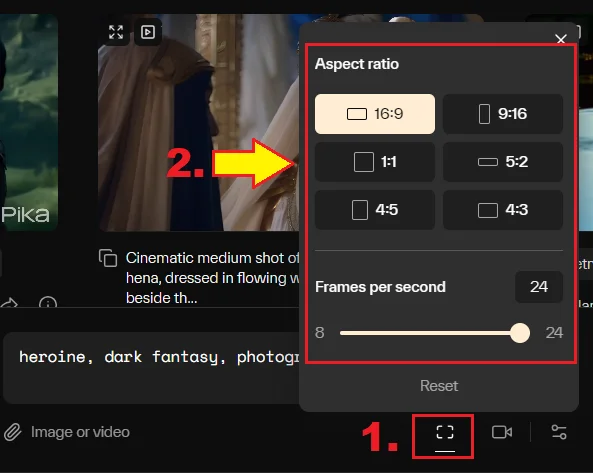
Step 4: Selecting Video Options
- Aspect Ratio: Choose from various aspect ratios like 16:9, 9:16, 1:1, 5:2, 4:5, or 4:3 depending on where you intend to use or display your video.
- Frames Per Second: Select the frame rate for your video, ranging from 8 to 24 fps. A higher frame rate generally results in smoother video playback.
Step 5: Adjusting Motion Control
You have options to adjust how the camera moves in your video:
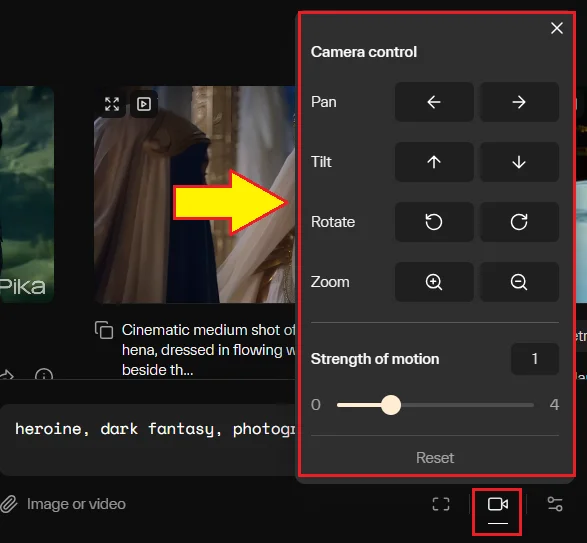
- Pan: Move the camera horizontally.
- Tilt: Adjust the camera’s vertical angle.
- Rotate: Rotate the camera around its axis.
- Zoom: Zoom in or out to focus on different parts of the scene.
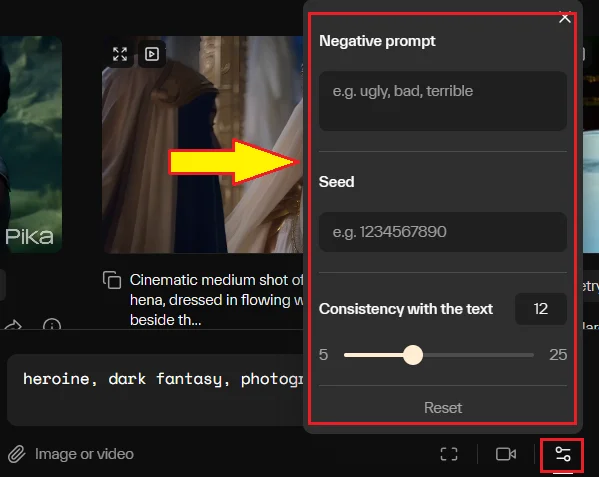
Step 6: Fine-Tuning Parameters
- Seed Value: This parameter influences the randomness in video generation. Different seed values can produce varied results with the same prompt.
- Negative Prompt: Specify what you do not want to include in your video. This helps in refining the output.
Step 7: Generating the Video
Once all settings are adjusted to your liking, click the ‘Enter‘ or ‘Generate’ button to start the video creation process. The system will use your input to create a video based on the provided prompt and settings.
Post-Creation
After the video is generated, you can review it. If it meets your expectations, you can download or share it. Otherwise, you might want to tweak your settings or prompt and try again.
Accessing Your Created Videos
My Library: After generating a video, it will be stored in the ‘My Library‘ section of Pika 1.0. This area serves as a repository for all your created videos, allowing you to easily access and manage them.
Managing Generated Videos
In ‘My Library’, you have several options to manage and modify your videos:
Retry: If you’re not satisfied with how a video turned out, you can choose to ‘Retry’ the creation process. This option allows you to generate the video again, possibly with some adjustments to your initial prompt or settings to achieve a different result.
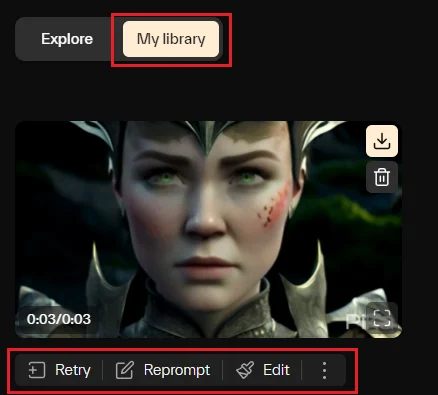
Reprompt: This option lets you alter the initial prompt you used for creating the video. It’s useful when you want to maintain some aspects of the video but change others based on a new or revised prompt.
Edit: The ‘Edit’ option provides you with tools to make changes to the already generated video. This could include adjusting aspects like brightness, and contrast, or applying various filters.
Enhancing Your Video
Adding Duration: You can extend the length of your video by up to 4 seconds. This feature is particularly useful if you feel that a little more time would benefit the narrative or visual impact of your video.
Upscaling: Upscaling is a powerful feature that enhances the resolution of your video. This can be especially beneficial if you’re planning to display your video on larger screens or simply want a higher-quality output. Upscaling improves the clarity and detail of the video, making it more visually appealing.
Pika Explore Tab
The ‘Explore’ tab in Pika 1.0 serves as a platform to discover and view videos generated by other users. This feature can be a significant source of inspiration, learning, and community interaction. Here’s how to use it effectively and what you can expect:
Navigating the Explore Tab
You can find the ‘Explore’ tab easily on the main navigation menu of Pika 1.0. Clicking on it takes you to a gallery of videos created by other users.
Features of the Explore Tab
The tab showcases a wide range of videos, highlighting the versatility and creative potential of Pika 1.0. You can see how different users interpret prompts and use the platform’s features.
Trending and Popular Videos: Often, this section includes trending or popular videos, giving you a sense of what is currently capturing the community’s interest.
Tips for Effective Use
Be Specific in Your Prompt: The more detailed your description, the closer the generated video will be to your envisioned concept.
Experiment with Settings: Don’t hesitate to experiment with different aspect ratios, frame rates, and motion controls to see how they alter the final product.
Use Negative Prompts Wisely: This can greatly refine the output by excluding unwanted elements.
Regularly Review Your Library: Periodically check ‘My Library’ to organize and keep track of your created videos. This helps in maintaining a streamlined workflow and easier access to your work.
Use Editing Wisely: When editing a video, consider the overall theme and purpose. Subtle changes can sometimes make a big difference in the final output.
Experiment with Extensions and Upscaling: Don’t hesitate to add a few extra seconds or upscale your video to see how it impacts the viewer’s experience. Sometimes, these enhancements can significantly improve the effectiveness of your video.
Keep Track of Versions: If you make multiple versions of a video using the ‘Retry’ or ‘Reprompt’ options, keep track of these variations. It helps in comparing and deciding which version best suits your needs.
FAQs:
1. How Do I Create a Video on Pika 1.0?
To create a video, log in to Pika 1.0 and navigate to the dashboard. Enter a descriptive prompt in the provided field, optionally add images or videos, select your desired video options like aspect ratio and frame rate, and adjust motion controls if needed. Finally, click the ‘Generate’ button to create your video.
2. Is it possible to edit my video after it has been generated?
Yes, you can edit your video after generation. In the ‘My Library’ section, select the video you want to edit and choose the ‘Edit’ option.
3. What customization options are available for video creation on Pika 1.0?
You can customize your video by choosing different aspect ratios, frame rates, and motion controls (pan, tilt, rotate, zoom).
4. How can I share my videos created on Pika 1.0 with others?
After generating and editing your video, you can download it from the ‘My Library’ section. Once downloaded, you can share it through various platforms like social media, email, or directly from your device.
5. What is the best way to use the Explore tab on Pika 1.0?
Use the Explore tab to view and get inspired by videos created by other users.