Every shot was directed individually inside Higsfield’s new Cinema Studio 2.0. This proves that we are finally moving past those short random clips and into full multi-shot scenes where characters actually stay consistent. I’m going to break down exactly how I built this entire scene from scratch.
Higsfield’s Cinema Studio has been around for a while, and the original version already did things differently from other AI video tools. You’d set up a virtual camera rig, generate an image, and then animate that image into a video. And that whole foundation is still here.
What 2.0 adds is everything that happens around it. There’s also a new grid mode that generates up to 16 variations at once in a 4×4 layout, so you can compare options side by side before you commit to anything. For a broader platform walkthrough, see this overview of Higgsfield Cinema Studio.
Why Multi-Shot AI Video Generation Matters
On the video side, the big addition is multi-shot control. Instead of generating one clip, you can now direct up to six individual shots within a single 12 second generation. Each shot gets its own prompt, its own camera movement, and its own timing.
There’s genre selection that changes how the AI handles pacing and motion based on if you’re making an action scene, a horror scene, a comedy, or something else entirely. And the last big one is Mframe chaining, which lets you pull the final frame from one generation and use it as the start frame for the next one. You can keep extending your footage past the 12 second cap.
That’s a lot of new tools in one update. Instead of just listing what they do, I’m going to build a full cinematic sequence from scratch so you can see exactly how all of it fits together.
Building the Scene From Scratch
Inside Higsfield, I’ll open the Cinema Studio 2.0 tab at the top. The first thing I need to do is create the main character as a reference element so he stays the same across every shot. In the image tab, I’ll press the add button, click create new element, and upload four reference angles of the character.
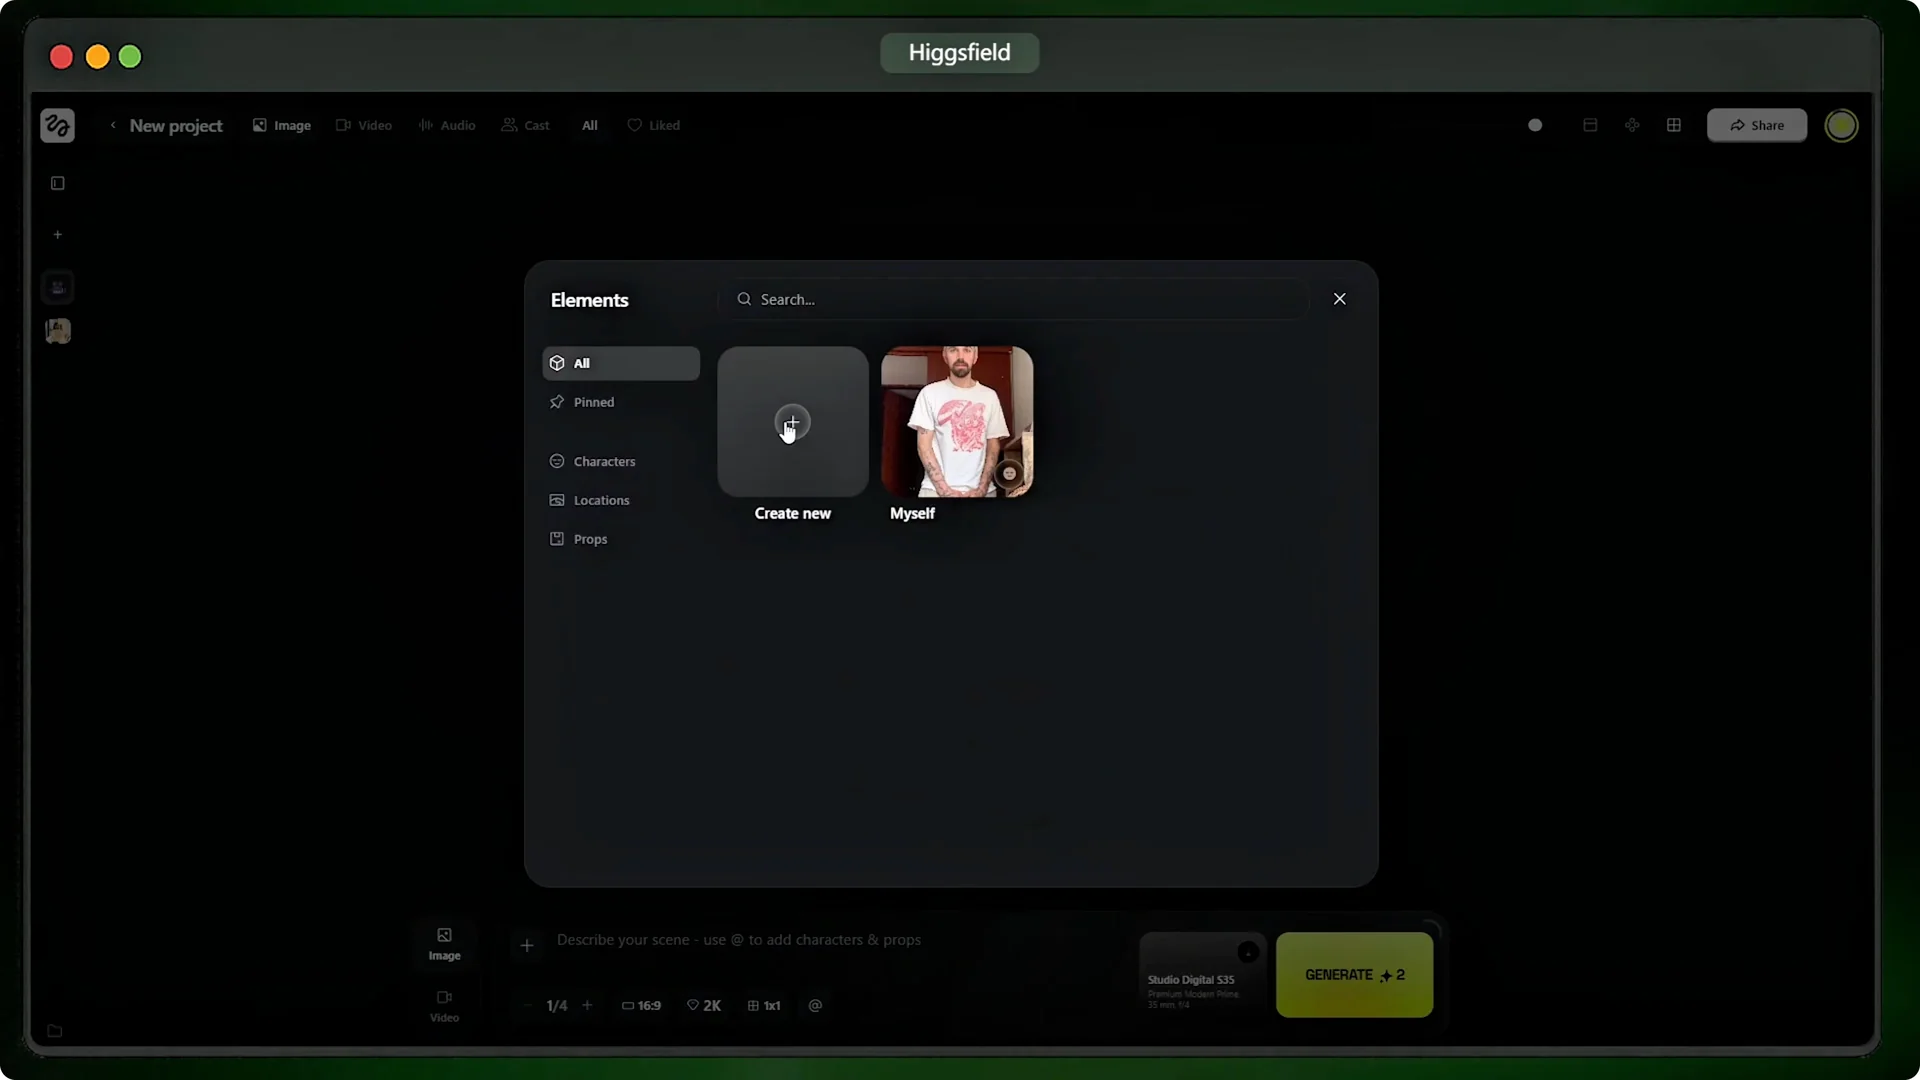
Once I press create, he’s saved and I can mention him in any prompt by typing it followed by his name. Cinema Studio pulls in his persona automatically. Now I’ll paste in my scene prompt describing the fight.
Lock the Hero Frame
Cinema Studio 2.0 lets you build a virtual camera rig where you pick a camera body, a lens type, your focal length, and your aperture. What all of those controls in plain terms is how wide or tight the shot looks, how much background blur you get, and the overall feel of the image. You can build a custom setup if you know exactly what you want, or just pick from the recommended presets.
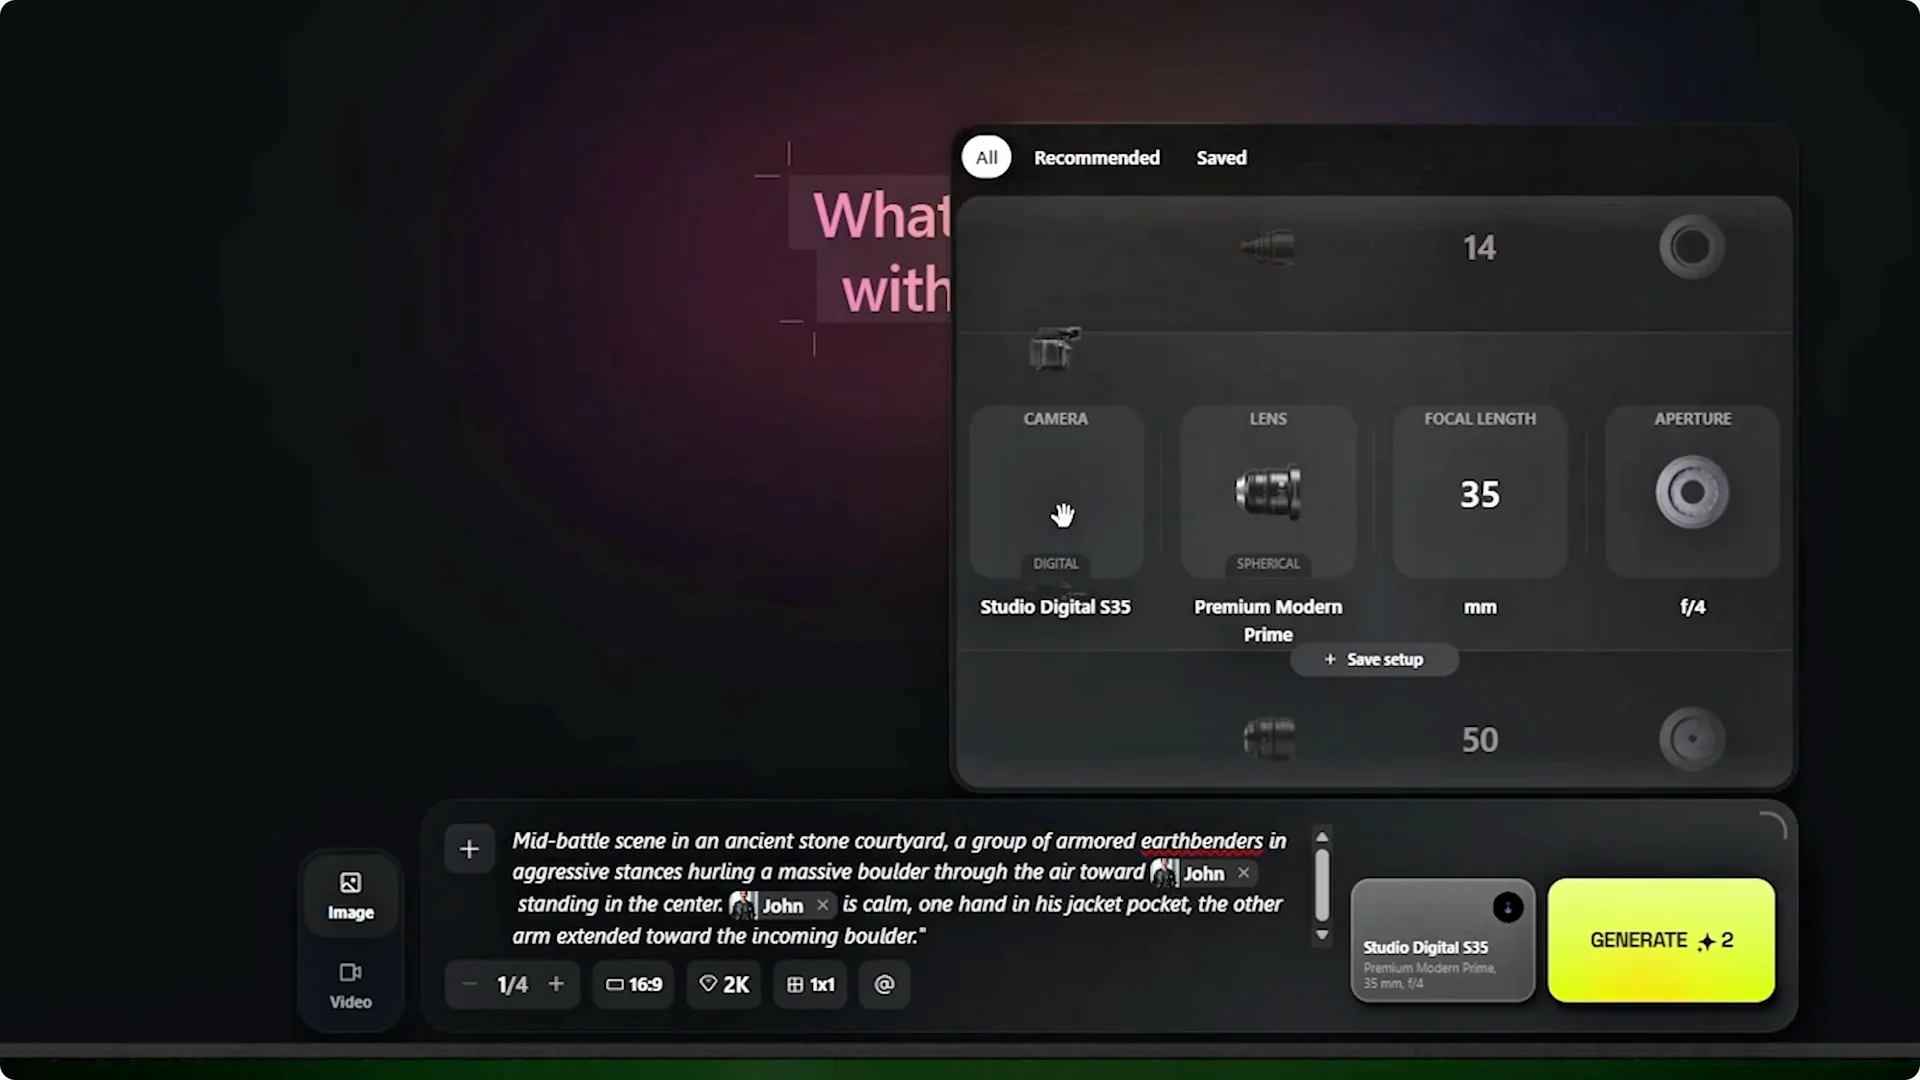
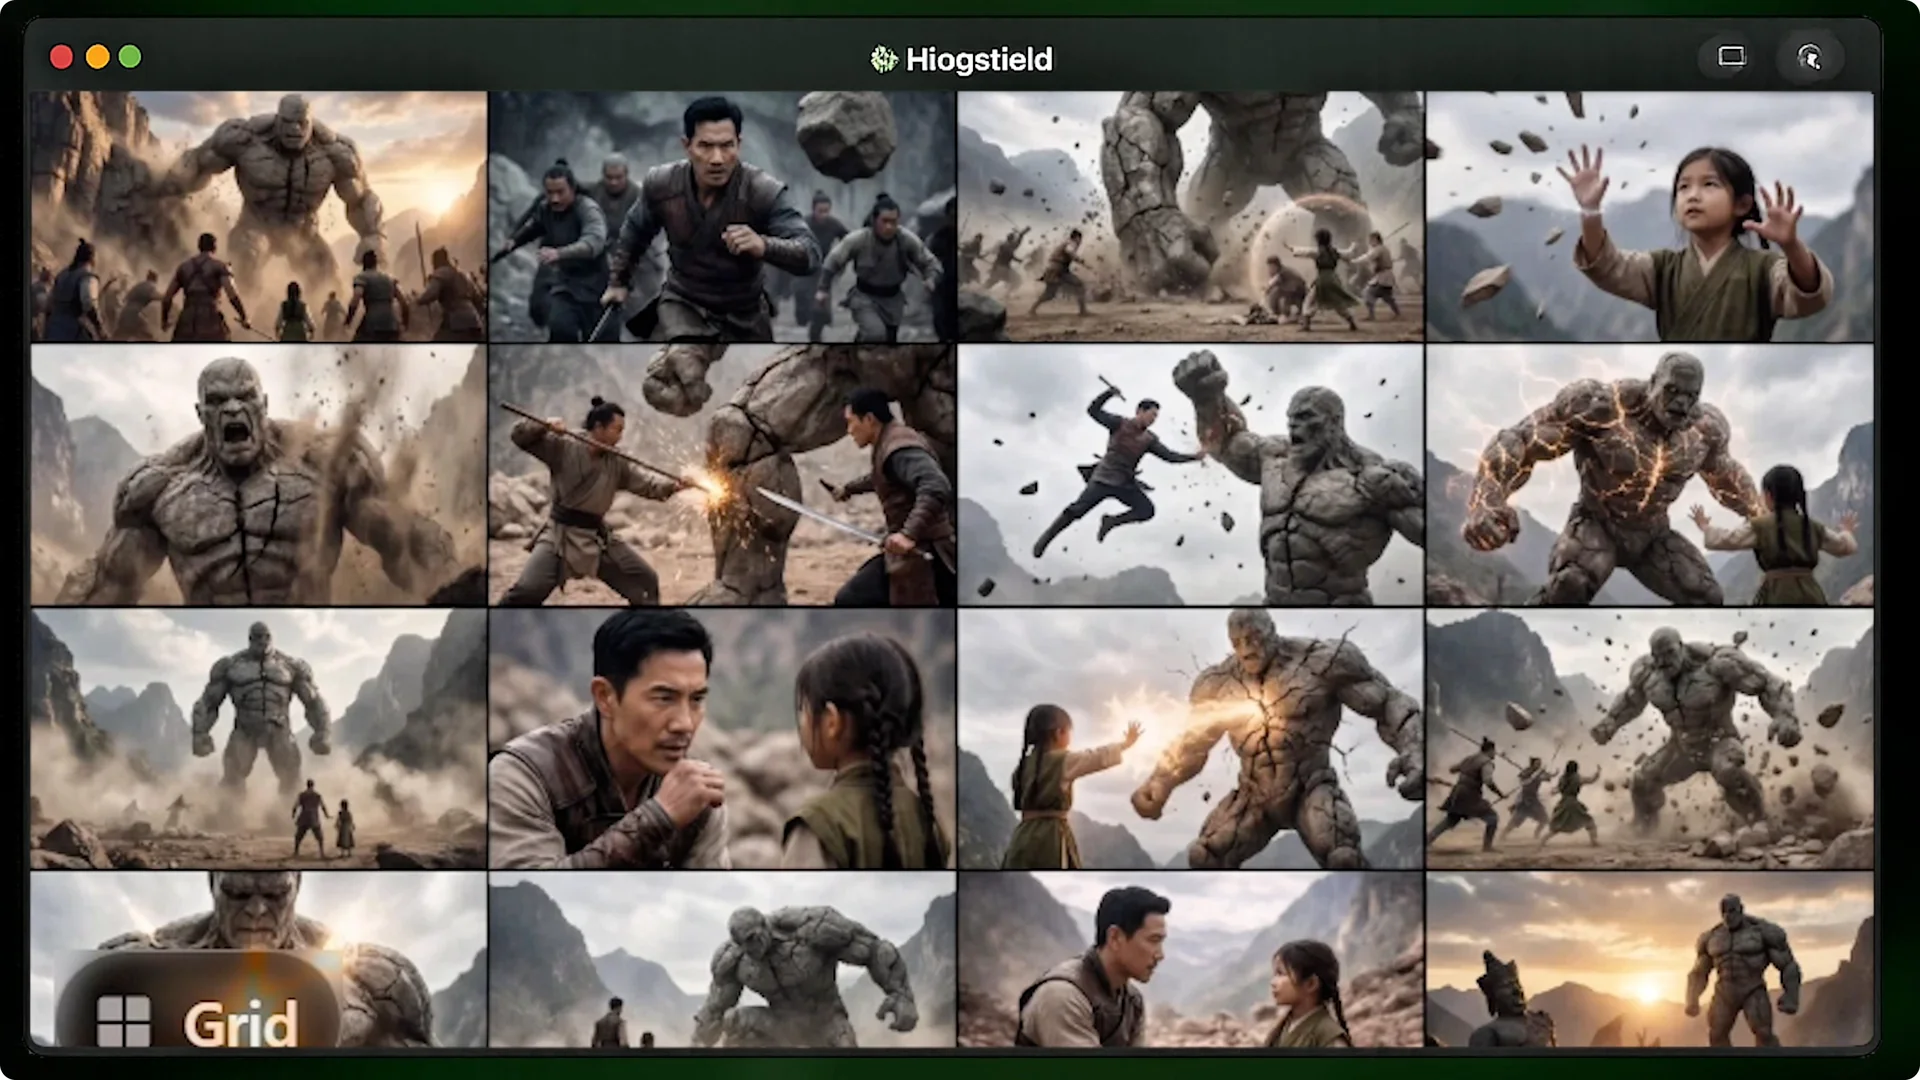
For this shot, I want a wide cinematic look with a blurred background. I’ll pick this preset. I’ll also switch to the new 4×4 grid mode, set the ratio to 16 to 9, and max the quality to 4K.
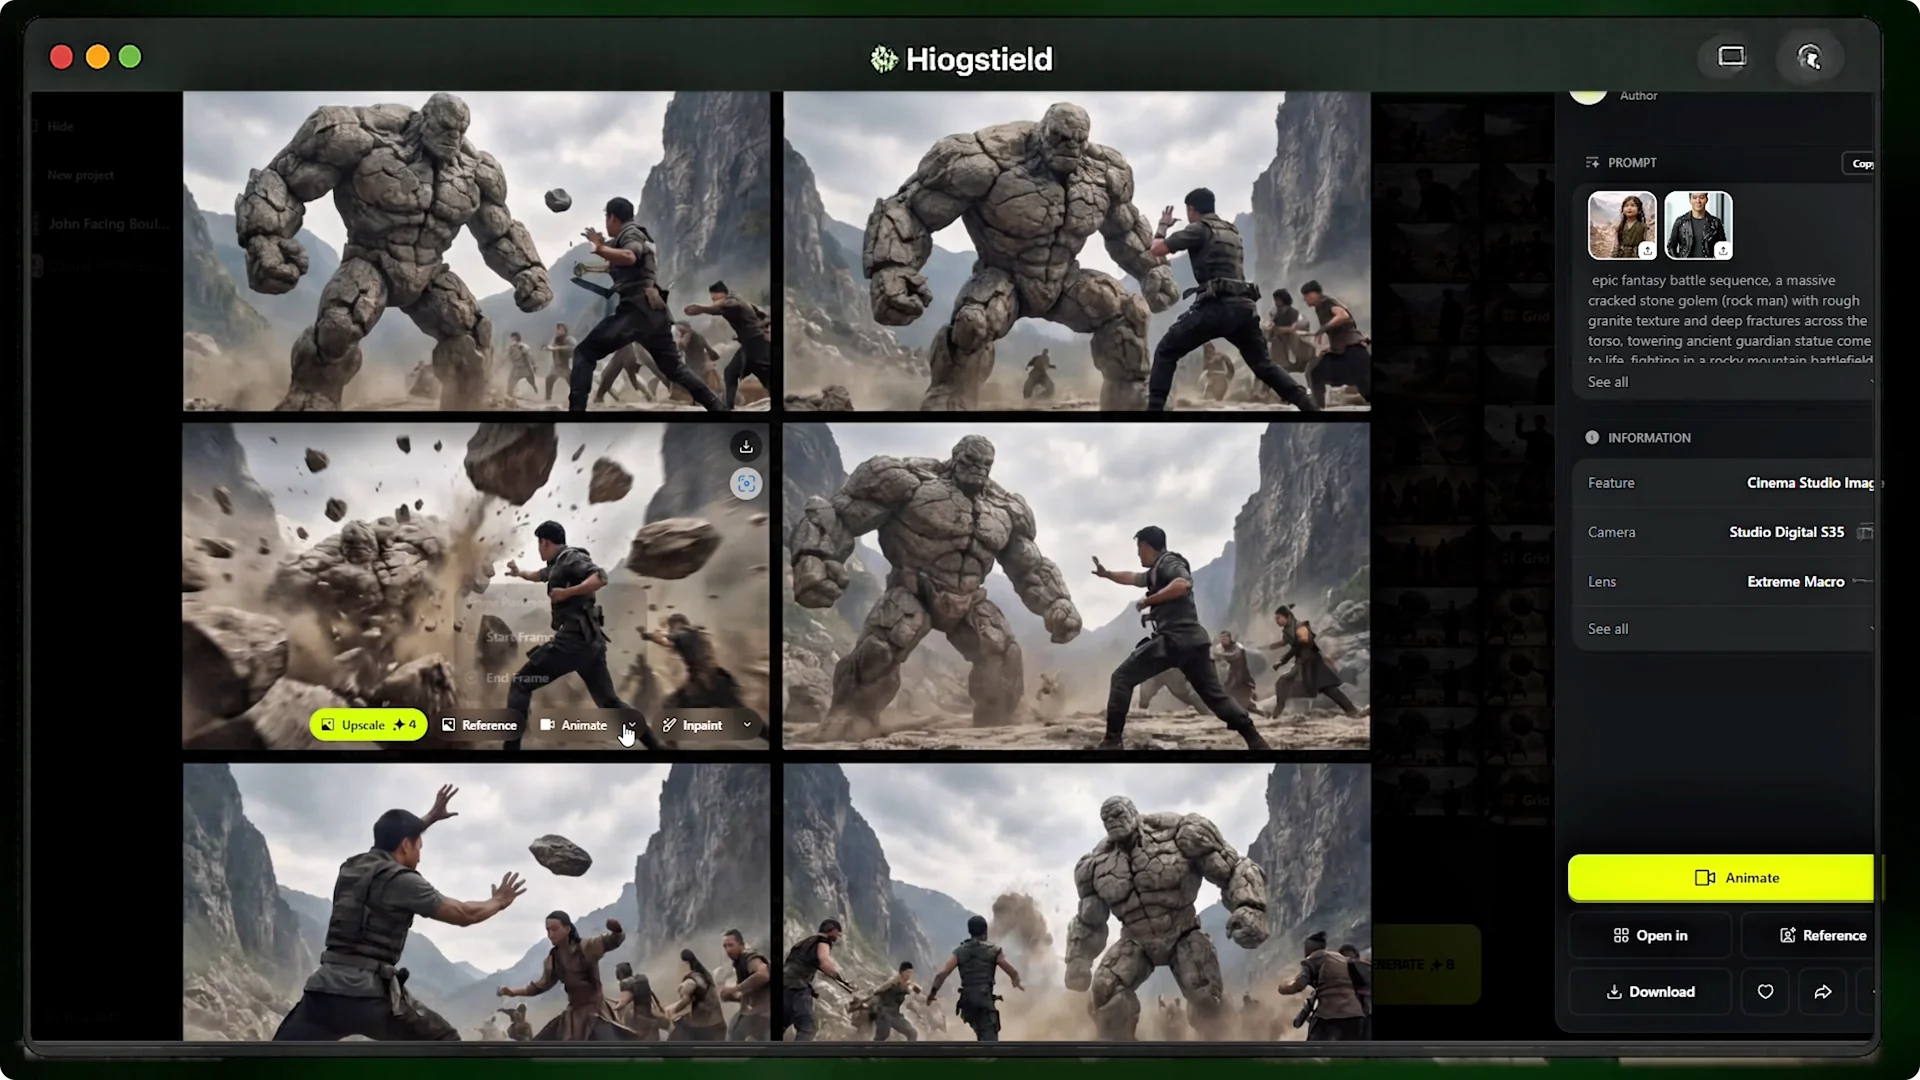
That gives me 16 versions of this image at once so I can pick the best one instead of generating them one at a time. Out of these 16 images, I’m going to use this one because the composition and the lighting are exactly what I want for the opening shot. This is what Higsfield calls the hero frame first approach.
The idea is that you lock in your lighting, composition, and character details in an image first so that it maintains that exact look when you animate it. I’ll click on this hero frame, press animate, and select it as my start frame. The image is loaded into the video tab and ready to go.
For step-by-step scene-building tactics, see this cinematic scene creation guide.
Multi-Shot AI Video Generation Modes
Getting a good start frame matters, but what Cinema Studio 2.0 allows you to do with that frame is what got me genuinely excited because that is where the true potential of this update really kicks in. Cinema Studio 2.0 brought in multi-shot capabilities, and when I click on the mode selector I get three options that basically offer different levels of control. First is single-shot which you use when you just need one specific clip or a quick loop.

Then there is multi-shot auto, which is perfect if you want to write one prompt and let the AI act as the director to build a cinematic sequence for you. And finally, multi-shot manual, which is what you use when you have a very specific vision and need to control the exact timing and camera work yourself. For this scene, I’m going with multi-shot manual.
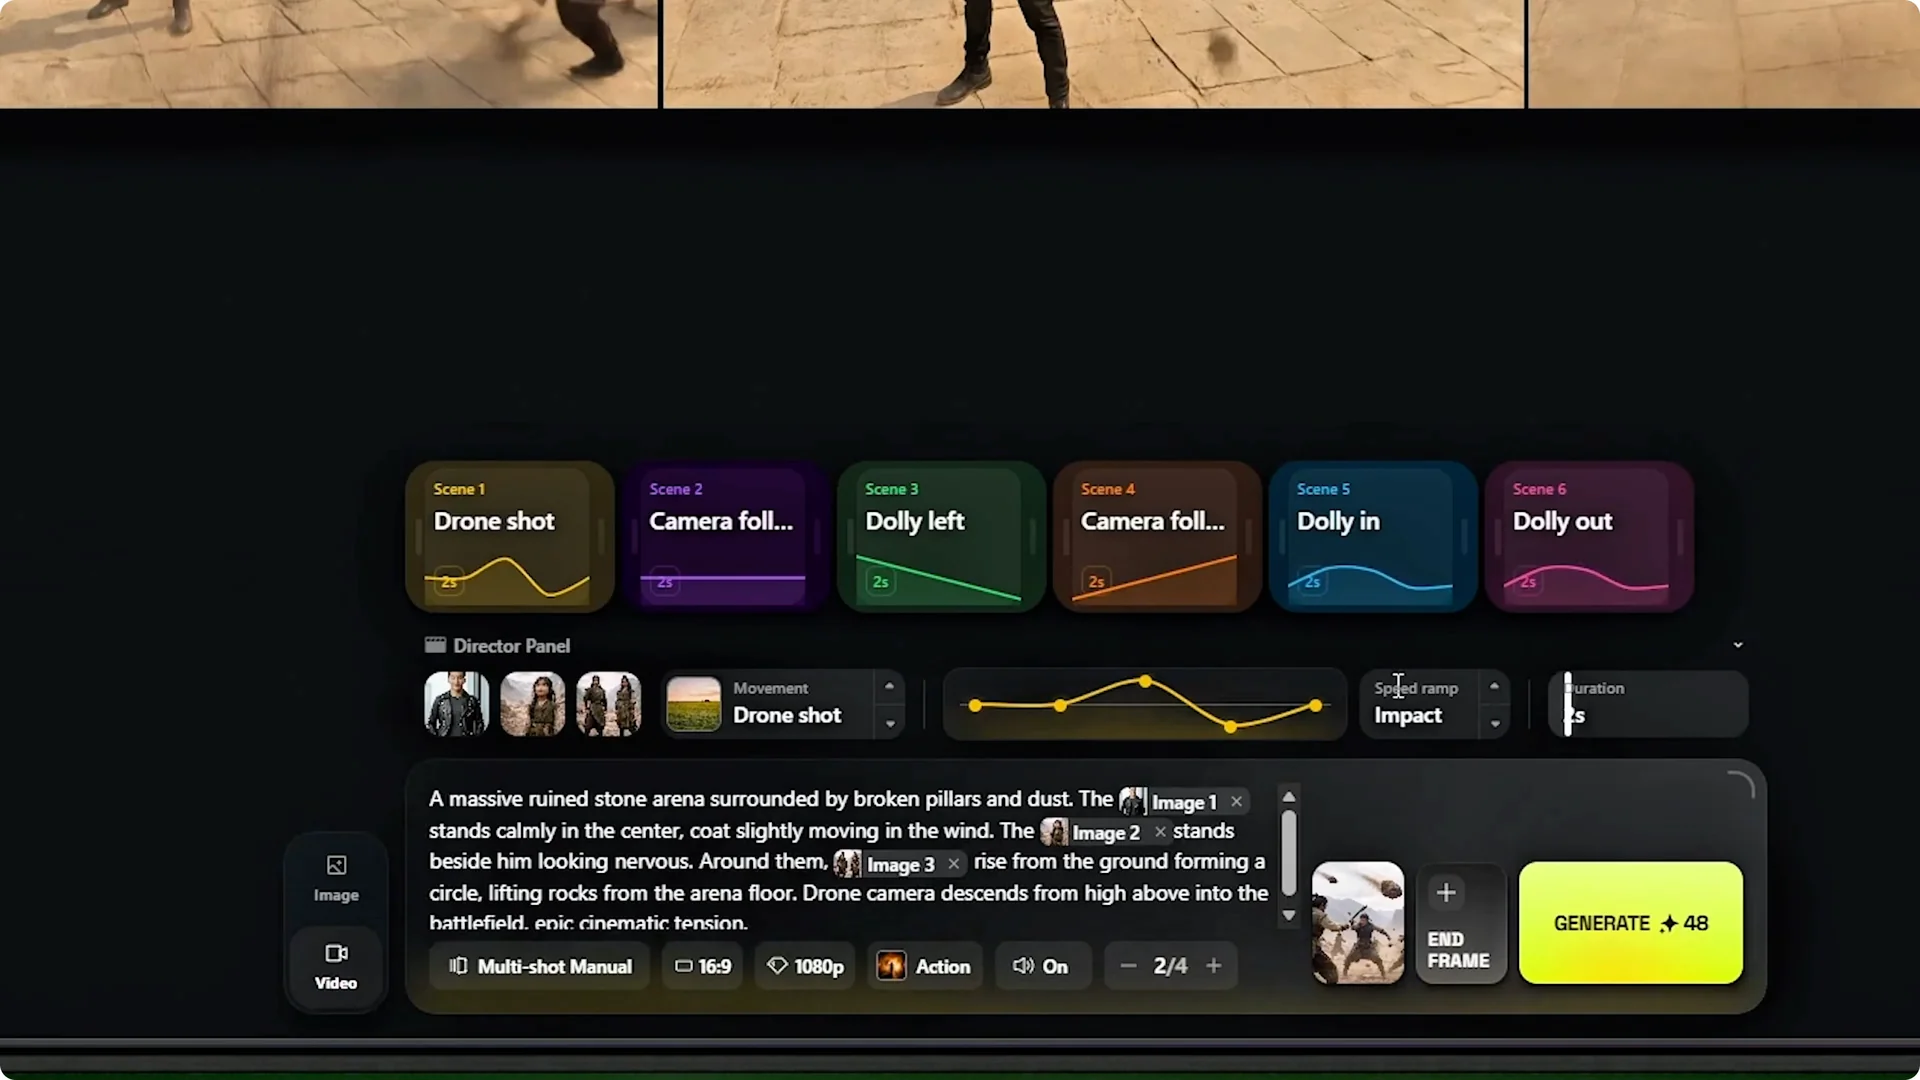
When I select that, I can see these boxes appear on the timeline. Each one is an individual shot that I can configure separately. I can have up to six of these within a 12-second runtime.
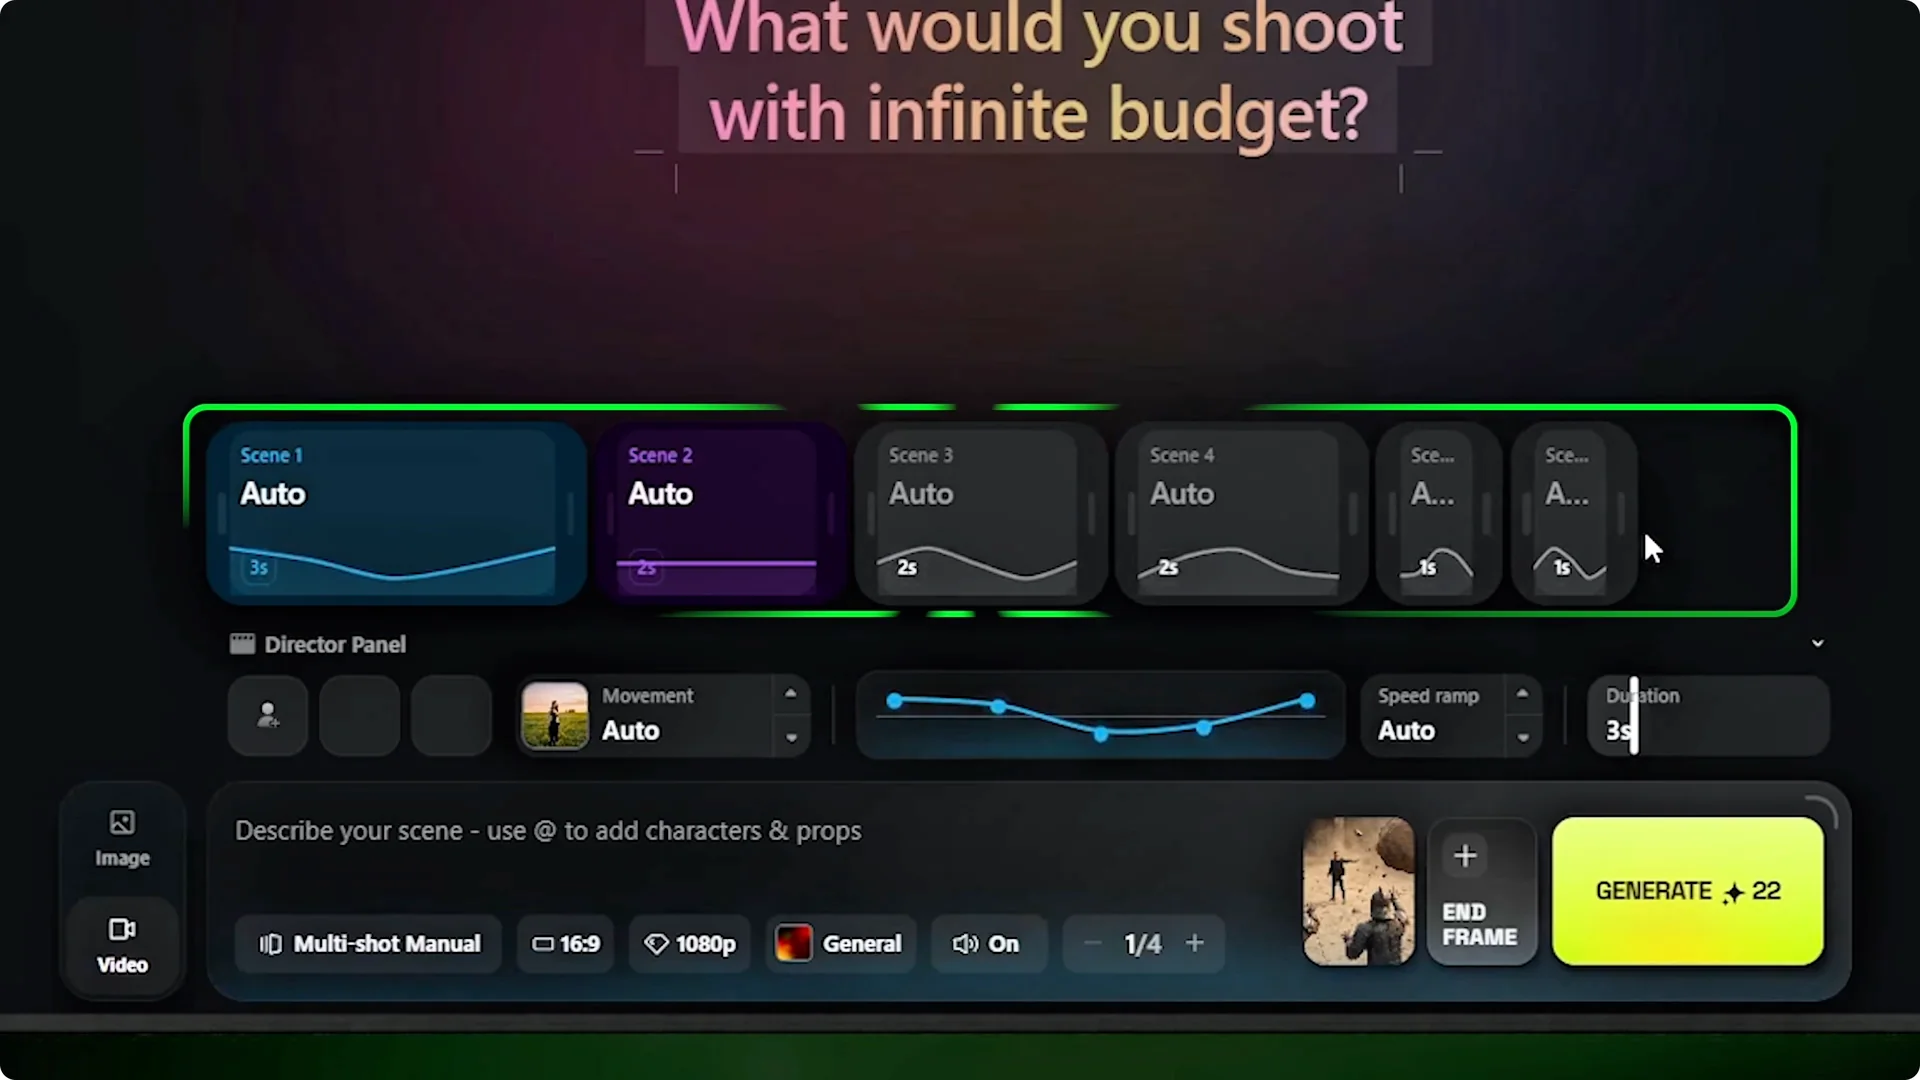
I can split the duration however I want. One shot could be 3 seconds and another could be one, as long as they add up to 12. Each box gets its own prompt, camera movement, and speed ramp setting.
This allows me to treat every shot in the sequence as a unique event with a completely different look and feel.
Director’s Panel and Genre
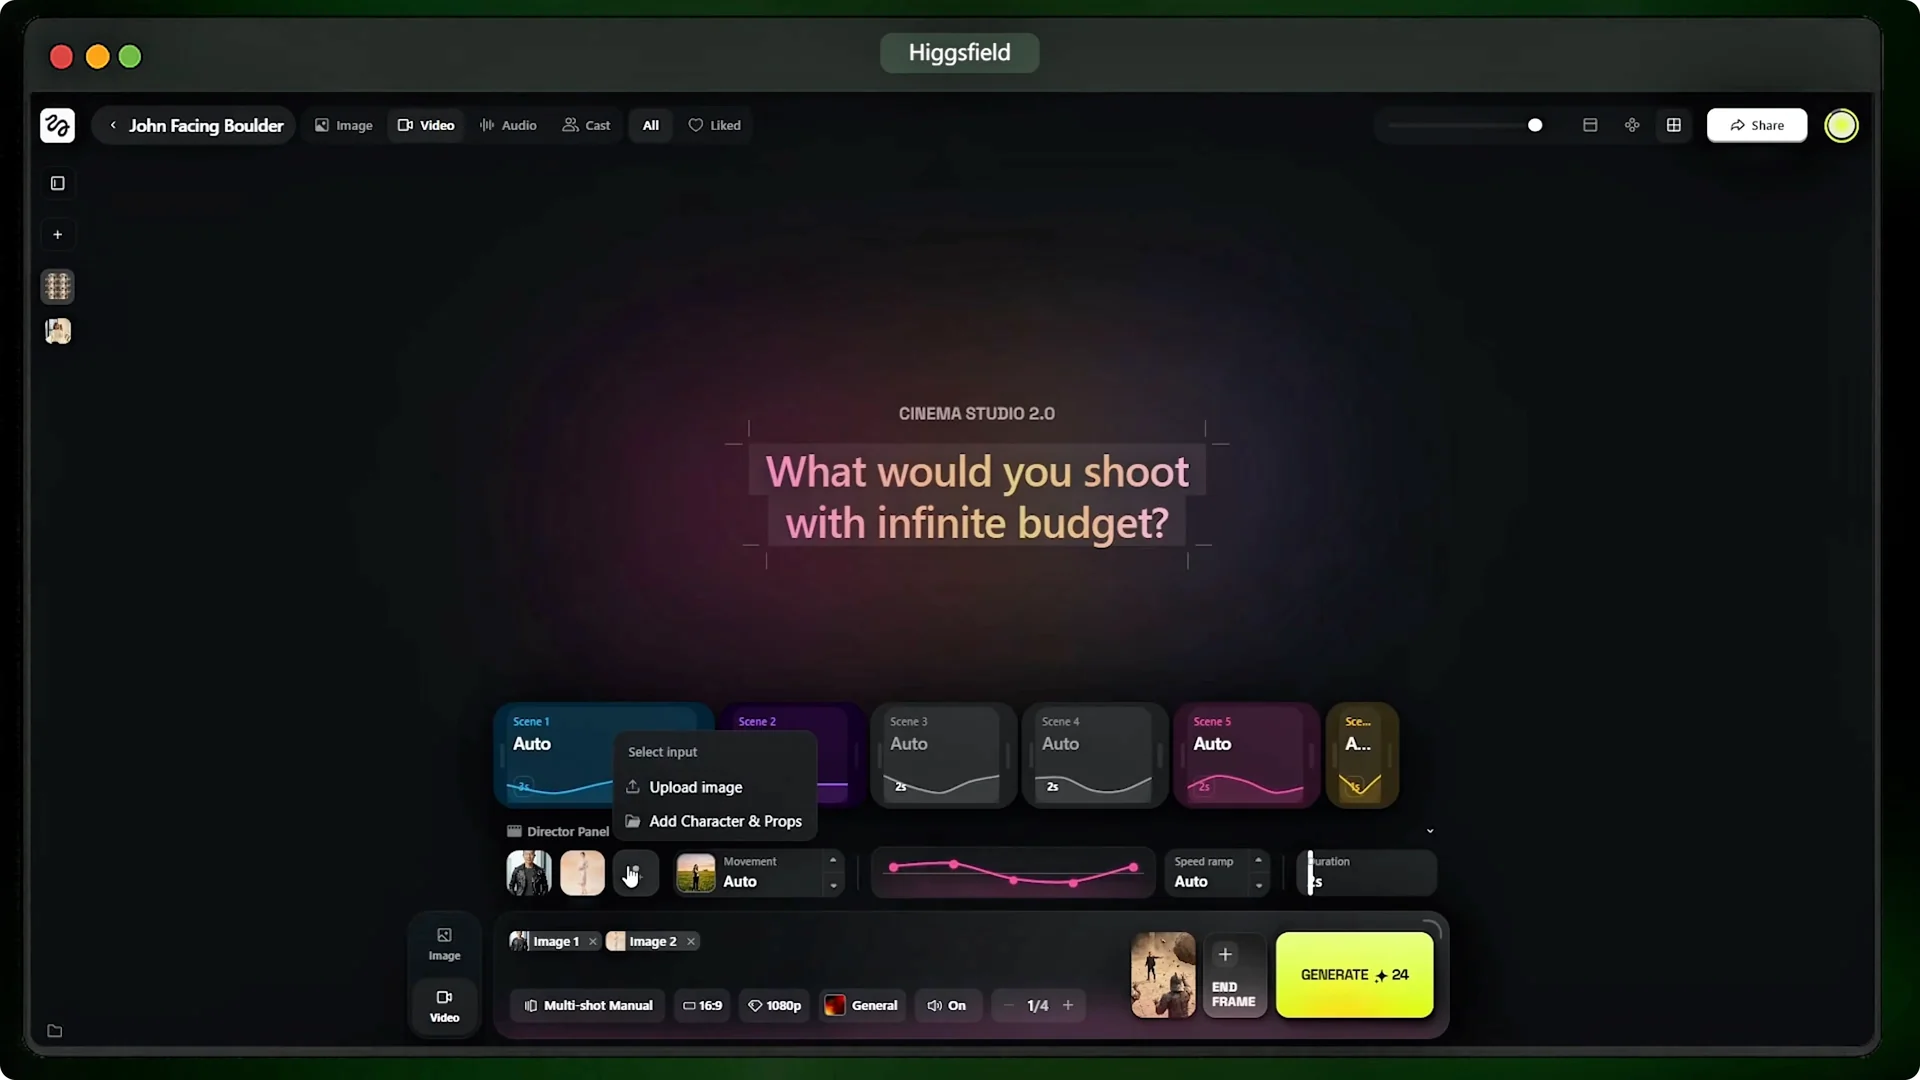
Before I build those out, I need to open the director’s panel. This is where I import the characters and set up props for the scene. I’ll add our main character, the girl right here, and the earth benders here.
I also need to pick a genre for the overall generation, and I’ll go with action. This affects the pacing and the motion energy across all six shots. If I pick horror instead, the exact same prompts would produce creeping tension and much slower, unsettling camera movements.
Camera Moves and Shot Setup
When I click into the first box and expand the camera movement tab, the list is massive. You have everything from standard pans and tilts to complex crane moves, orbits, and drone shots. That is actually more camera control than most traditional video editing gives you.
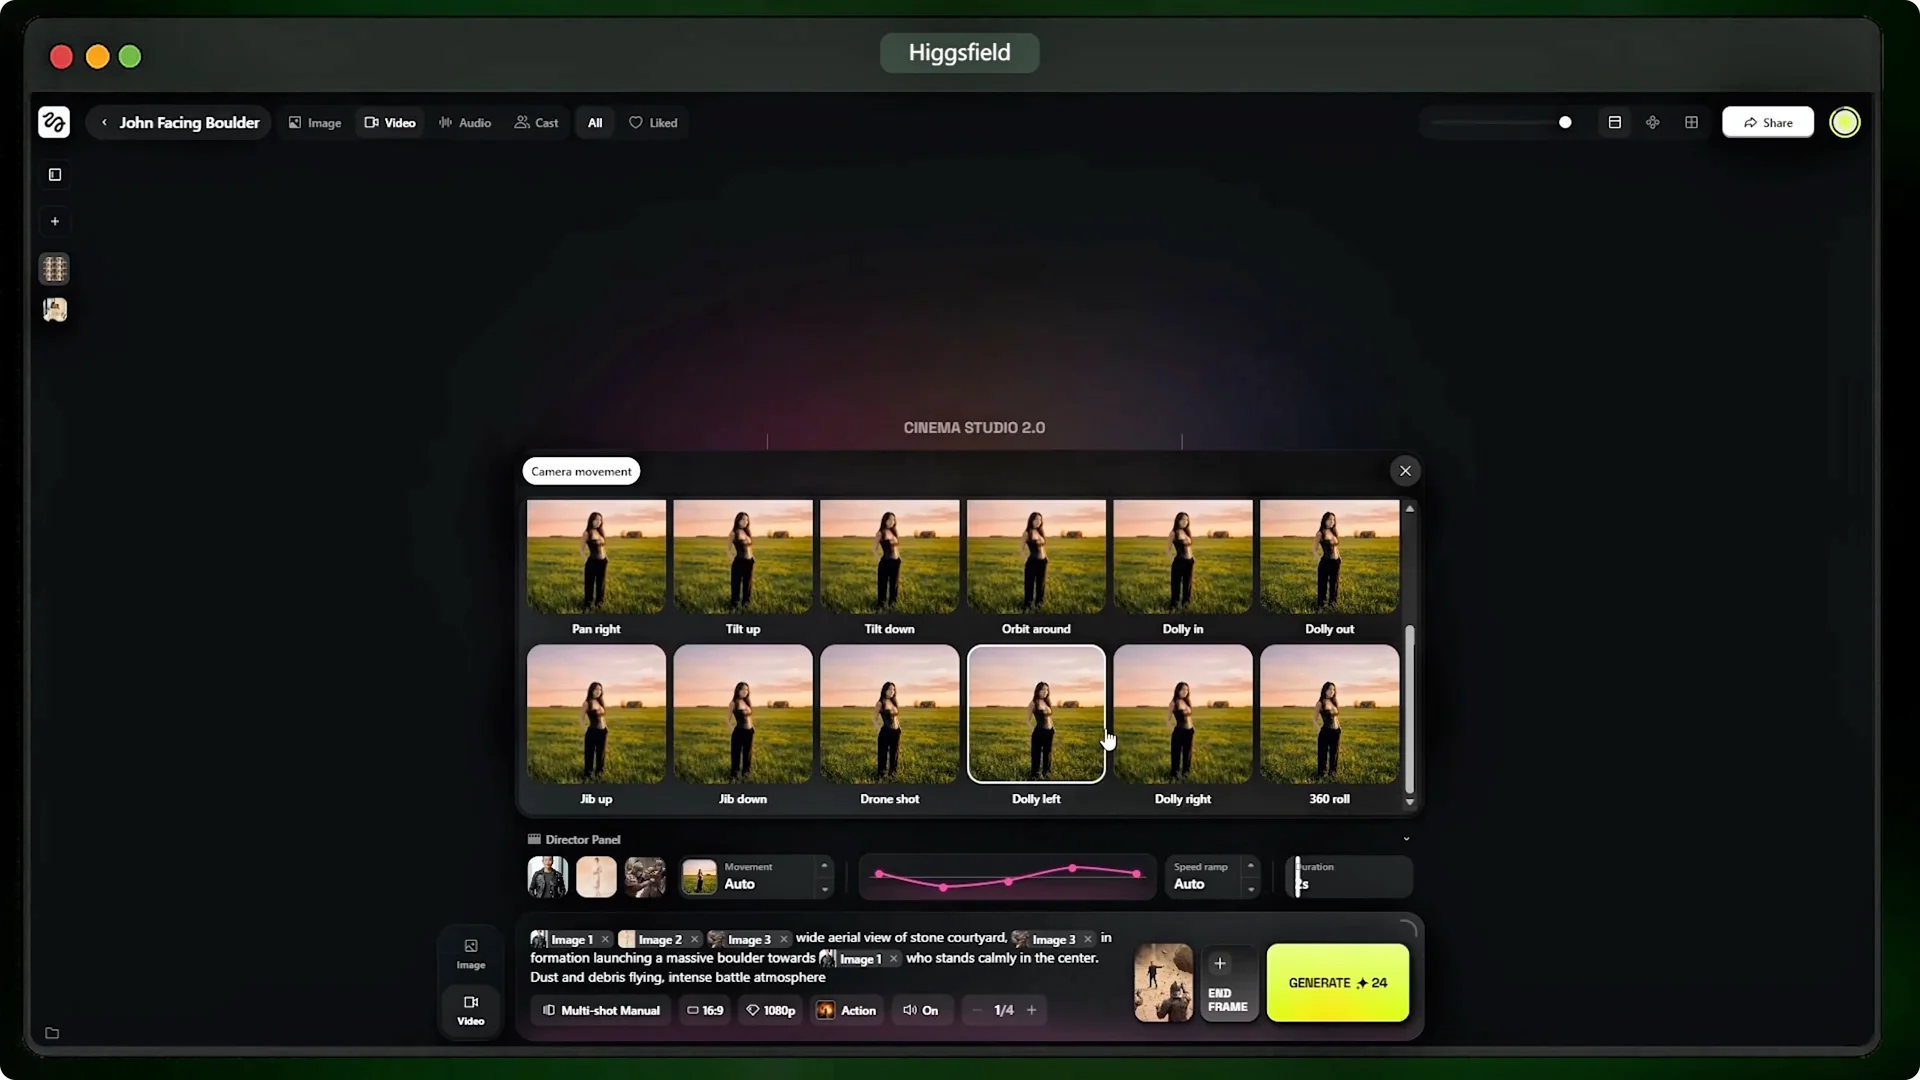
Each shot can use a completely different one. A cinematic ruined stone arena at sunset. Broken pillars and cracked ground everywhere.
Warm golden light and drifting dust particles. In the center stands the main character wearing a dark modern jacket, calm expression, one hand in pocket. Slightly behind him stands a girl with long flowing hair and neutral colored clothing looking alert.
Around them at a distance, a group of armored earth benders in stone armor preparing to attack. Small rocks floating around their hands. Ultra cinematic lighting, dramatic atmosphere, epic movie frame, highly detailed.
I’ll set the camera to a drone shot and lock the duration at 2 seconds. For the speed ramp, I’m going with impact. This is my favorite setting because it creates a sudden hit of slow motion right at the moment of contact, which is exactly what I need for this boulder catch.
From here, I’ll build out the remaining five shots. I’ll hit generate. Here’s what we get.
That looks really good. It’s six distinct shots, but they flow together perfectly. The characters actually stayed consistent with the right emotions, and that impact ramp on the catch adds exactly the kind of weight the scene needed to sell the moment.
12 seconds of directed footage is already more than what most AI video generators give you in a single generation. For related comparisons and settings across models, see this Seedream 4.0 breakdown for Higgsfield AI.
Step-by-Step: From Reference to Render
Step 1: Create the main character as a reference element so he stays the same across every shot. In the image tab, press add, click create new element, and upload four reference angles. Press create, then mention him in any prompt by typing it followed by his name so Cinema Studio pulls in his persona automatically.
Step 2: Paste your scene prompt and configure the virtual camera rig. Pick a camera body, a lens type, your focal length, and your aperture. This controls how wide or tight the shot looks, how much background blur you get, and the overall feel of the image.
Step 3: Use 4×4 grid mode to find the hero frame. Set the ratio to 16 to 9 and max the quality to 4K. Select the best composition and lighting for the opening shot.
Step 4: Animate from the hero frame. Click the hero frame, press animate, and select it as the start frame. The image loads into the video tab and is ready to go.
Step 5: Choose a Multi-Shot AI Video Generation mode. Use single-shot for one clip, multi-shot auto to let the AI direct from one prompt, or multi-shot manual for full control. For precise timing and camera work, pick manual.
Step 6: Configure up to six shots in the 12-second timeline. Assign a prompt, camera movement, and speed ramp to each box. Split durations as needed so the total adds up to 12 seconds.
Step 7: Set the director’s panel and genre. Import characters and props, then pick action, horror, comedy, or another style to shape pacing and motion. This applies across all shots.
Step 8: Select camera moves per shot and render. Choose from pans, tilts, cranes, orbits, and drone shots, then generate. Review how the shots flow, character consistency, and the weight added by speed ramps like impact.
Final Thoughts
Every tool I used here builds toward Multi-Shot AI Video Generation that keeps characters consistent while giving you per-shot control. From hero frame first to multi-shot manual and Mframe chaining, the update turns short clips into directed sequences. Now you know how to create cinematic AI videos with a consistent character using Higsfield Cinema Studio.