
Today I’m excited to share my experience testing an AI tool that allows you to transform your photos into unique and creative videos. The tool is called Pika 2.0, and it includes Scene Ingredients, Text Alignment and Lip Syncing.
If you’ve followed my previous posts, you might already know that Pika recently made its video generator version 2.0 completely free to use until December 22. This was a fantastic opportunity to test all the previously locked paid features and try out the new “Ingredients” feature.
Let’s dive into the details of my experience and see how it went.
Getting Started with Pika 2.0
The website for Pika can be found at pika.art, and the process to begin is straightforward:
Sign Up: First, you’ll need to create an account. You can also use your Google account to simplify the process.
Explore Features: Once you log in, you’ll see an introduction to Pika 2.0 on the left-hand side. This includes guides on using the “Ingredients” feature.
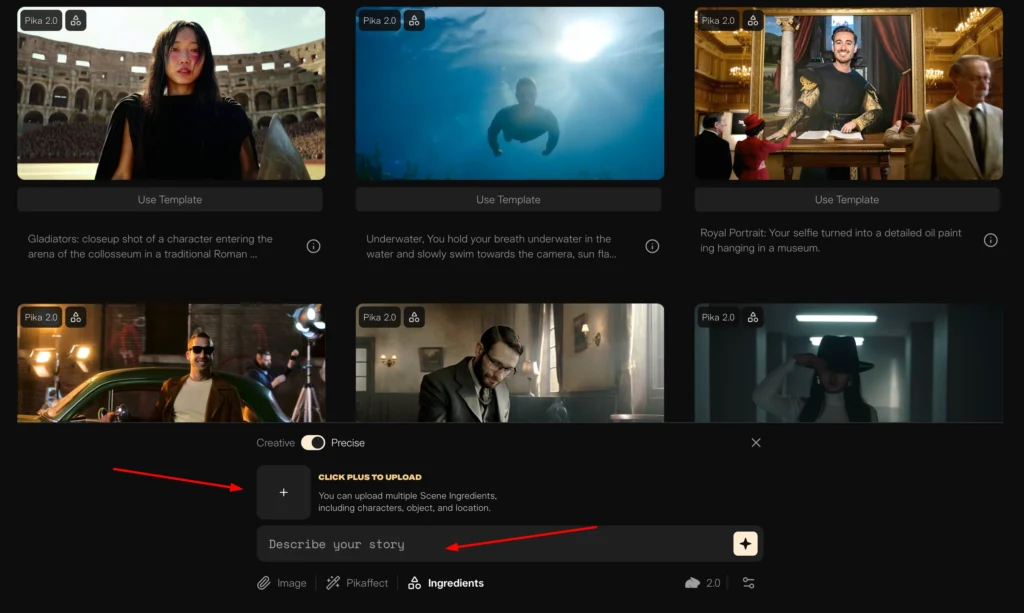
Templates and Prompts: On the homepage, you’ll find various examples with prepared prompts. These can be reprompted or retried directly from the interface.
First Impressions:
At first glance, the interface is clean and user-friendly. There are plenty of prepared examples to explore, making it easy to jump right in.
I decided to start by using a template and tweaking it to see what kind of results I could achieve.
My Experience with Pika 2.0
Here’s a step-by-step guide to how I tested the tool:
Step 1: Choosing a Template
I selected the first template. It showcased a character in a dynamic setting, which seemed like a good starting point.
From there, I reviewed the “Ingredients” listed for the generation.
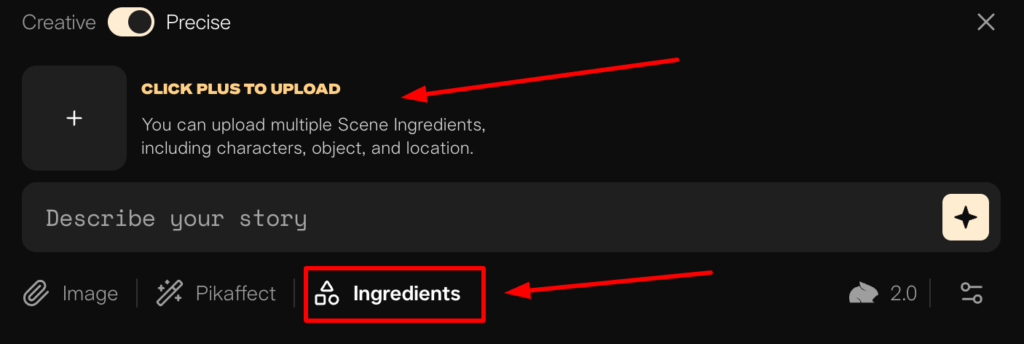
- Note: Ingredients include elements like characters, locations, and outfits.
- Since I wanted to create something entirely new, I deleted the pre-set ingredients.
Step 2: Adding My Own Ingredients
Next, I clicked the plus (+) icon to add my own elements. Here’s what I chose:
- Characters: The Rock (Dwayne Johnson) and Mike Shod.
- Location: A Coliseum.
- Outfit: A jacket.
Step 3: Adjusting the Prompt
With the ingredients in place, I customized the prompt to ensure it aligned with my vision.
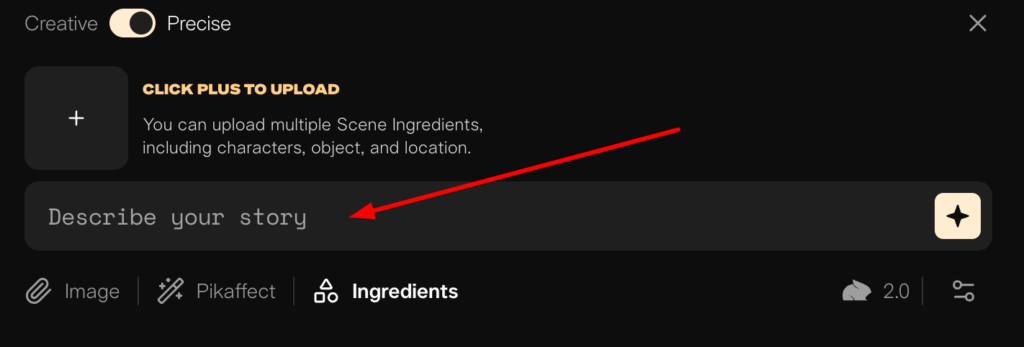
Since I had two characters, I specified camera movements to make the video feel dynamic. After finalizing the prompt, I hit Generate.
Results: The Good, the Bad, and the Crazy
The AI generation process took a few moments. A jumping rabbit icon appeared on the screen to indicate progress, and soon enough, the video was ready.
Retrying the Generation
I retried the generation several times. Here are the highlights of my results:
- Attempt 2: Instead of The Rock, the AI inserted a character resembling someone from Mongolia.
- Attempt 3: The video improved slightly, but Mike wasn’t wearing the jacket as expected.
- Attempt 4: Similar issues persisted, so I decided to rewrite the prompt more carefully.
Key Features of Pika 2.0
1. Scene Ingredients: This innovative feature allows users to break down videos into customisable components. Creators can select backgrounds, define object placements, and adjust character interactions, providing unprecedented control over the visual storytelling process.
2. Text Alignment: Pika 2.0 enhances text-to-video generation with improved text alignment capabilities, ensuring that narratives remain cohesive.
3. Lip Syncing: The platform includes advanced lip-sync technology that synchronizes character lip movements with audio tracks, enhancing the realism of animations.
4. User-Friendly Interface: Designed for a wide range of users—from casual creators to professional marketers Pika 2.0 aims to make video creation accessible and enjoyable, allowing for high-quality output without the complexity typically associated with video production.
Key Takeaways and Tips
After experimenting with Pika 2.0, here’s what I learned:
1. Be Patient
AI tools like Pika aren’t perfect yet. It often takes multiple attempts to get a result that matches your expectations.
2. Write Detailed Prompts
The tool responds well to detailed and specific instructions. For example, if you want only two characters in the video, make sure to explicitly state that in the prompt.
3. Analyze the Ingredients
Understanding how each ingredient contributes to the final output can help you refine your prompts and improve your results.