Do you want to upscale and restore the high-quality resolution of your videos?
If yes, then I’ve curated the latest list of the 7 best AI video upscalers to fit your needs. These upscalers can be either paid or free. I’ve used all these AI upscalers and here are my takeaways on why you should use each tool.
These AI Video upscalers will save you time and help you create high-quality videos that attract viewers and audiences.
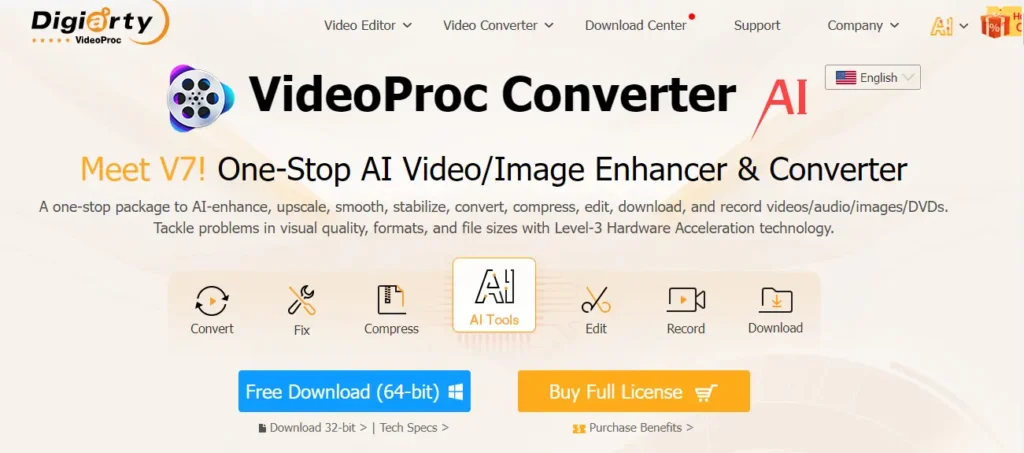
1. VideoProc Converter AI
The first upscaler I want to discuss is VideoProc Converter AI. This software offers a range of features that enhance both video and image quality.
Key Features
- Super Resolution: This feature allows for significant enhancement of video quality, making details sharper and more defined.
- Frame Interpolation: Improves the smoothness of videos by generating intermediate frames.
- Stabilization: Reduces shakiness in videos, making them more stable and easier to watch.
My Take on VideoProc Converter AI:
AI Super Resolution in VideoProc Converter AI is designed to enhance video quality by upscaling the resolution. You can transform low-quality videos into high-definition ones without any noticeable noise or artifacts.
This feature is perfect for improving old videos or simply boosting the quality of new content.
How to Use VideoProc Converter AI?
Open the Software: Start by visiting the official VideoProc Converter AI website to read about all the features and updates.
Import Your Files: Click on the interface to import video and image files. You can drag and drop files or click to upload.
Select the Video: Choose the video file you want to upscale.
Choose Upscaling Options: You have options to upscale the video by two, three, or four times. Select the desired level of upscaling.
Denoise and Enhance: Adjust the denoise level to high to eliminate any unwanted blur or noise.
Output Settings: Choose your output settings, including video and audio codec, quality, frame rate, and output folder.
Run the Process: Click ‘Run’ to start the upscaling process.
Pros
- User-friendly interface
- Supports 4K upscaling
- Batch processing available
- Fast processing speed
- Multiple output formats
- Noise reduction
- Detail enhancement
Cons
- Limited free features
- Requires powerful hardware
- Subscription cost
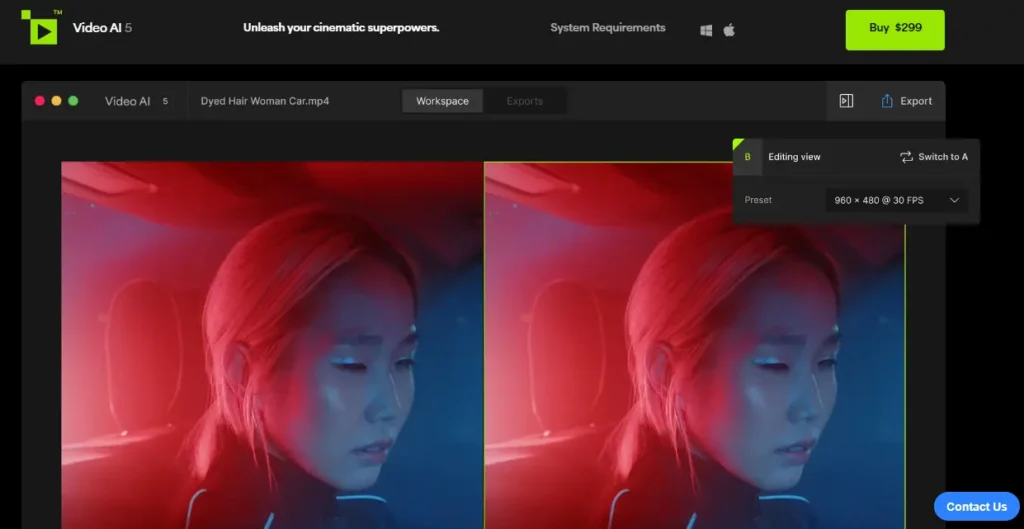
2. Topaz Video AI
Topaz Video AI stands out among its competitors for its powerful video upscaling and enhancement capabilities. This software uses machine learning models trained on thousands of videos to accurately predict and generate more pixels, resulting in improved detail and sharpness.
Key Features:
- Upscaling to 8K Resolution: AI models predict and create detailed, sharp high-resolution video content.
- Noise and Motion Blur Reduction: Eliminates unwanted noise and blur, improving video quality.
- Batch Processing: Upscale and enhance multiple videos at once, saving time.
My Experience with Topaz Video AI:
Topaz labs is awesome at upscaling and Enhance videos to 4k/8k.
Getting Started with Topaz Video AI
When you open Topaz Video AI, you’ll see a screen that prompts you to drag and drop your videos. You can also browse videos on your device by selecting the “Browse Videos” button.
Importing Your Video
To start, drag and drop your video file into the software or use the browse feature to locate the video on your device. For this tutorial, I’ll use a video of a Prime bottle that I filmed earlier. This video has a lot of camera shake and is currently 1280x720p at 29 frames per second. Our goal is to enhance its quality.
Setting Up Enhancements
- Enhancements Button: Click the “Enhancements” button to start improving your video.
- Input Type: Choose the correct input type (Progressive or Interlaced). For this tutorial, select “Progressive.”
Adjusting AI Models and Parameters
- AI Models: Leave the AI model on its default setting for now.
- Parameters:
- Select “Manual” to adjust settings.
- Compression: If your video is highly compressed, increase this value. For uncertain cases, set it to 50%.
- Detail: Increase to enhance fine details. I’ll set this to 50% for this tutorial.
- Sharpen: Adjust to make edges crisper. Avoid setting too high to prevent white lines on edges.
- Noise Reduction: Remove grain from the video. Keep this low to avoid blurriness.
- De-Halo: Skip this for now.
- Anti-Alias and D-Blur: Use these to fix specific issues like movement blur.
Advanced Adjustments
- Adding Noise: Optional, for artistic purposes.
- Recover Detail: Enhance lost details. Set to 50% if necessary.
- Focus Fix: Useful for correcting autofocus issues. Leave off if not needed.
- Frame Interpolation: Leave off unless creating slow-motion effects.
- Stabilization:
- Full Frame: Shows the full image with smooth movement.
- Auto Crop: Crops the image to correct movement.
- Set stabilization strength to 50% for this tutorial.
- Motion D-Blur and Grain: Toggle these based on your video’s needs.
Export Settings
- Codec: Use H.264 for standard online uploads.
- Profile: Set to “High”.
- Target Bitrate: Set to 180 for better quality.
- Audio Mode: Leave on “Copy”.
- Container: Choose MP4 for simplicity.
Final Adjustments
- Frame Rate: Increase to 60 frames per second.
- Resolution: Bump up from 720p to 4K.
Exporting Your Enhanced Video
- Click “Export” and choose “Export As”.
- Select the destination and name your file (e.g., Prime_export.mp4).
- Save and export the video.
Comparing Original and Enhanced Videos
After exporting, compare the original video with the enhanced version side by side. Notice improvements in stability, resolution, and frame rate.
Pros:
- Outstanding sharpness and clarity.
- Supports upscaling up to 8K resolution.
- Effective noise and motion blur reduction.
- Batch processing saves time.
Cons:
- Resource-intensive.
- Can be costly for hobbyists or small-scale users.
3. Pixop AI
Pixop is a cloud-based AI video upscaling software known for its advanced neural networks and machine learning algorithms. It’s perfect for those who prefer not to install any software.

Key Features:
- Cloud-Based Access: Accessible from any device, providing convenience.
- Robust Video Upscaling: Uses advanced algorithms to enhance low-resolution videos.
- Additional Features: Noise reduction, color grading, and frame rate conversion.
- Wide Format Compatibility: Supports various video formats.
My Take:
In the past, upscaling video required powerful computer hardware. But now, services like Pixop make it possible to upscale videos online without needing any specialized equipment. You can even follow along on your smartphone. That’s why I am suggesting this AI video upscaler in the list.
How to Use Pixop?
- Visit the Pixop Website: Access Pixop through your web browser.
- Upload Your Video: Upload your video file to the Pixop platform.
- Choose Upscaling Settings: Select the desired upscaling resolution and other enhancement options.
- Process the Video: Start the processing and wait for Pixop to enhance your video.
Pixop is great for users looking for an online solution to upscale and enhance their videos.
Getting Started with Pixop
To begin, go to pixop.com and sign in to your user profile. On your dashboard, you can either click the upload button or drag and drop your video into the designated area. This will upload the video to Pixop’s server.
Managing Your Uploaded Video
Once uploaded, click on your video project to access an overview of all your videos. Click on the specific video you want to upscale to view its details, including the quality score, which indicates the potential for a high-quality upscale.
Choosing the Resolution
For this demonstration, I uploaded a 720p video intending to upscale it to 4K. Select the “HQ input enhanced UHD 4K” option to upscale to 4K. If needed, you can choose a different resolution, such as 8K.
Configuring Video Settings
Changing Video Format
In the Format tab, decide the format for your processed video.
Configuring Enhancements
In the Filter tab, select the processes to run on your video. Pixop’s “Deep Restoration 2” preset is pre-selected, utilizing their neural network for upscaling to 4K. You can switch to 8K if preferred.
Fine-Tuning for Different Camera Types
If your video was shot with a webcam, smartphone, or a small camera sensor, you might want to adjust the fine-tuning to “Selfie Style.” For videos shot with standard cameras, this step may not be necessary.
Trimming the Video
If you only need a specific section of your video upscaled, use the Trim tab to select the segment.
Creating a Preview
Before processing the entire video, create a preview by clicking the Create Preview button. Pixop will generate a 10-second preview of the upscaled video, allowing you to compare it with the original and make any necessary adjustments.
Processing the Video
Once satisfied with the settings, click the Process button. Pixop will estimate the processing time and cost. The service charges based on the length of the video and the filters applied, making it a cost-effective solution.
Downloading the Upscaled Video
After processing, select your video and click Download. You can choose to download the original or the upscaled version (e.g., 4K or 8K).
Pros:
- High-quality video enhancement.
- User-friendly interface.
- Supports a wide variety of video formats.
- No installation required.
Cons:
- Requires a stable high-speed internet connection.
- Expensive for large video files due to pricing per process minute.
4. AVC Labs Video Enhancer
ABC Labs Video Enhancer combines traditional methods and AI technology to offer high-quality video enhancement, particularly useful for older classic movies.

Key Features:
- Upscaling to 4K: Allows for higher resolution viewing of older videos.
- Noise Reduction: Removes unwanted noise for cleaner, more detailed visuals.
- De-blurring Tools: Clarifies blurry videos.
- Color Restoration: Restores lost colors in videos.
- AI Facial Recovery: Detects faces and removes blur and artifacts, enhancing facial details.
My Take on AVC Labs Video Enhancer:
We all know that videos have been a long-standing form of documentation. Many of us have videos we’d love to enhance, colorize, or upscale. This is where the excellent tool from the folks at AVCLabs comes in.
Getting Started
Firstly, download AVCLabs Video Enhancer for either Windows or Mac. After downloading, fire up the application, and you’ll notice a simple, user-friendly interface. You can either drag and drop the file you want to work with or click the browse button to select the file.
Steps to Get Started:
- Download and install AVCLabs Video Enhancer.
- Open the application.
- Drag and drop your video file or click browse to select it.
Basic Settings
Once you’ve selected your video, the software displays the video’s current quality. For example, a 640×480 video running at 24 frames per second. To start enhancing, go to the preset section, click the dropdown, and select the preset you want. For simplicity, start by selecting the option to upscale to high definition resolution.
Steps for Basic Settings:
- Select your video file.
- Check the current video quality.
- Go to the preset section.
- Choose the preset for high definition upscaling.
You can adjust various settings, such as:
- AI enhancement (Standard, Denoise, Ultra Multi-frames)
- Face enhancement
- Colorization
- Motion speed adjustments
Upscaling Basics
After setting your preferences, select the video file format, usually MP4, and the appropriate encoder. Choose the output path and click on start processing. The software will show you the processing progress, including how many frames have been processed.
Steps for Upscaling:
- Set AI enhancement options.
- Choose video file format (e.g., MP4).
- Select the output path.
- Click start processing.
You’ll notice a significant improvement in visual quality once the processing is complete.
Video Colorization
To use the colorization feature, load a black-and-white video into the software. You can trim the video to select specific parts. Scrub the playhead to select the start and end points, then apply the changes.
Steps for Video Colorization:
- Load a black-and-white video.
- Trim the video by selecting start and end points.
- Click apply.
You can add multiple clips to the stream and perform specific actions across all of them. Turn on colorization and, if necessary, face enhancement. Select the output resolution and frame rate, then start processing.
4K Video Upscale
For upscaling videos to 4K, upload the video and go to the upscale section. Set your preferences and start processing. You’ll see an improved visual fidelity compared to the original video.
Steps for 4K Video Upscale:
- Upload the video.
- Go to the upscale section.
- Set preferences (resolution, frame rate, etc.).
- Start processing.
Face Enhancement and Grading
For face enhancement, trim the video to the desired portions. Apply settings such as upscaling to full HD, selecting AI models, and adjusting video settings like saturation, contrast, and brightness. Click start processing to enhance the video, focusing on face refinement.
Steps for Face Enhancement:
- Trim the video.
- Apply settings for upscaling and AI models.
- Adjust video settings.
- Click start processing.
Pros:
- Excellent for enhancing and upscaling classic movies.
- User-friendly interface.
- Great detail and color restoration.
Cons:
- Does not support batch processing.
- Limited to 4K upscaling.
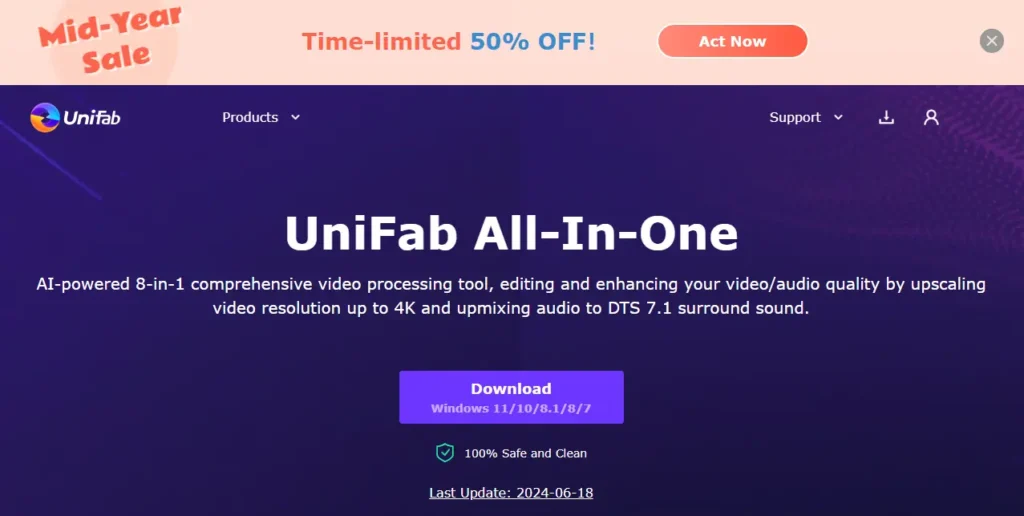
5. DVDFab Video Enhancer
DVDFab Video Enhancer is a comprehensive tool that combines AI technology and deep learning to optimize video quality. It’s a popular choice for upscaling DVD and Blu-ray movies.
Key Features:
- 300% Video Enlargement: Increases video size without sacrificing quality.
- 4K Upscaling: Converts standard definition videos into higher quality content.
- Enhancement Features: Improves color contrast and detail.
- Automatic AI Optimization: Determines the best output settings based on video content and quality.
- TensorFlow Framework: Uses TensorFlow for sharpness and overall video quality improvement.
My Experience:
DVDFab is become the great tool in my list that provides the clarity to the low-resolution videos. It is a complete AI-powered video upscaler that works with DVDFab products to enhance your DVDs, Blu-rays, or lower-quality videos to crystal-clear visuals.
How to Use DVDFab Enlarger AI
Follow these steps to upscale your video quality and resolution using DVDFab Enlarger AI:
Step 1: Launch DVDFab 12
- Open DVDFab 12 and you will see various modules on the top of the interface.
Step 2: Choose the Appropriate Module
- For DVD to Blu-ray video conversion: Click the “Copy” module and choose the “To Blu-ray” option.
- For DVD or Blu-ray conversion and enlargement: Click the “Ripper” module.
- For video conversion: Click the “Converter” module.
Step 3: Load Your Source Video
- Load your source DVD video.
- Click “Choose another profile” to access the profile library.
- Select “Enlarger AI” and choose MKV or MP4 as the output format.
Step 4: Select AI Model
- Go back to the main interface and select an AI model from 8 available options.
- Customize your output video with various settings if needed.
Step 5: Start the Process
- Hit the “Start” button to begin AI enlarging your videos up to 4K.
Pros:
- Provides automatic optimization based on input.
- Great for DVD and Blu-ray movies.
- Easy-to-use interface.
Cons:
- Limited to 4K upscaling.
- Resource-intensive.
6. Video 2X
Video 2X is a free, open-source solution for video upscaling. Video2X is an open-source software available on GitHub that allows you to upscale video resolution. It’s particularly useful for converting 1080p videos to 4K.

While it might lack some advanced features of other software on this list, it’s a fantastic option for users on a tight budget or those who support open-source projects.
Key Features:
- Video Upscaling and Denoising: Improves video quality at no cost.
- Frame Interpolation: Generates new frames for smoother videos.
- Various Format Support: Provides flexibility and versatility.
My Experience with Video 2X:
Example: Original vs. Upscaled
Here’s a comparison of a 1080p .TREC file from Camtasia (left) and the upscaled 4K version (right) using Video2X.
- At 125% zoom, the original 1080p file starts to lose resolution, appearing foggy.
- At 150% and 175%, the upscaled 4K version maintains clarity.
- At 200%, the difference is even more noticeable, with the upscaled version remaining clear.
When zoomed to 400%, the original 1080p file shows significant pixelation, while the upscaled version retains much more detail.
How to Use Video2X?
Step 1: Download Video2X
Download the GUI version from GitHub. The latest version is 4.8.1, and the package size is 1 GB.
Step 2: Launch Video2X
- After downloading, you’ll get a folder containing different files.
- Use the
gui.exefile to open the graphical user interface.
Step 3: Prepare for Conversion
- Open the GUI and select a file or folder for conversion.
- The output file will have the same name with
_outputadded, saved in the output folder within the Video2X directory.
Step 4: Convert Your Video
- During conversion, every frame of the video is extracted as a PNG file.
- For example, a 1920×1080 video will create 1080p PNG files.
- The software then converts each frame to 4K (3840×2160) and recompiles them into a video.
Step 5: Monitor the Conversion Process
- Conversion times vary depending on the video’s frame rate and your computer’s specifications.
- For instance, a 60 FPS video takes twice as long to convert as a 30 FPS video.
Step 6: Retrieve the Converted File
- The upscaled video will be saved as an
_output.mp4file in the output folder. - The resulting video will be 4K, with improved clarity and detail compared to the original 1080p file.
Pros:
- Free and open-source.
- Supports a wide variety of formats.
- Basic video upscaling and enhancement features.
Cons:
- Lacks advanced features found in premium software.
- Less intuitive user interface.
7. Nero AI Video Upscaler
Nero AI Video Upscaler is known for its user-friendly interface and effective upscaling capabilities.
Key Features
- Upscaling Up to 4X: Enhances video quality by up to four times the original resolution.
- Simple Interface: Easy-to-use interface suitable for all skill levels.
- Impressive Image Quality: Provides clear and detailed video output.
How to Use Nero AI Video Upscaler?
Open the Software: Launch Nero AI Video Upscaler on your device. Click here.
Import Your Video: Drag and drop your video file into the software.
Select Upscaling Level: Choose the level of upscaling, up to four times.
Start the Process: Click to start the upscaling process and wait for the software to complete the enhancement.
Conclusion
Hopefully, there’s something on this list for everyone. If you’re looking to upscale old movies, achieve 8K resolution, or find a free option, there’s a tool here for you.