
I’m excited to introduce you to Pixverse, an AI video generator that has just launched its 3.5 version. In this article, I’ll walk you through every feature, tip, and setting to help you create stunning AI-generated videos. Pixverse’s latest update brings incredible results, and I’m excited to share them with you.
What is Pixverse 3.5 AI?
Pixverse 3.5 AI Video Generator is an innovative tool designed to create visually engaging videos from text prompts, images, or a combination of both. It uses AI to generate high-quality animations and transitions with impressive precision.
The 3.5 version introduces enhanced features like seamless transitions between frames, customizable motion modes, lip-syncing capabilities, and style-based video generation.
The Brand New Transition Feature
The standout feature in Pixverse 3.5 is its Transition mode. To access it, simply left-click on the “Transition” button, which will open a menu. While the concept of transitions might not be entirely new, it’s effectively a keyframe-based system where you define a starting frame, an ending frame, and a prompt.
Once you click “Create,” the AI fills in the frames to create a seamless transition between the images.
Here’s how it works:
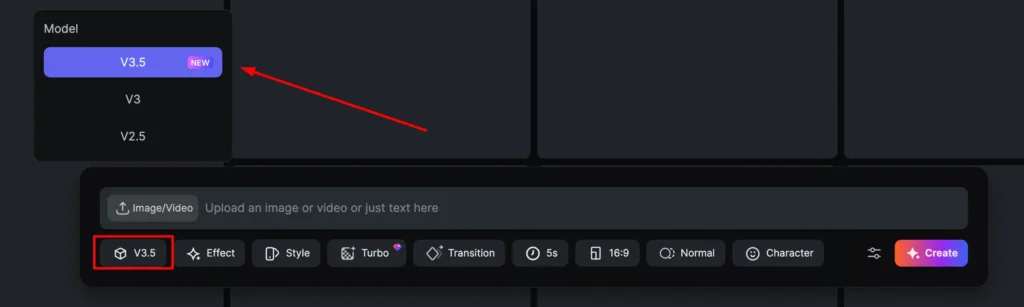
1. Enable the 3.5 Model: Ensure you’re using the 3.5 model for the best quality and coherence.
2. Access the Transition Menu: Left-click on the “Transition” button to open the menu.
3. Set Start and End Frames: Choose a starting frame and an ending frame.
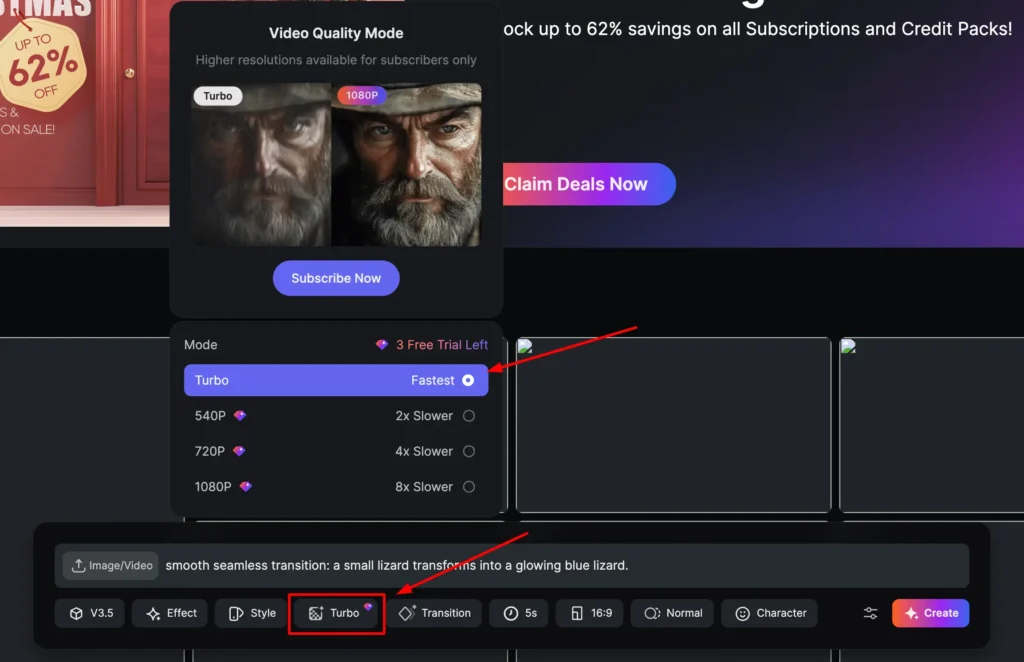
4. Provide a Prompt: For example, “smooth seamless transition: a small lizard transforms into a glowing blue lizard.”
5. Click Create: The AI fills in the missing details to generate a morphing animation.
Creative Use Cases
- Evolving Creatures: Transform a small lizard into a glowing blue lizard, like creating your own evolving Pokémon.
- Fashion Transitions: A fiery dress transitions into an icy outfit, unfolding like magic.
- Dynamic Characters: A stone statue morphs into a sci-fi female.
Pro Tip: Use the prompt “smooth seamless transition” for the best results. Ensure your start and end frames have similar compositions for optimal output.
Control the Quality of Your Outputs
Pixverse offers multiple settings to control the quality and duration of your videos. Let’s break it down:
Turbo Mode
- What It Does: Generates output quickly, in about 10 seconds.
- Quality: Best for previews; quality is lower compared to higher settings.
High-Quality Options
- Resolution Options: You can go up to 1080p for the best clarity.
- Credits Usage: Higher resolutions consume more credits.
Duration
The maximum duration for a generated clip is 8 seconds. Adjust it based on your requirements.
Motion Mode Settings
Pixverse provides two motion modes:
- Normal Mode: Ideal for standard clips with minimal movement.
- Performance Mode: Best for action-packed scenes like chase sequences or explosions.
Visual Comparison
- Normal Mode: Outputs appear smoother but may seem slower.
- Performance Mode: Delivers dynamic motion with better quality but uses more credits.
Removing Watermarks and Changing the Seed
Pixverse includes features to refine your output:
- Remove Watermarks: Click on the watermark removal button for a cleaner video.
- Change the Seed:
- Lock the seed to replicate a specific output.
- Roll the dice for a new, random result.
Additional Settings
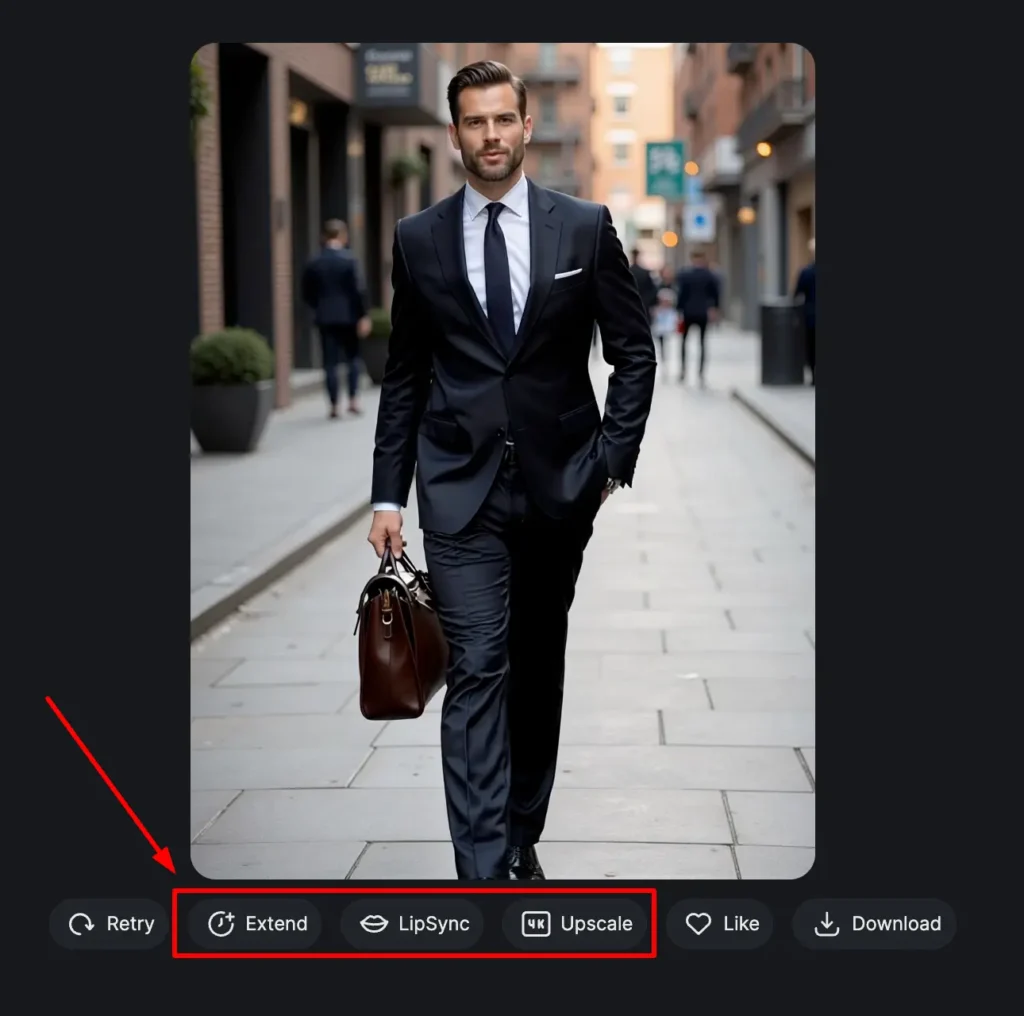
Extend Mode
Extend your video by 4-5 seconds:
- Click on “Extend.”
- Add a new prompt.
- Click “Create” to add the extended segment.
Lip Syncing
- How It Works: Add voiceover to your video. Choose from:
- Predefined voices.
- Uploaded audio files.
- Effectiveness: Results vary depending on the prompt and input.
Upscale and Download
- Upscaling: Enhance your video to 4K resolution.
- Download: Save your generated video locally.
Creating Text-to-Video and Image-to-Video
Text-to-Video
- Navigate to the “Home” tab.
- Type your prompt (e.g., “A samurai in a mystical forest”).
- Click “Create” to generate your video.
Image-to-Video
- Drag and drop an image into the upload area.
- Type your prompt.
- Click “Create” to convert the image into a video.
Examples
- Samurai Video: Stunning results using a simple text prompt.
- Image Transformations: Impressive motion generated from static images.
Style, Aspect Ratio, and Character Features
Style Application
- Options: Anime, comic, clay, and more.
- How It Works: Analyze your image or text prompt and apply the selected style.
Aspect Ratio
- Text-to-Video: Choose custom aspect ratios.
- Image-to-Video: Automatically matches the image’s aspect ratio.
Character Feature
- Upload an image of a person’s face.
- Name the character.
- Generate a video featuring the character’s likeness.
Note: Results may vary, and likeness isn’t always accurate.
Using Effects: A Fun Feature
Pixverse offers a range of predefined effects that guarantee specific results:
How to Use
- Click on “Effects.”
- Choose a preset effect.
- Upload your image or video.
Pixverse 3.5 has a lot to offer, making it an excellent tool for creating AI videos. Experiment with its features, prompts, and settings to explore its full potential.