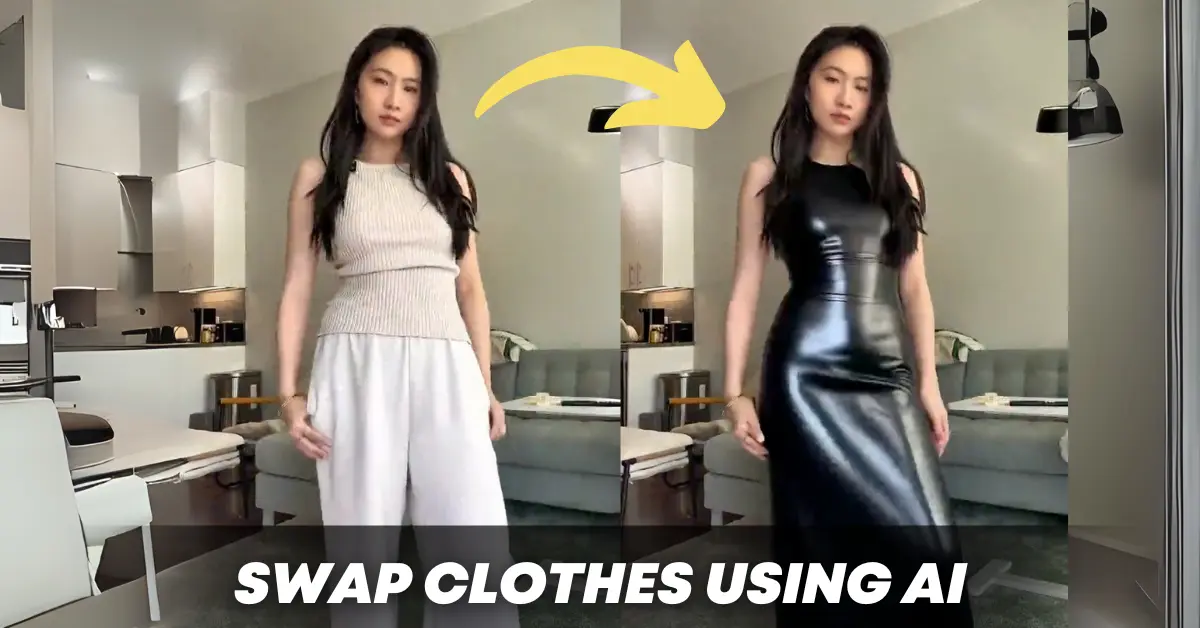
I’m going to walk you through how I change my clothing in videos using Pika AI. This is a step-by-step guide with zero skipped details.
People think that AI is daunting, but it’s really just going to websites and playing around until you figure it out.
What is Pika AI?
The AI model that I like to use for changing my clothing is Pika. Pika AI (accessible at pika.art) is a paid web-based AI video generation platform that lets you modify short video clips using simple prompts.
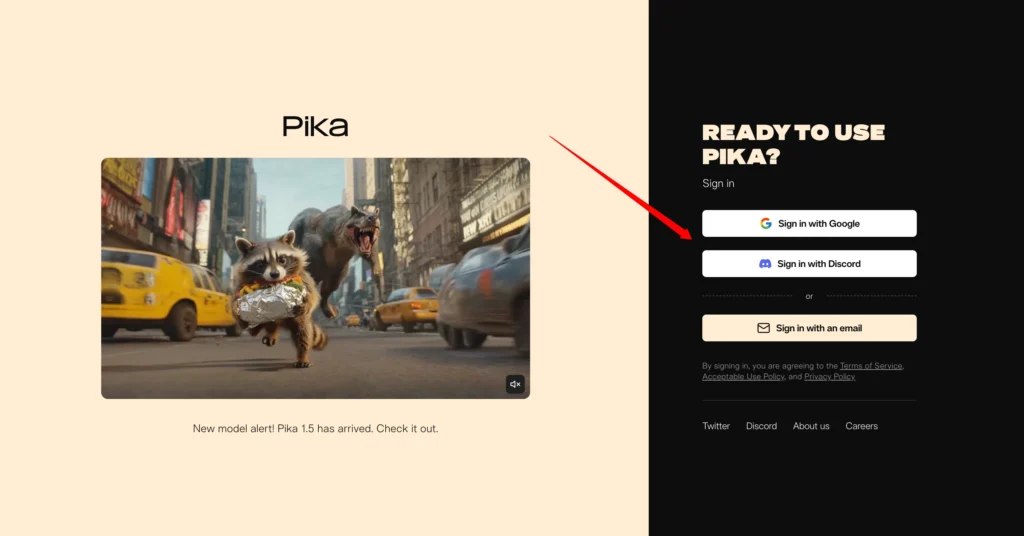
It is a paid service. I do the cheap version, which is $8 a month.
How Credits Work
- You purchase a set number of credits.
- Credits go toward the AI model you are using.
- More complex or longer generations cost more credits.
- For example:
- Something complex may take 1,000 credits.
- Something simple might use just 100 credits.
But here’s the thing: you’ll likely regenerate something several times to get it just right. So you can go through credits fast. That said, $8 a month has never been an issue for me. I’ve never run out of credits using Pika.
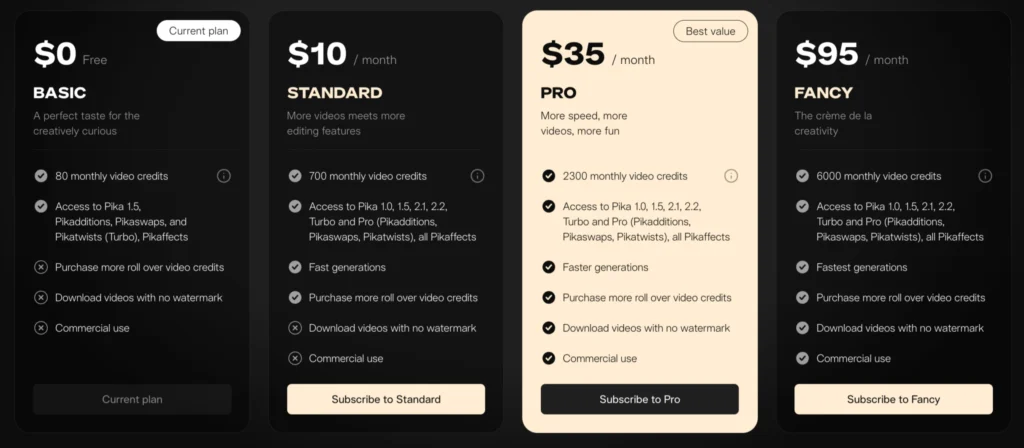
And if you don’t use all your credits, they roll over to the next month.
Key Features I Use
- Pika Swaps for outfit changes
- Brush tool for masking the outfit area
- Prompt input for desired clothing
- Negative prompt input to exclude unwanted elements
- Reference image support to guide the AI
- Pika Pro mode for enhanced results (uses more credits)
Change Clothes with PikaSwaps by Pika Art
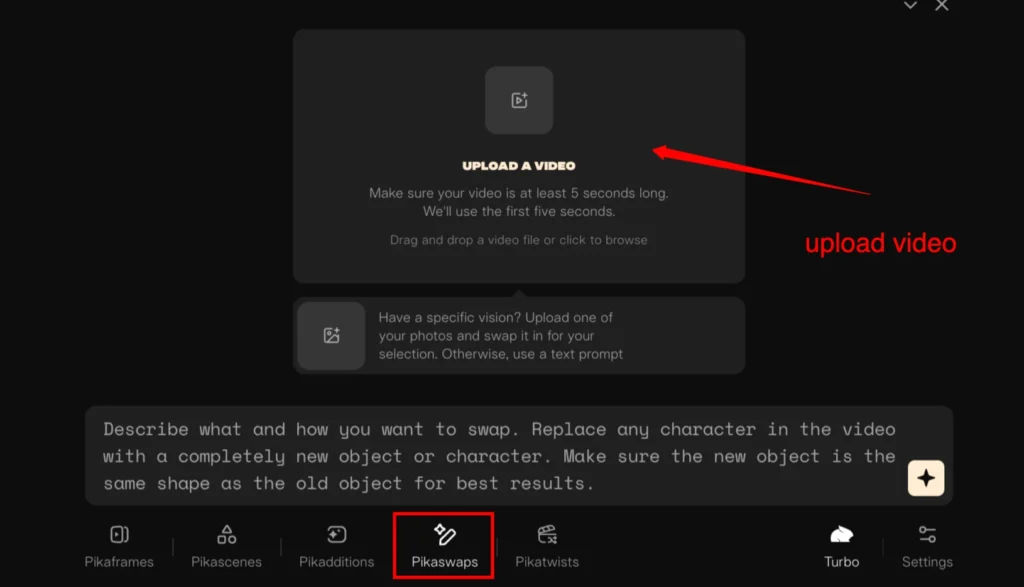
From the homepage, go down to Pika Swaps. This tool only generates 5 seconds of footage at a time.
That’s why my clips are always really short.
Handling Longer Clips
Sometimes I have a video clip that’s longer than 5 seconds, but I want to replace my outfit for the full 8 seconds.
So what I do:
- Generate the first half of the clip with a prompt.
- Then use the same prompt on the second half of the clip.
Step 1: Go to Pika Art
From the homepage of Pika, scroll down and click on “PikaSwaps.”
- This feature only generates 5 seconds of footage.
- If your video is longer (say 8 seconds), you’ll need to generate two clips using the same prompt and then merge them during editing.
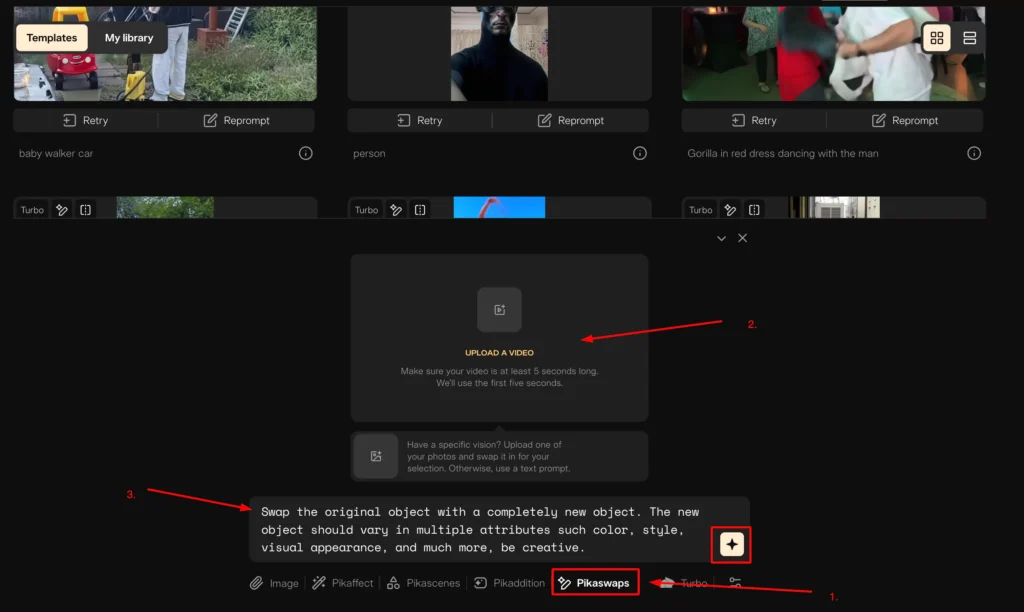
Step 2: Uploading a Video
I took a clip of my intro. It’s about 10 seconds long. Once uploaded, Pika gives you the first frame of your video.
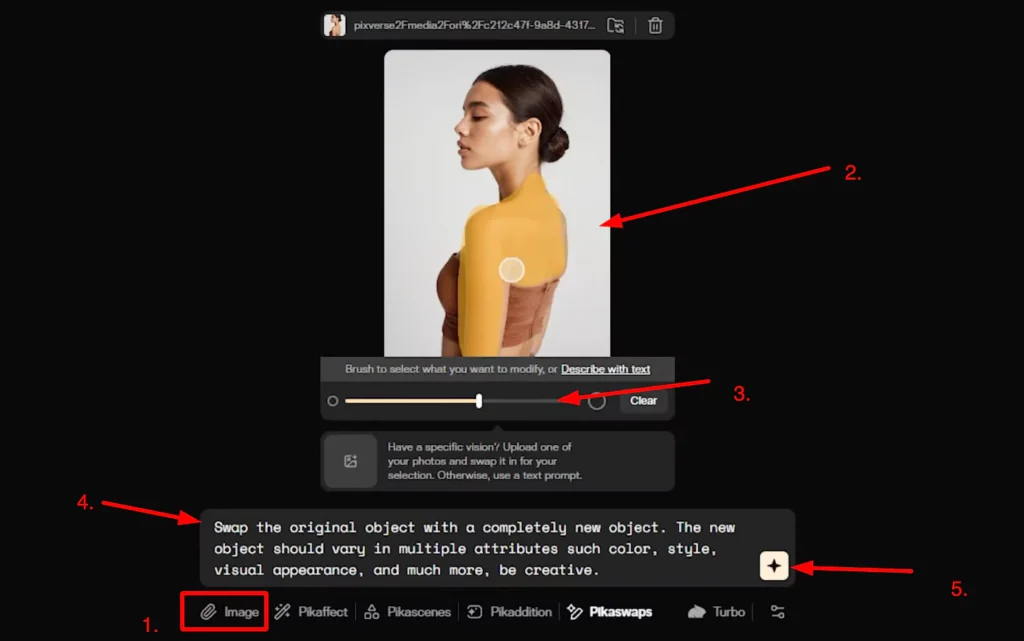
Step 3: Mark the Clothing Area
From here, I like to use the brush tool to draw on what I want to change.
Tip: They don’t have a zoom-in feature, so I just zoom in on my browser.
I use my brush and try not to spill over onto my hair too much, because I hate when the AI replaces my hair. It doesn’t look very realistic.
Since the area is over my tank top, I just let it be part of the swap.
Step 4: Writing Prompts
Prompting is different for every AI model.
- With Firefly, I use long, incredibly descriptive prompts.
- With Pika, I keep it short. The longer the prompt, the more confused it gets.
So it’s frustrating if you want something very specific. The best way to approach this: keep an open mind.
Example Prompt:
“Replace white tank top with a blue silk v-neck tank top”
(Use Negative Prompts) Advanced Options:
Negative prompts are where you list what you don’t want in your video:
- Animated-looking clothing
- No additional figures
- No added jewellery
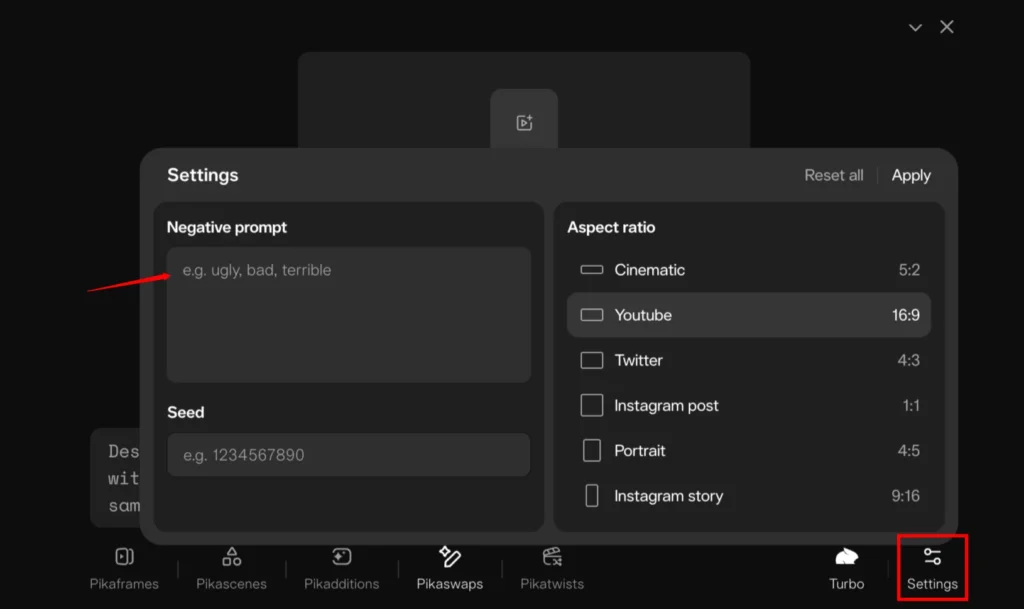
I usually skip the additional settings for clothing swaps to avoid complicating things. I can also write the negative prompts into my regular prompt.
Step 6: Enable Pika Pro (Optional)
I use Pika Pro, which uses up more AI credits.
Note: You have to minimize the panel to see your video generating. I’ve made the mistake of hitting it five times, wasting credits.
Step 7: Using a Reference Image
Another cool thing: you can highlight the area you want to change and upload a reference image.
I found a cute tank top to use as a reference.
- Took a screenshot.
- Went back to Pika.
- Uploaded the screenshot.
- Adjusted my selection to mimic where the top goes on the model.
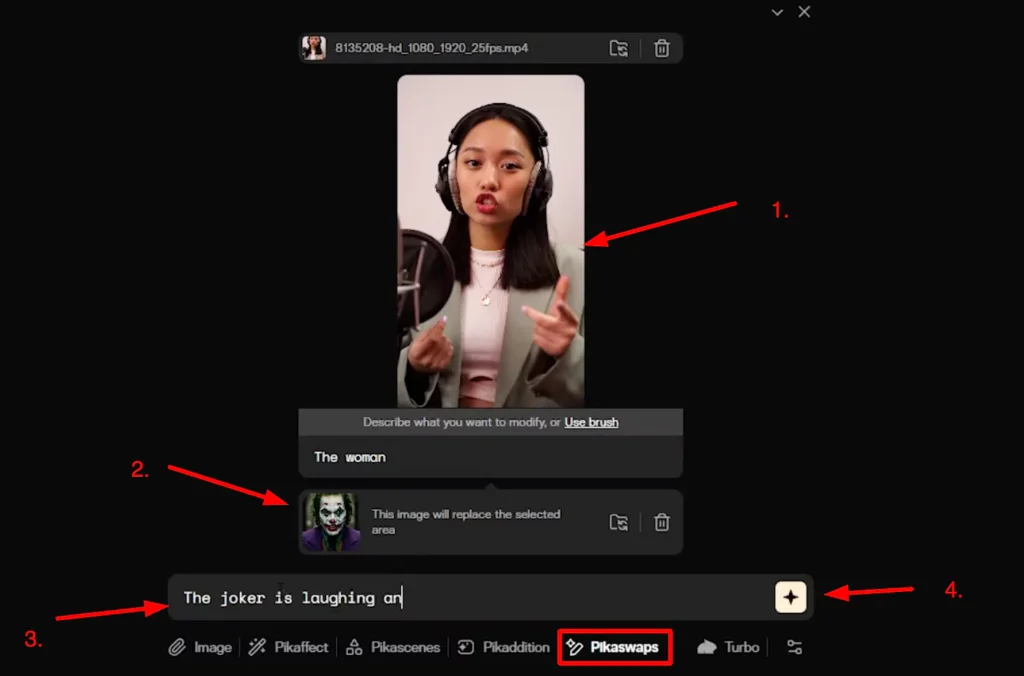
Prompt:
“Replace tank top with a navy blue polyester halter top”
Generate.
That took an hour. Usually it takes five minutes. I ended up generating more versions.
Step 8: Reviewing the Generations
Some results:
- Added weird colors and shadows
- The reference image version was more revealing than I intended
- My hair caused strange shading and warped shapes
Another changed my top, but there was something weird running through it. Likely because my hair was over it.
Tip: Keep your hair out of the way to avoid strange generations.
Lessons Learned:
- Keep hair out of the selection area
- Avoid selecting overlapping areas like curves from your hair
- Try to keep shadows and gray areas out of prompts: “No gray shadows, no unusual colors”
Using the Reference Photo
It was more revealing than intended. Also had a weird color running through it.
I think the weirdness comes from how I painted the selection. It was interpreting the curve of my hair as covering my body.
So I cleared it and selected inside the hair only.
New prompt:
“Purple patterned top”
Then added negative prompts:
- No gray shadows
- No unusual color
Generated:
- Teal spandex tank top
- Silk navy blouse
Then repeated the same process for the second clip:
- Shiny black halter top
- Silk navy blouse
Some had weird splotches again. I could fix that with reflection or content-aware fill in After Effects.
One Worked Well
- Shiny leather tank top
- Shiny orange tank top
Then… I ran out of credits.
Yes, after bragging about never running out.
It was the end of the month too, so I almost made it.
That’s the hard thing about credit-based AI. You waste credits on poor generations.
Editing in Premiere Pro
So I worked with what I had. Took all my clips into Premiere Pro (my editing software of choice).
I stacked them over my original footage.
But the Pika footage was too small, so I:
- Scaled it to 200%
- Copy-pasted the motion effect so it matched the size
Important Note About Pika’s Output
Pika doesn’t just edit the part you selected. It ingests your entire video and recreates it.
So you get:
- Artifacts on the eyes
- Digital glitching
- Weird hair texture
That’s why I create an opacity mask over the Pika footage.
I use the Pen Tool to draw around the generated outfit. That’s the only part that remains visible.
Bonus: This also removes the watermark.
But:
- The mask doesn’t move with your body
- May need adjustment
Identifying AI-Generated Clothing
After reading this tutorial, you should be able to spot AI-generated outfits:
Key Signs:
- The grain on the top vs. original footage
- Strange bumpy or warped texture
- Doesn’t fully match your body shape
- Clear edge lighter than the background
- Ghost of old clothing still visible
General Rule:
Remnants will always show through. It’s part of the AI’s strange texture.
Usually I distract you the first time with something on-screen. But the second viewing, it becomes clear:
- Weird texture
- Odd movement
- Moiré effect (those ripple patterns on TV)
Final Thoughts
Some generations made me look thinner. You can still see ghost outlines.
Even though the body looks real, remnants of the old me always remain. One had a clear ghost tank top.
You’ve probably seen hyperrealistic AI videos that don’t have these textures. Stuff like Google Veo3, Kling 2.0, etc. have high-quality outputs.
But not many AI video models actually edit your video. That’s why I use Pika.
Most models can’t change elements in a video yet. I’m sure that will change soon.
My Workflow
- Combination of tools
- Premiere and sometimes After Effects
- AI elements are only part of my videos
That’s why I pick the best-looking three versions. The morph effect looks okay. Still bothered by remnants, but I’ll fix that with masking.
If you just want to change your outfit and post the video, you can do that directly from Pika.
FAQs
1. How long does it take to generate a clothing swap?
Usually 5 minutes, but can take longer depending on load.
2. Do you have to use a reference image?
No, but it helps. Especially for more specific clothing types.
3. Can you change more than clothing?
Yes, but this guide focuses only on outfit changes.
4. Do I need to edit in Premiere?
No. You can post the Pika video directly.
I edit further because I want perfect integration with original footage