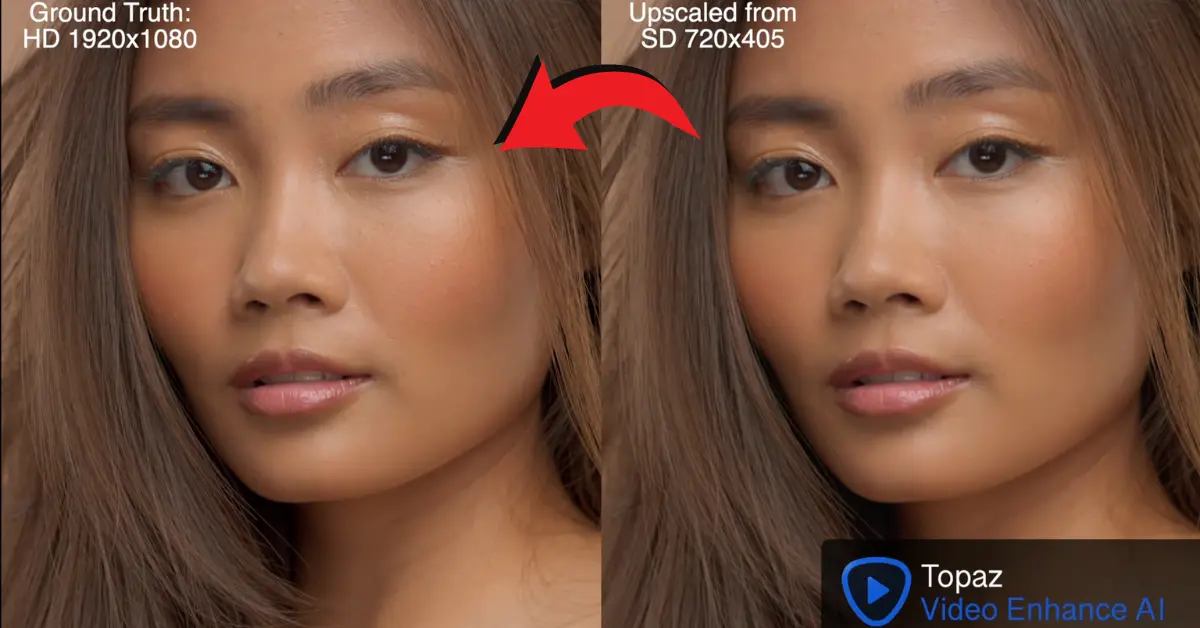
In this tutorial, I will walk you through using Topaz Labs’ Video Enhance AI to upscale videos and remove noise and compression problems. Compared with other upscaling techniques, Video Enhance AI imagines the missing details, producing stunning videos that often look as good as high-definition originals.
I’ll be talking about the latest release of Topaz Labs Video Enhance AI. This is software I frequently use and find very effective.
Recently, Topaz updated their suite to version 5.0. I’ll go over this new version, share how I use it, determine which models to use, and give my thoughts on it.
Topaz Video Enhance AI:
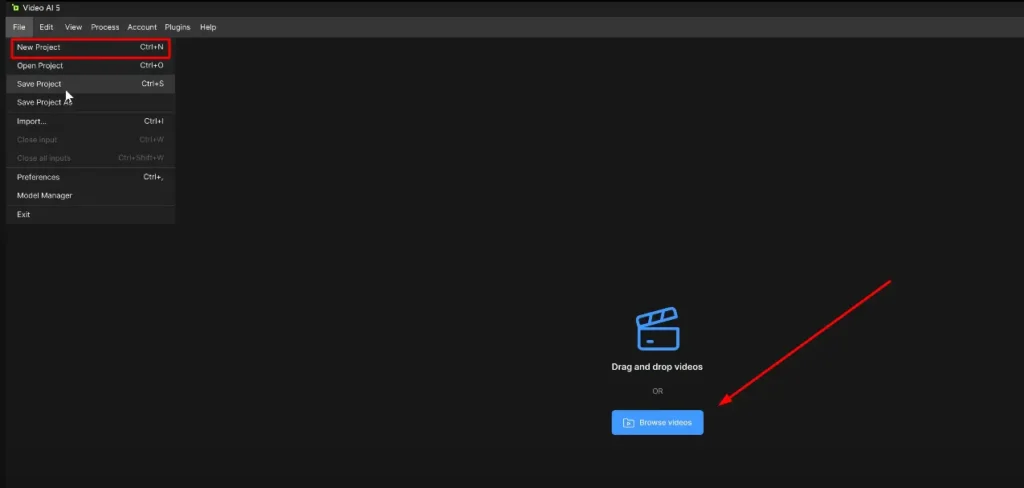
Getting started with Video Enhance AI is simple. After downloading and launching the app, you can either drag and drop your videos or click to open them.
Currently, only progressive videos are supported, but interlaced video support will be available soon.
How to use Topaz Video AI?
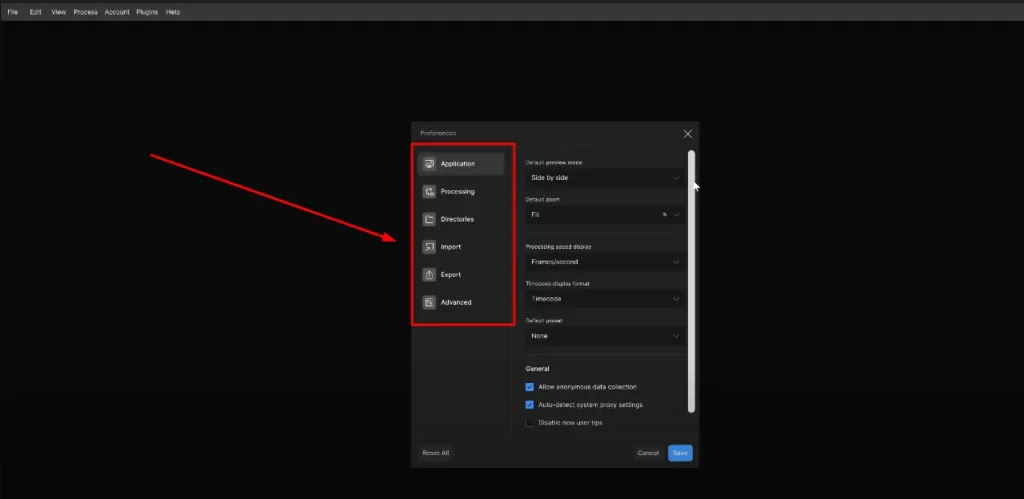
Step 1: Settings and Preferences
Opening Projects: You can open a saved project or import a new one.
Preferences:
Save your settings after making these adjustments.
Step 2: Processing Settings
GPU Settings:
Make sure to use your GPU instead of the CPU for processing. I have two GPUs and use my 3060 as it is more efficient.
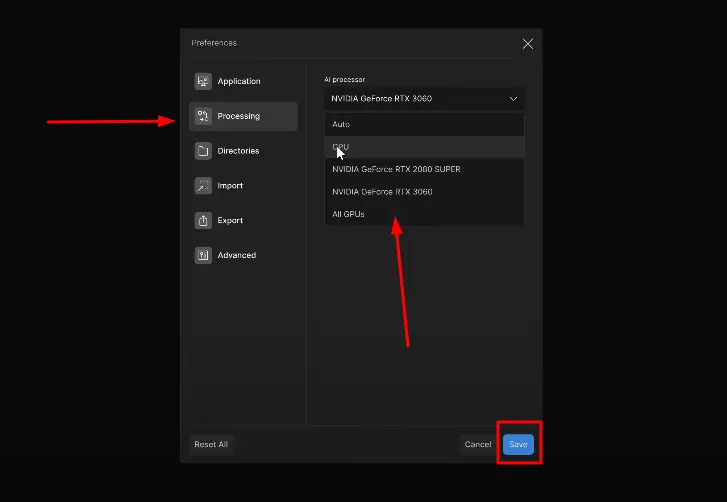
Image Sequences:
I stick to video processing and avoid image sequences unless necessary.
File Types:
For high-quality outputs, I don’t find much benefit in image sequences.
Step 3: Export Settings
Video Codec:
I typically use H.265 (HEVC) with the main profile, as my videos are usually 8-bit.
Bit Rate:
Set a constant bit rate, typically between 70 to 180 Mbps, depending on your needs.
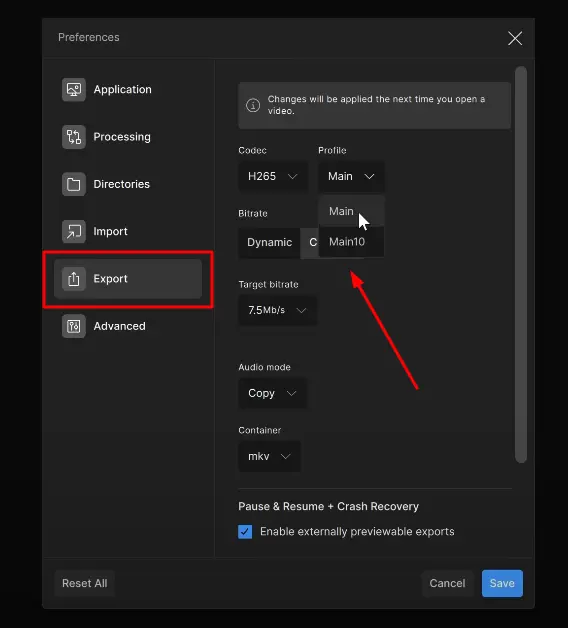
Audio Mode:
I usually copy the audio settings, but you can convert to AAC, AC3, or PCM.
Container Format:
I prefer MKV, but you can choose MOV or MP4.
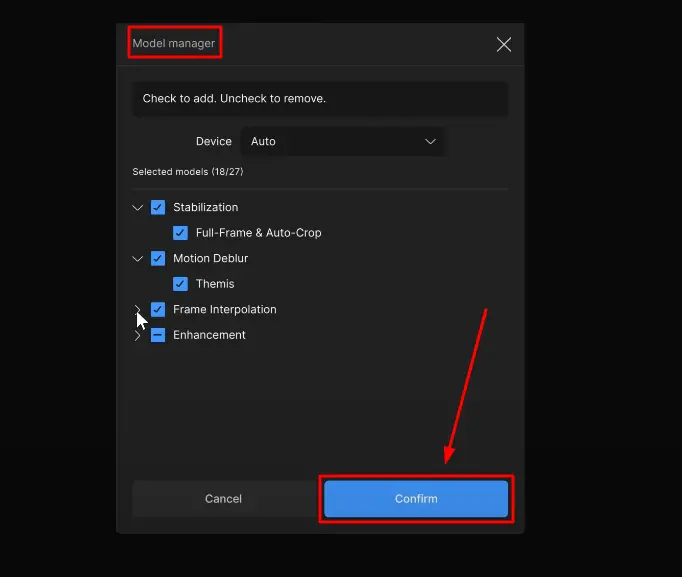
Step 4: Model Manager
A new feature in Video AI 5.0 is the model manager. This allows you to select and download various models for enhancement and interpolation.
Step 5: Creating a Preset
To create a new preset:
- Import a video.
- Go to the “Create New Preset” option.
- Name your preset (e.g., 4K Slowmo).
- Set the resolution to 4K and choose your preferred settings:
- Resolution: 4K
- Pixel Format: Square pixel
- Frame Rate: 24 FPS
- Enhancement Model: Artemis high quality
- Interpolation: Set to 4X Apollo
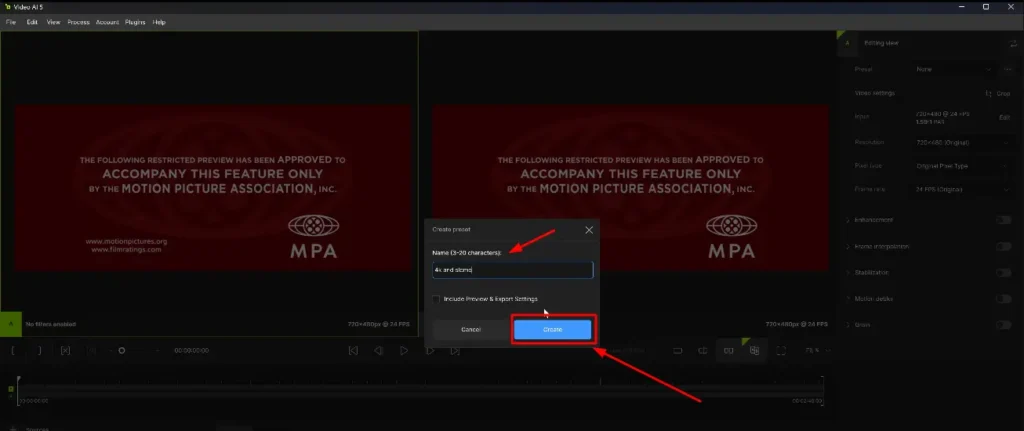
Save and update the preset to streamline your workflow.
Step 6: Navigating the View Menu
Zoom Options:
Adjust the zoom level (fit, 100%, 400%).
View Modes:
Choose between single view or split view.
Process and Export:
Use the export button to process your video. You can also use the command prompt if you’re comfortable with programming.
How to use Kling AI Video Generator
Step 7: Managing Your Account
Log Out and Updates:
Log out or check for updates as needed.
Plugins:
Install plugins for After Effects or DaVinci Resolve. I primarily use DaVinci Resolve for editing.
Step 8: Upscaling
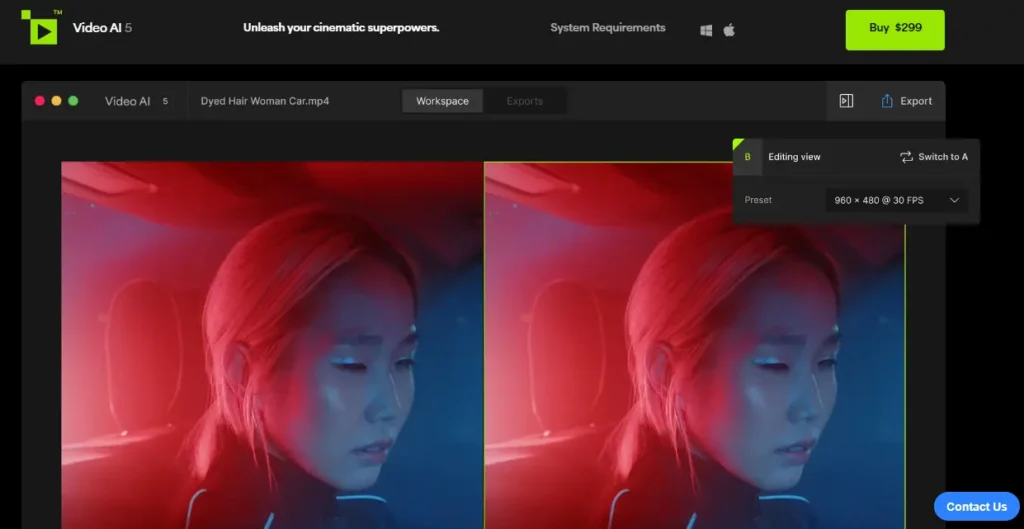
Side-by-Side and Split-Screen Comparisons
Comparison Views:
The speaker demonstrates the use of side-by-side and split-screen views to compare the effects of different models on the same footage.
Proteus vs. Artemis:
The speaker notes the detailed improvements Proteus and Artemis provide when upscaling footage to Full HD (1080p). Proteus enhances finer details, while Artemis adds high-quality smoothing and sharpening effects.
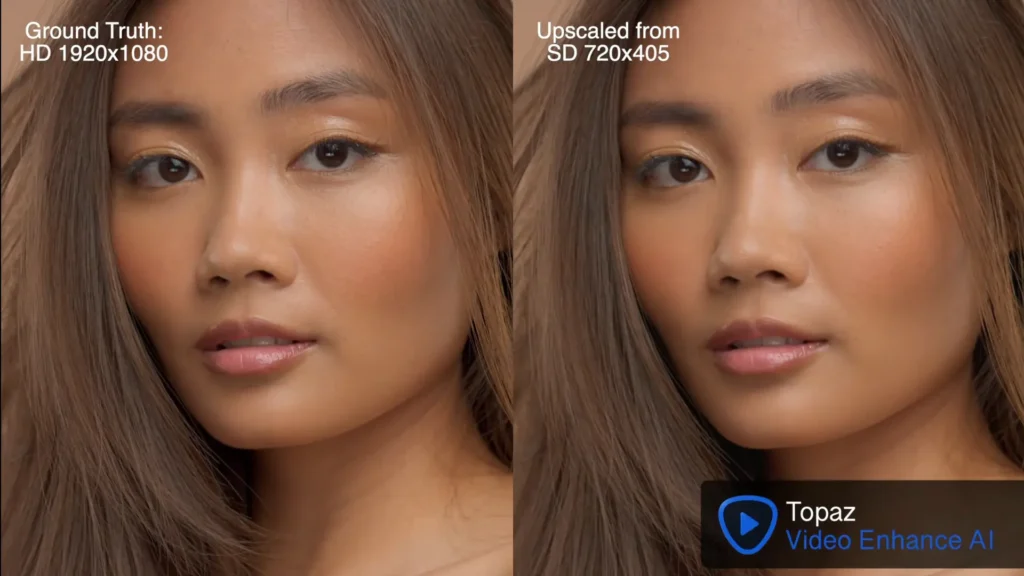
Original vs. Processed Footage
Quality Improvements:
By comparing original low-resolution footage with processed versions, the speaker highlights significant improvements in clarity and detail, even at a distance.
Example Footage:
Uses scenes from the “Deadpool” trailer to illustrate the upscaling process, showing how low-resolution video can be enhanced significantly.
Models and Use Cases
Model Selection:
Proteus for fine detail enhancement and Artemis for high-quality smoothing.
Limitations:
The speaker points out the limitations of the software, noting that extremely low-quality footage may not benefit as much and may introduce artifacts or unnatural looks.
Step 9: Slow Motion
The speaker uses scenes from the “Dune” trailer to demonstrate slow motion capabilities.
Upscaling with Slow Motion: Shows the process of upscaling footage while simultaneously applying slow motion, highlighting the smoothness achieved in the final output compared to the original choppy video.
Performance: The processing speed is noted, with the software handling about 11 frames per second during the upscale and slow-motion process.
Practical Use Cases
Challenging Footage:
Demonstrates the software’s ability to handle fast-moving scenes and objects, noting the effectiveness and occasional warping.
Comparison with Other Software:
The speaker mentions the superior slow-motion capabilities of Topaz Video AI compared to Da Vinci Resolve’s Optical Flow, making it a preferred choice for their own projects.
Step 10: Exploring AI Models
Different AI models are available for specific needs:
Gaia CG Model:
Designed to remove aliasing in computer-generated images and camera sensors that drop lines while recording video. This model reduces jagged edges effectively.
Theia Model:
Ideal for videos with noise or high compression problems. Adjust settings like “Restore Details,” “Sharpen,” and “Reduce Noise” to handle issues like blockiness and compression artifacts.
Step 11: Experimenting with Settings
For the best results, experiment with different AI models:
- Multiple Copies: Bring in multiple copies of the same video.
- Test Models: Apply different AI models to each copy to compare quality.
- Compare: Preview and toggle between models to choose the best one.
Step 12: Finalizing and Batch Processing
Once satisfied with the settings:
Save Version:
Choose the version you want to save.
Start Batch Processing:
Click the “Start Batch Processing” button to process all videos at once.
Conclusion
Topaz Labs Video Enhance AI is a powerful tool for upscaling videos and enhancing details. By following this guide, you can improve video quality significantly and handle various issues like noise and compression.
FAQs:
How to use Topaz Video AI?
Download and launch the app, then drag and drop or open your video. Choose the desired output resolution and click start to process.
What is Topaz Video AI?
Topaz Video AI is a software that enhances video quality by upscaling and removing noise and compression artifacts.
How to get Topaz Video Enhance AI for free?
Visit the Topaz Labs website and download a free trial version of the software.
How to make Topaz Video AI faster?
Ensure your computer meets the recommended system requirements and close other applications to allocate more resources to Video AI.
How long does Topaz Video AI take?
Processing time varies based on your computer’s specifications and the video’s resolution.
How to speed up Topaz Video Enhance AI?
Use a computer with a powerful GPU and allocate more system resources by closing other applications.
How to download Topaz Video Enhance AI?
Go to the Topaz Labs website and download the software from the Video Enhance AI product page.
What does Topaz Video AI do?
Topaz Video AI upscales video resolution and removes noise and compression issues, enhancing video quality.