
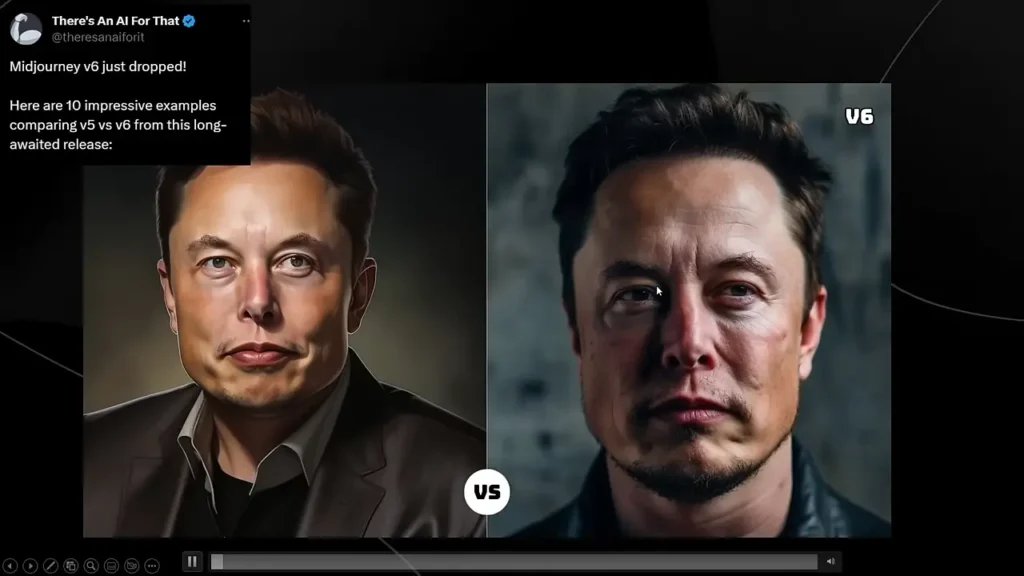
Midjourney V6 is a newly launched AI image generator known for its realistic outputs. Today, we’re going to explore into Midjourney V6. This article is my personal guide, detailing my experiences and insights on how to access and effectively use Midjourney V6.
What is MidJourney V6?
MidJourney V6 is an AI-powered image generation tool that takes your text-based prompts and transforms them into stunning visual representations. It’s a powerful tool for creating images, whether you’re a content creator, marketer, or just someone looking to enhance your projects with eye-catching visuals.
What Makes Midjourney V6 Special?
Midjourney V6 stands out due to its extraordinary features:
- Enhanced Realism: The images produced are incredibly lifelike, pushing the boundaries of AI-generated art.
- Improved Prompt Coherence: It interprets prompts more accurately, even complex ones.
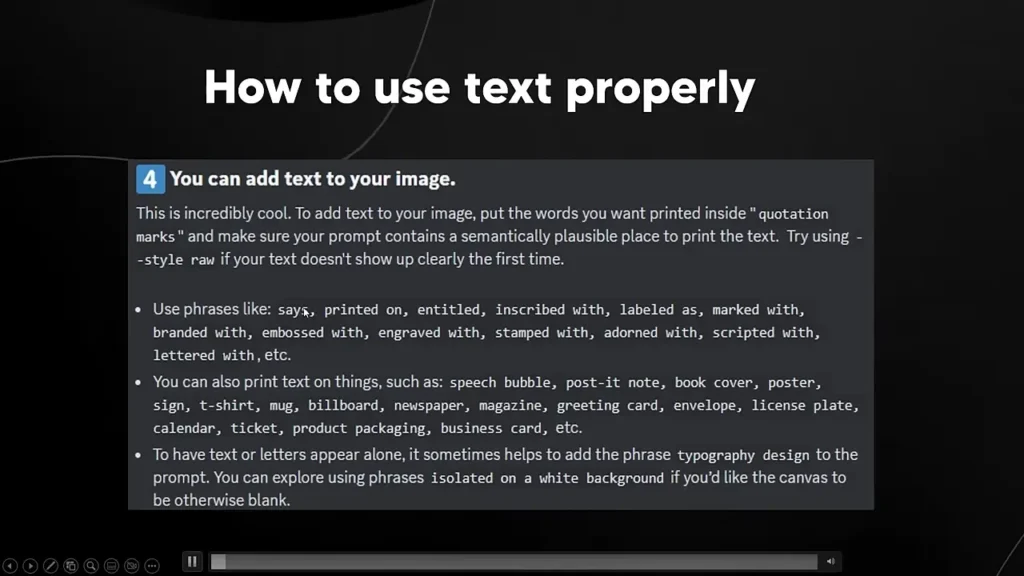
- In-Image Text Capability: A novel feature allowing users to incorporate legible text within images.
- Advanced Upscaling: Offers improved resolution for images.
How to Access Midjourney V6?
Midjourney V6 isn’t automatically available for all users. Here’s how I enabled it:
- Join the Midjourney Discord Server: This is where all the magic happens.
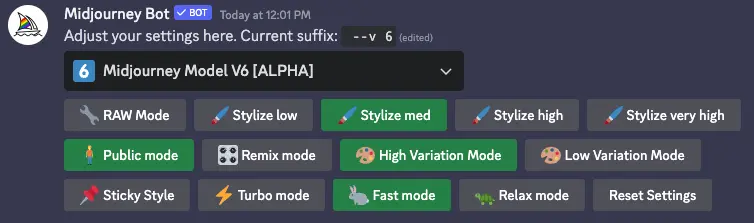
- Navigate to Settings: Simply type
/settingsin the server. - Activate V6: In the settings, select V6 from the dropdown menu or append
--v 6to your prompts.
Crafting the Perfect Prompt
What I learned quickly was that V6 demands precision in prompting:
1. Avoid Vague Terms:
Instead of terms like “photorealistic” or “4k,” be explicit about what you want.
2. Be Descriptive:
Detailed, descriptive prompts yield better results.

3. In-Image Text:
To generate text within your image, use quotation marks for clarity.
4. Styling and Aesthetics:
For photorealistic outcomes, I used --style raw. Adjust --stylize values based on the desired level of creativity.
My Experimentation with In-Image Text
One of the most fascinating aspects for me was the in-image text capability. While it’s not perfect, it does a commendable job with common words.
I experimented with various prompts, sometimes needing a few tries to avoid gibberish, but the results were fascinating.
Achieving Photorealism
Midjourney V6 excels in creating photorealistic images. The key lies in effectively using the --style and --stylize parameters. Lower --stylize values gave me images true to my prompts, while higher values added an artistic touch.
MidJourney V6 Specify Styles and Elements
Depending on your project, specify any particular styles, elements, or settings you want in your image. You can mention photography styles, colors, and more. Research different styles to get the best results.
Submit Your Prompt:
Once your prompt is ready, hit the submit button, and let Mid Journey V6 work its magic.
Review and Refine:
The generated image will appear on your screen. Take a moment to review it. If necessary, you can refine your prompt and try again until you’re satisfied with the outcome.
Download and Use:
Once you’re happy with the image, you can download it and use it for your projects, content, or marketing materials.
Personal Experiences and Tips
Through trial and error, I discovered some tricks:
- Be Specific: The more specific your prompt, the better the output.
- Experiment with Styles: Don’t hesitate to play around with
--stylizevalues. - Patience is Key: Sometimes, it takes a few tries to get the perfect image.
Conclusion:
In conclusion, MidJourney V6 is a remarkable tool that empowers users to create stunning images using natural language prompts. By following the steps outlined in this guide and adhering to best practices, you can harness the full potential of this AI-powered image-generation tool.