Kling Motion Control 3.0 just recreated camera control in AI videos, but getting actually good results from it is almost impossible unless you know exactly how to use it.
I am walking you through the whole thing step by step. By the end, you can run this on your own content.
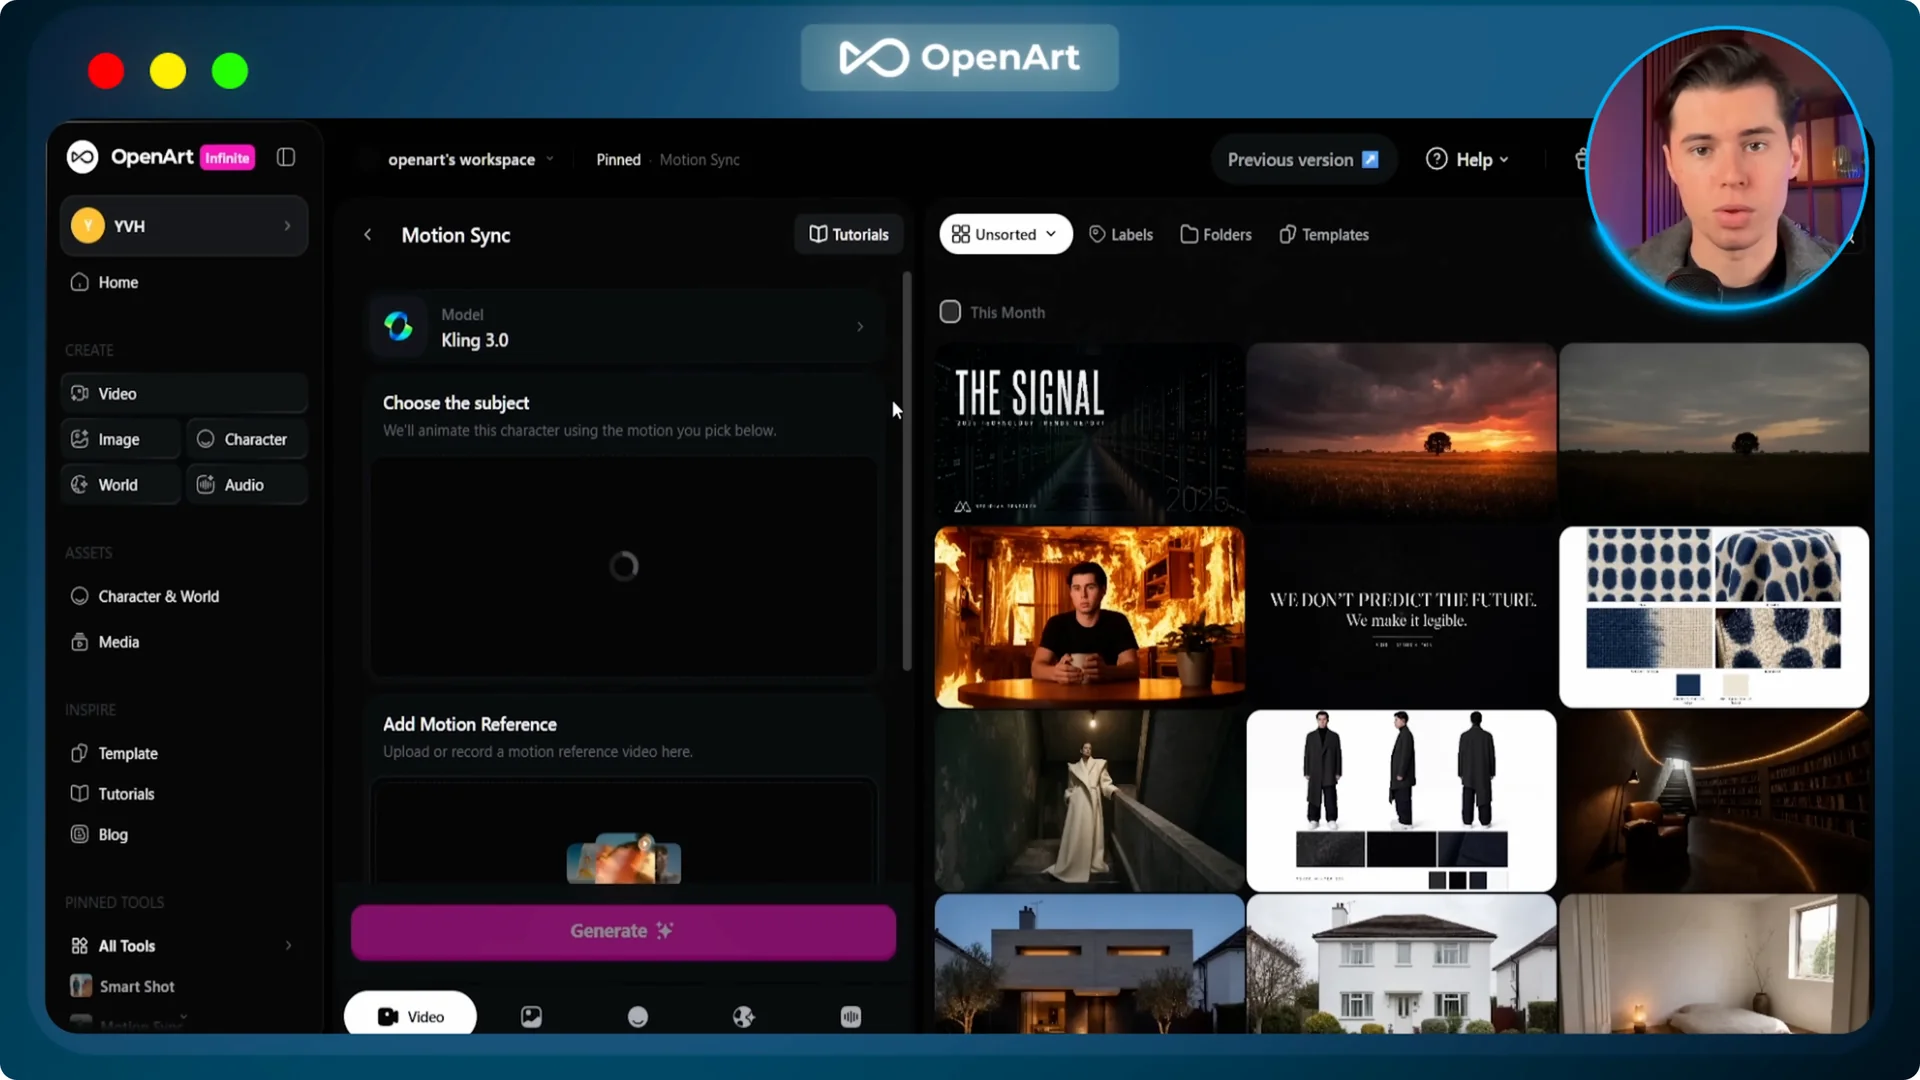
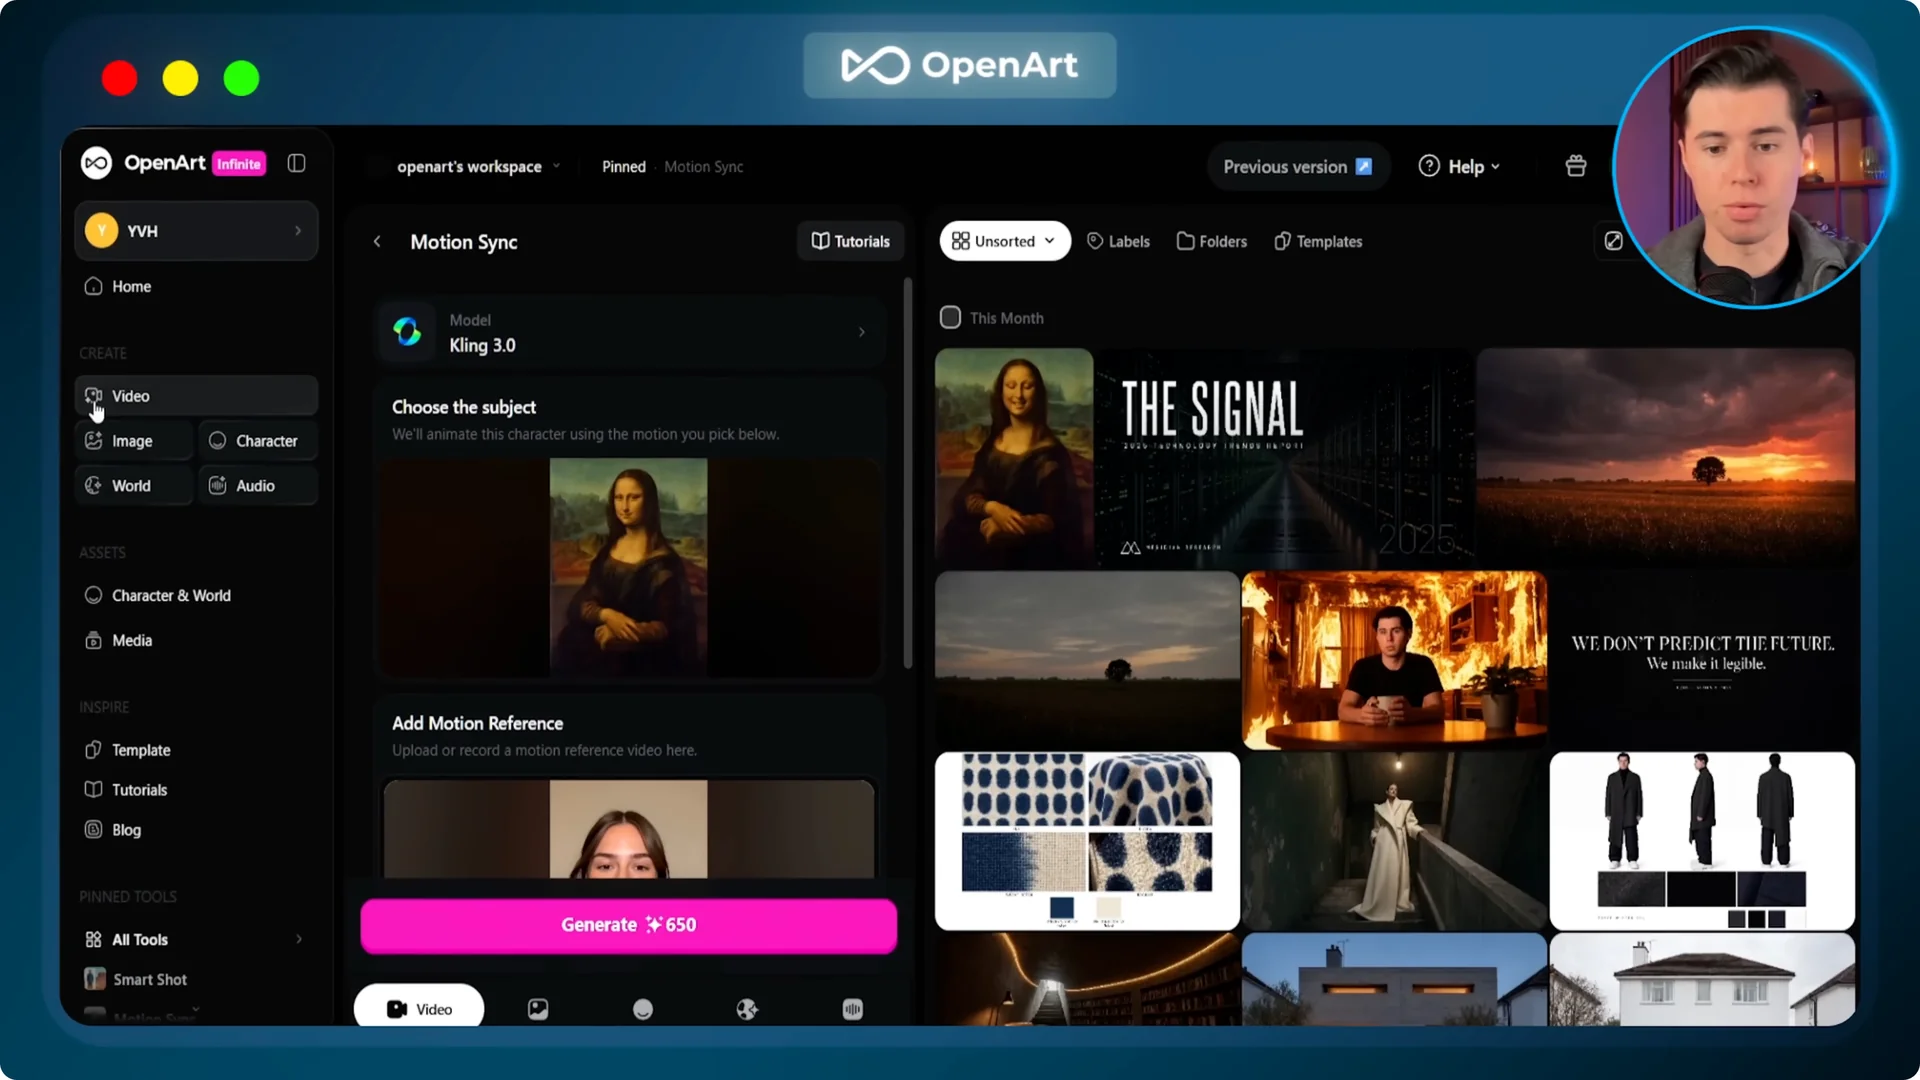
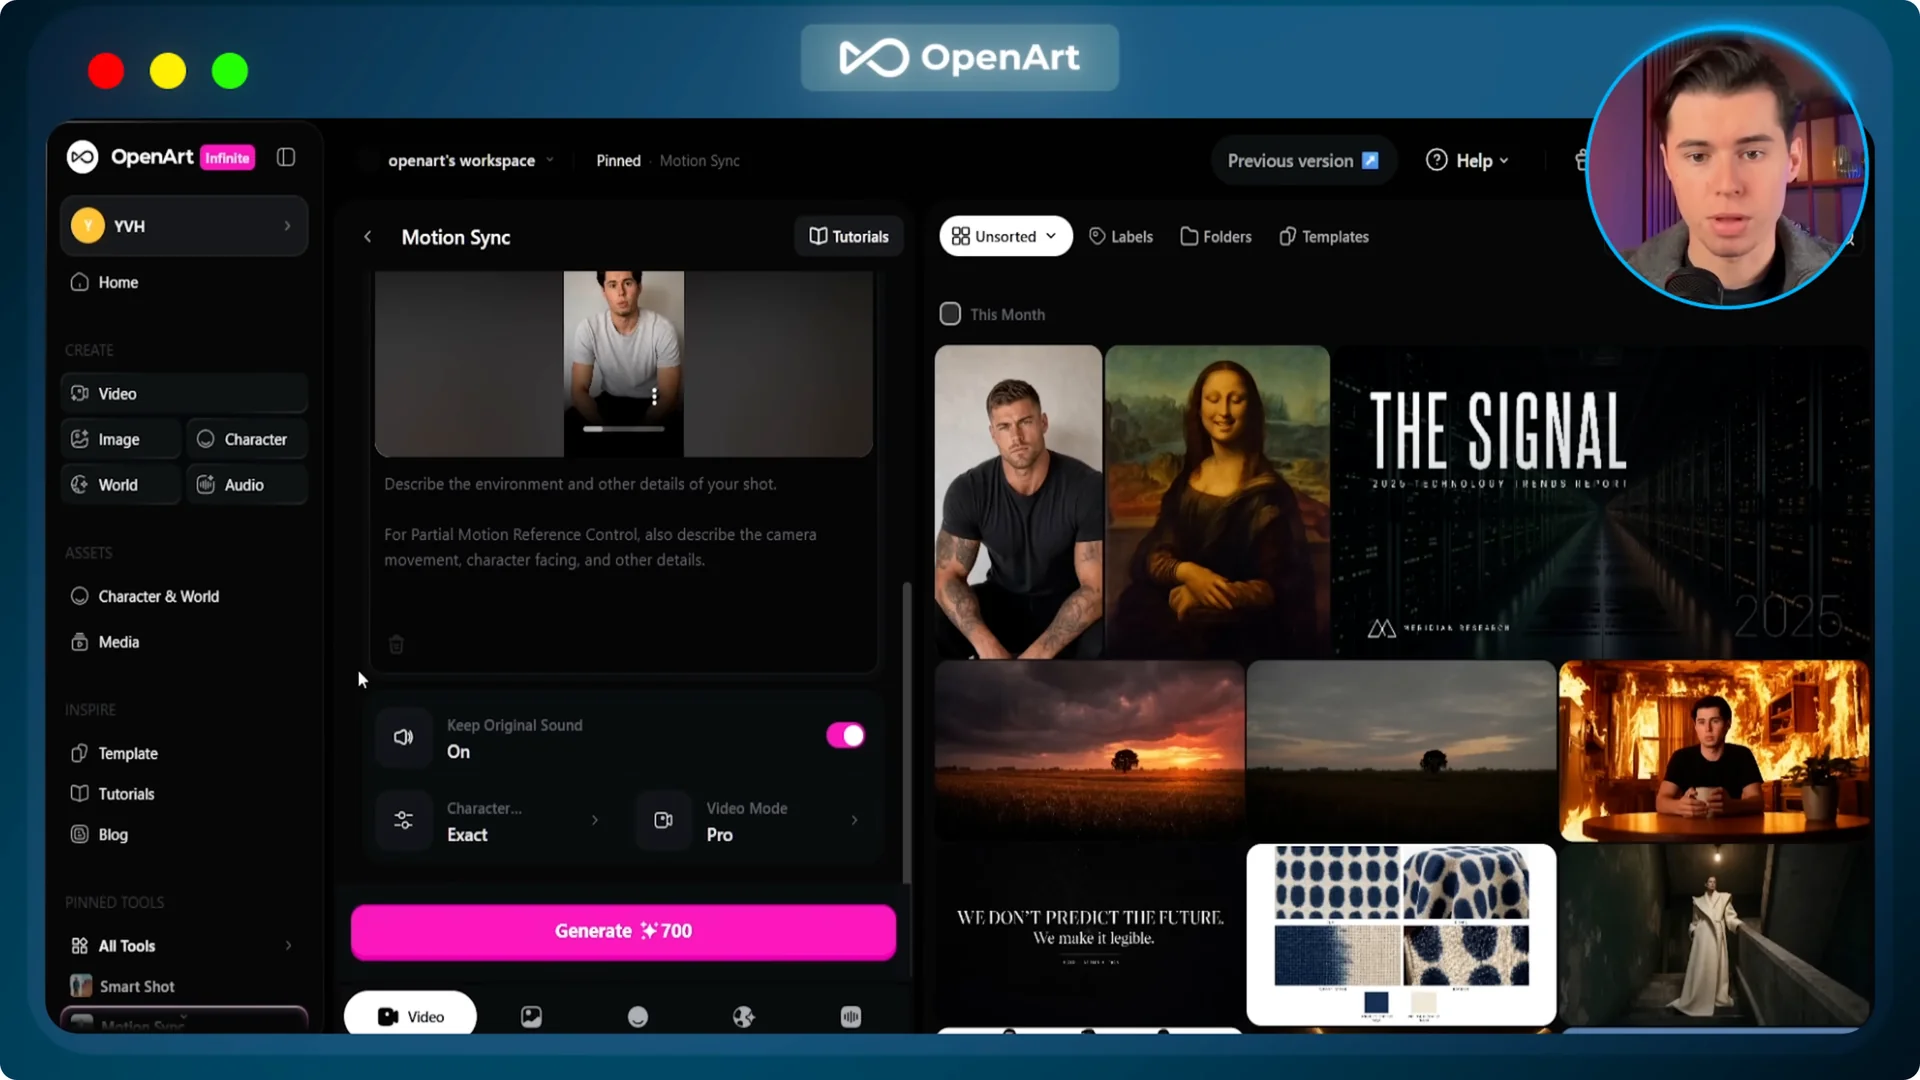
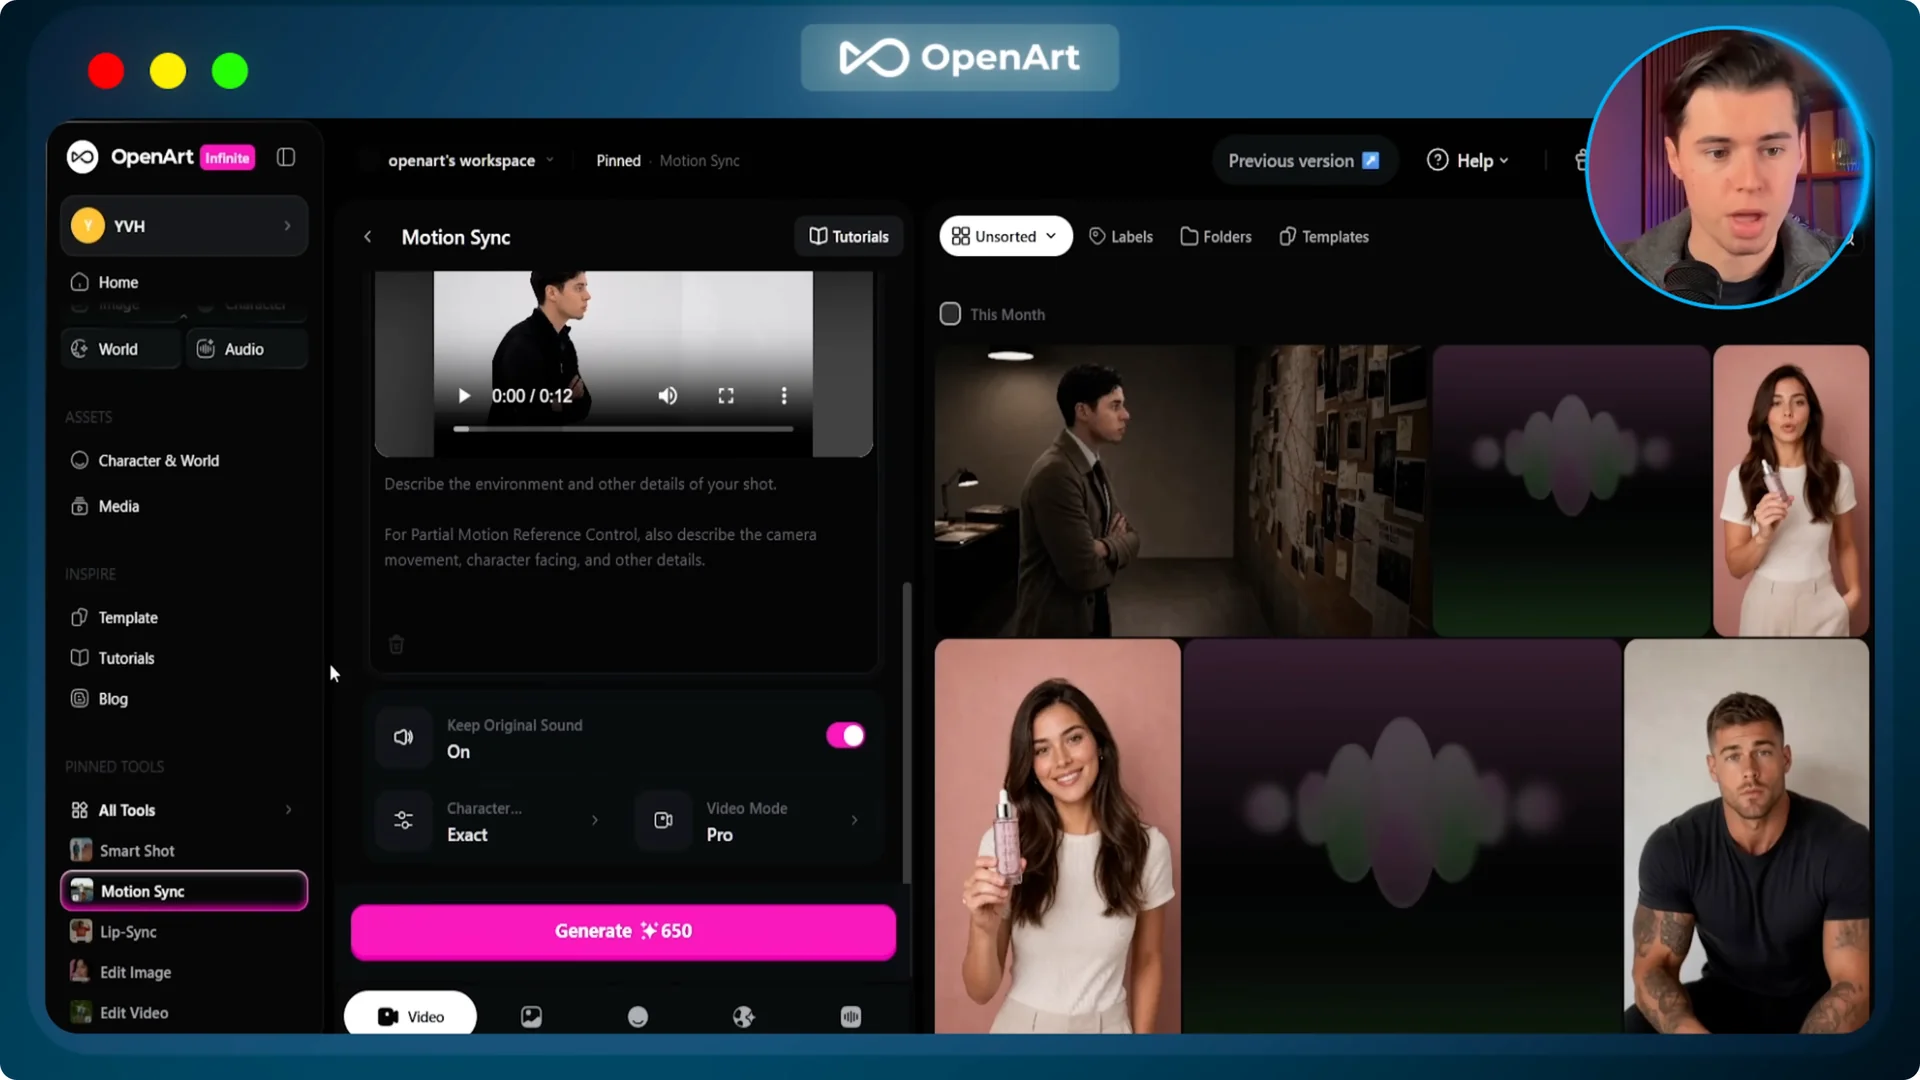
Go to OpenArt, select video, then motion sync, then choose Kling 3.0.
This tool works when you give it two things.
The first is a character image, and the second is a motion reference video.

It reads how the person is moving in the reference video and copies that onto whoever is in your character image.
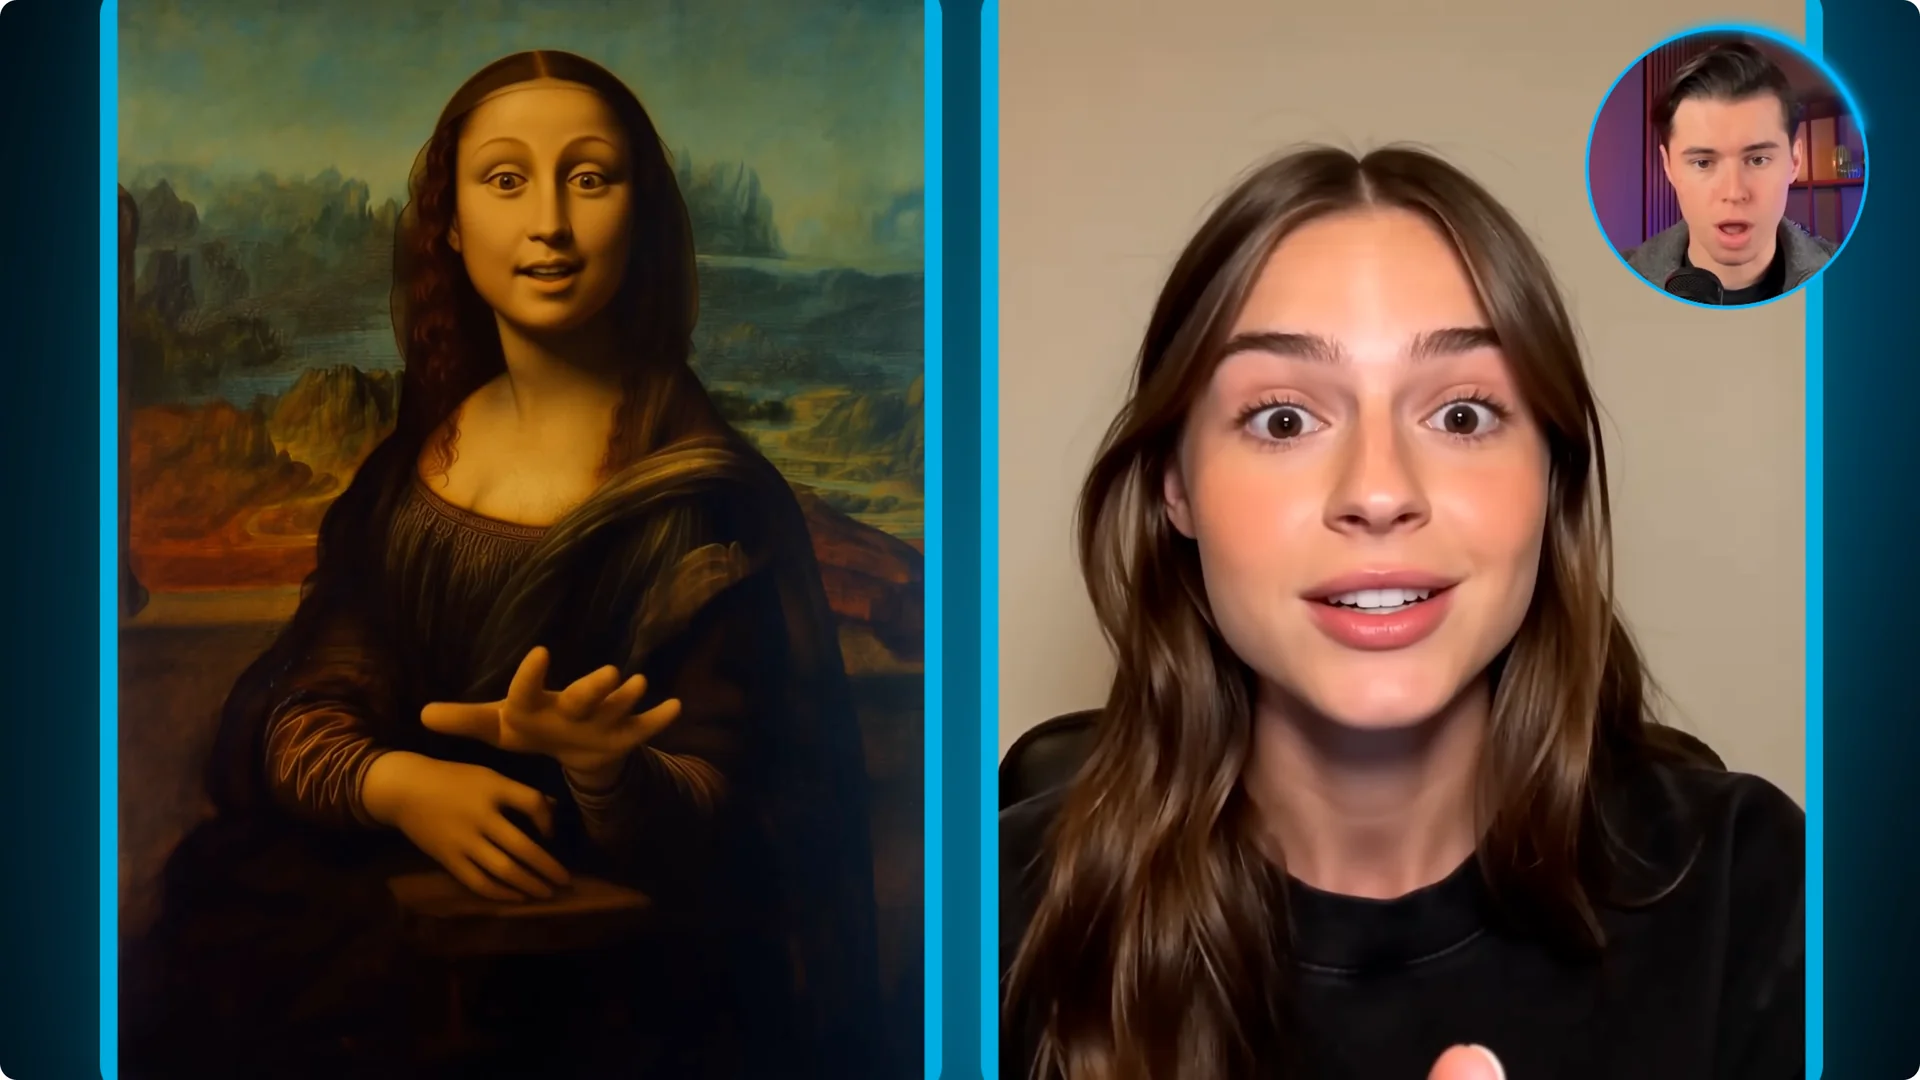
To show you exactly what that means, I ran it on the most recognizable painting in the world.
For the character image, I uploaded the Mona Lisa painting with no borders, and for the motion reference, I uploaded a video of a woman speaking expressively.
Set Character Orientation to Exact and the Mode to Pro, then generate.
Kling Motion Control goes through that reference video, picks up the facial expressions, the lip movements, the head rotation, the body sway, and just puts all of that onto the Mona Lisa.
For dance videos, viral reaction videos, or anything with quick movement, the results hold up a lot better than before.
For a deeper walkthrough of features and setup, check out this Kling motion control guide.
It pairs well with the hands on steps below. Keep it open as a quick reference while you build.
Getting Started With Kling Motion Control 3.0
Kling AI Motion Control transfers movements, gestures, and facial expressions from a reference video onto a static character image. Instead of guessing motion from text, the source clip acts as a physical blueprint.
The system behaves like AI driven motion capture without markers.
It handles full body movement with solid balance and inertia. It also tracks micro expressions, head rotations, and intricate hand motion.
If more than one person appears, it usually targets the most dominant subject.
You can leave the background as it is or add a short prompt to adjust lighting, atmosphere, or visual style without changing the performance.
Version 3.0 keeps audio from the reference clip by default. Face locking in 3.0 also anchors identity better on heavy turns.
Kling 2.6 vs Kling 3.0
Kling 2.6 focuses on stable motion transfer. Kling 3.0 aims for cinema level fidelity, complex angles, and very high consistency across frames.
Both support clips up to 30 seconds. Version 3.0 also supports native short storyboards.
Core Settings That Matter
Choose the engine you want based on your credit budget and detail needs. Upload a clean character image and a motion reference between 3 and 30 seconds. You can also pick a motion clip from the preset library.
Configure orientation based on your goal. Character Orientation Matches Video aligns your character to the source clip’s framing.
Character Orientation Matches Image keeps the original angle and pose of the uploaded image.
If you want extra identity stability in 3.0, click Bind Facial Element and upload side or profile views.
Set quality to Standard or Professional, add an optional style prompt, and generate.
Kling Motion Control 3.0 for UGC Characters
The first creative category is built for people who create content without ever showing their own face. Category one is UGC characters.
You start with a clip of yourself which shows motion, then you swap yourself out completely and bring that new character into Kling Motion Control.
The background and the movement stay the same, just with a totally new character.
From that same clip, you can create as many different characters as you want. Different face, different body, different voice, and the person watching will never know.
Workflow for UGC Characters
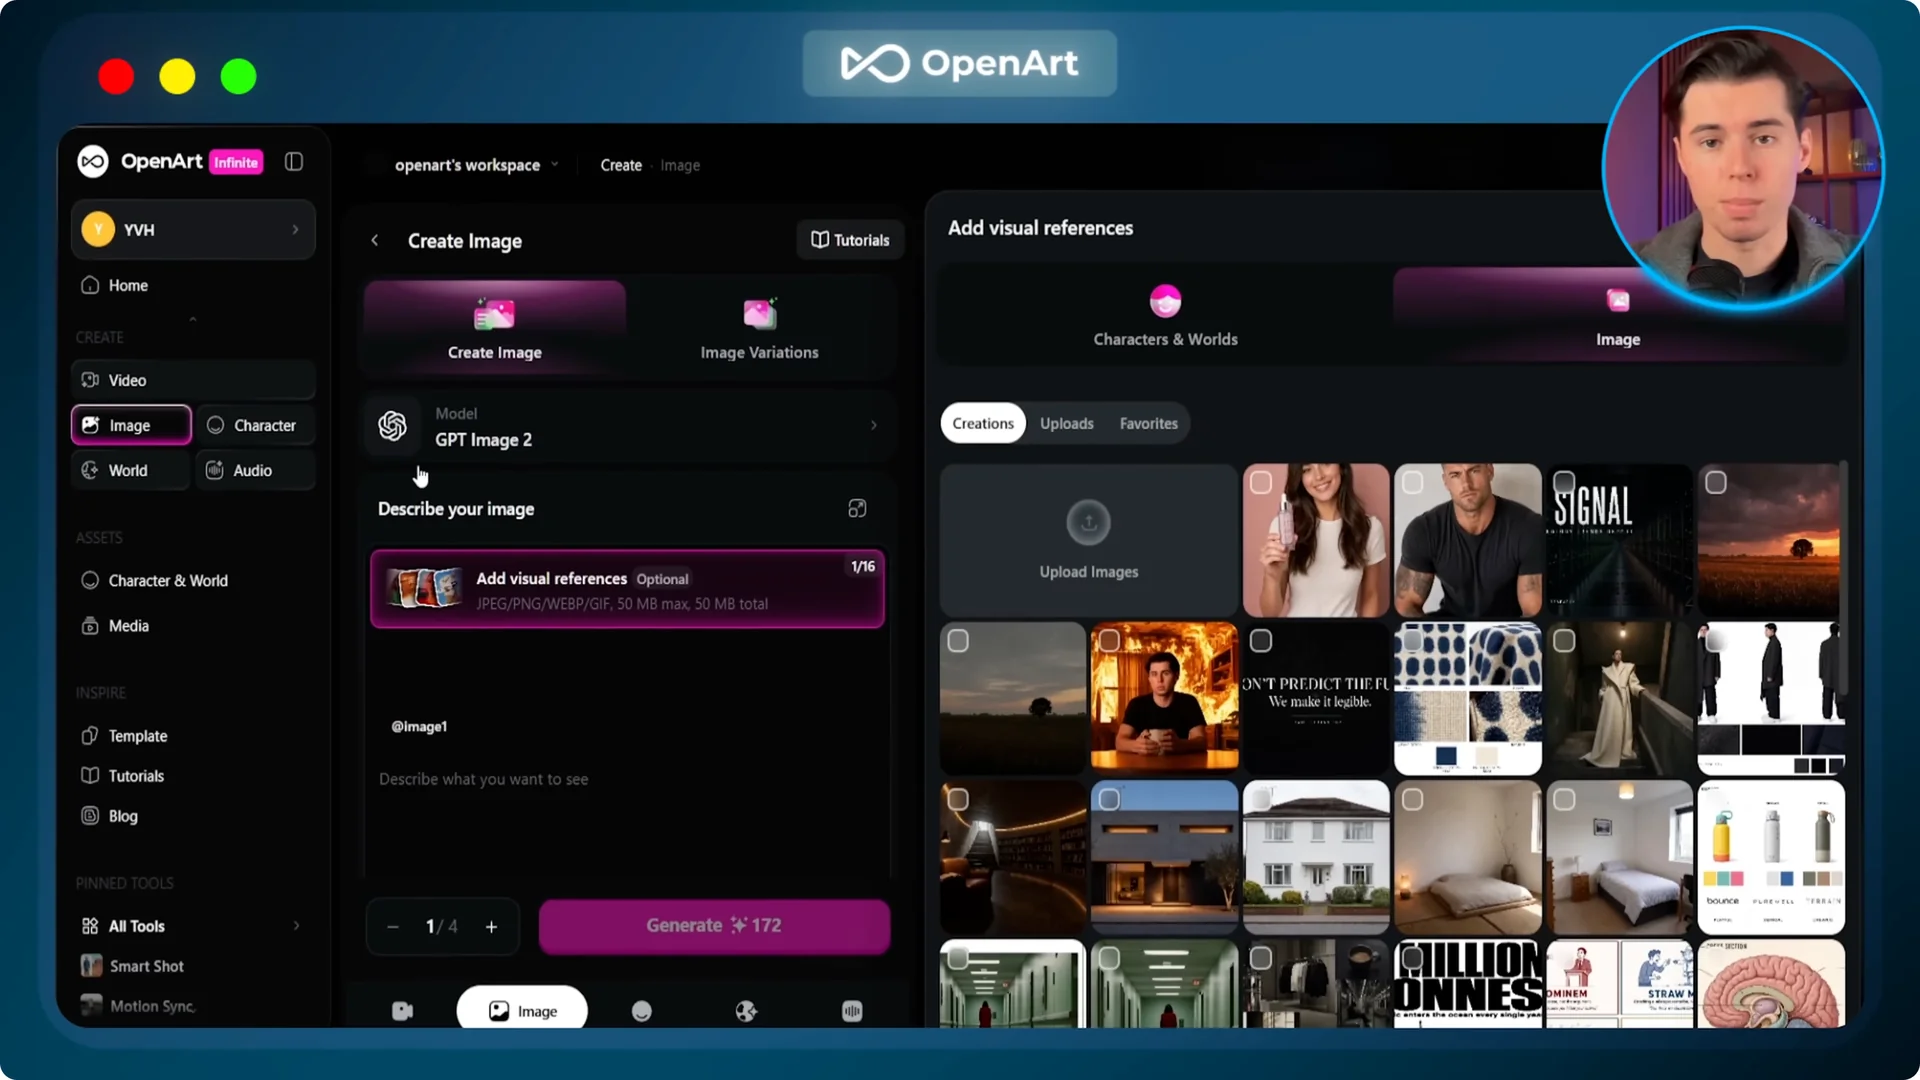
Start with a clip of yourself that already has the right pose, framing, lighting, and background. Take a screenshot from that clip and drop it into GPT Image 2 inside OpenArt.
Your prompt replaces you with the new person while keeping everything else exactly as it was.
Bring the returned image into Kling Motion Control 3.0 as the character image. Use your original clip as the motion reference.
Set orientation to Exact, mode to Pro, and generate.
For more ways to swap people convincingly, see how to replace anyone in video.
This method connects directly to the steps below.
It helps you plan character swaps that still look natural.
Example 1: Gym Influencer
I have a clip where I am speaking directly to the camera about gym rest times on a plain background. Take a screenshot from that gym clip and upload it into GPT Image 2. The prompt swaps me out for a heavily built gym influencer in his late 20s with a muscular build, a short fade haircut, tattooed forearms, and a fitted dark t shirt.
The second half of that prompt is just as important as the character description. Everything else stays as it was. The pose, the angle, the framing, and the background.
What you get back is a gym influencer in the exact same spot with the same background, but a completely new person. Now bring that image into Kling Motion Control. The gym influencer image is your character, and my original gym clip is the motion reference.
Character orientation set to Exact, mode set to Pro, and generate. Kling Motion Control goes through my original clip and copies every movement, gesture, and lip sync beat onto the gym influencer. The background stays the same because it was already part of the character image from GPT Image 2, and it looks perfect.
There is one more thing I need to do before this is actually ready. Kling Motion Control takes the audio from the reference clip and carries it straight through into the output.
The gym influencer looks completely different from me, but the voice is still mine.
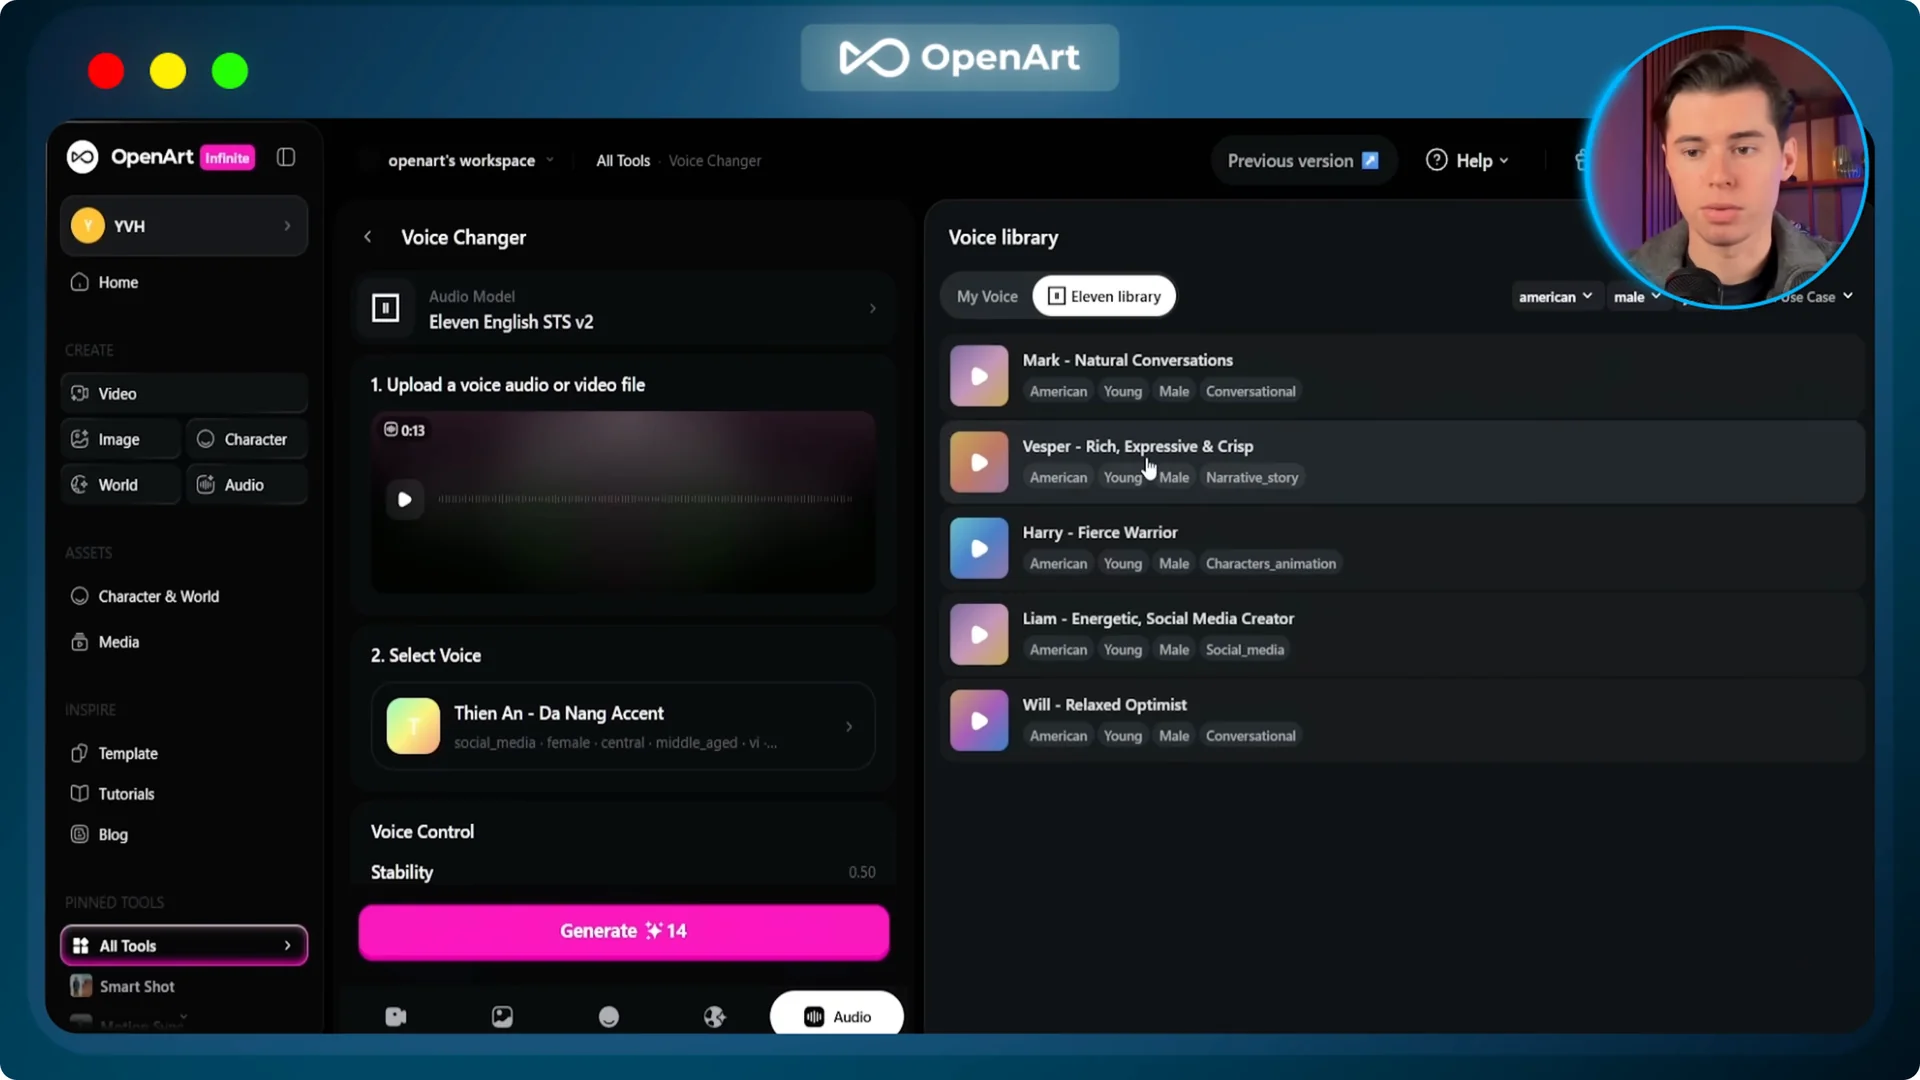
A gym influencer talking in my voice sounds immediately wrong. To change the voice, go to OpenArt, select audio, then select voice changer.
For the gym influencer, I pick American, male, young, and select Vesper, then export.
Open the Kling Motion Control output video in CapCut. Replace the original audio track with the new Vesper voice file, and export the final video. Now the influencer looks right and sounds right.
“Bro, I have been training for 3 years and nobody told me this.”
“Your rest time between sets is literally killing your gains.”
“90 seconds minimum, I do not care what your program says. Test it for 1 week, thank me later.”
Example 2: Beauty Creator With Product Lock
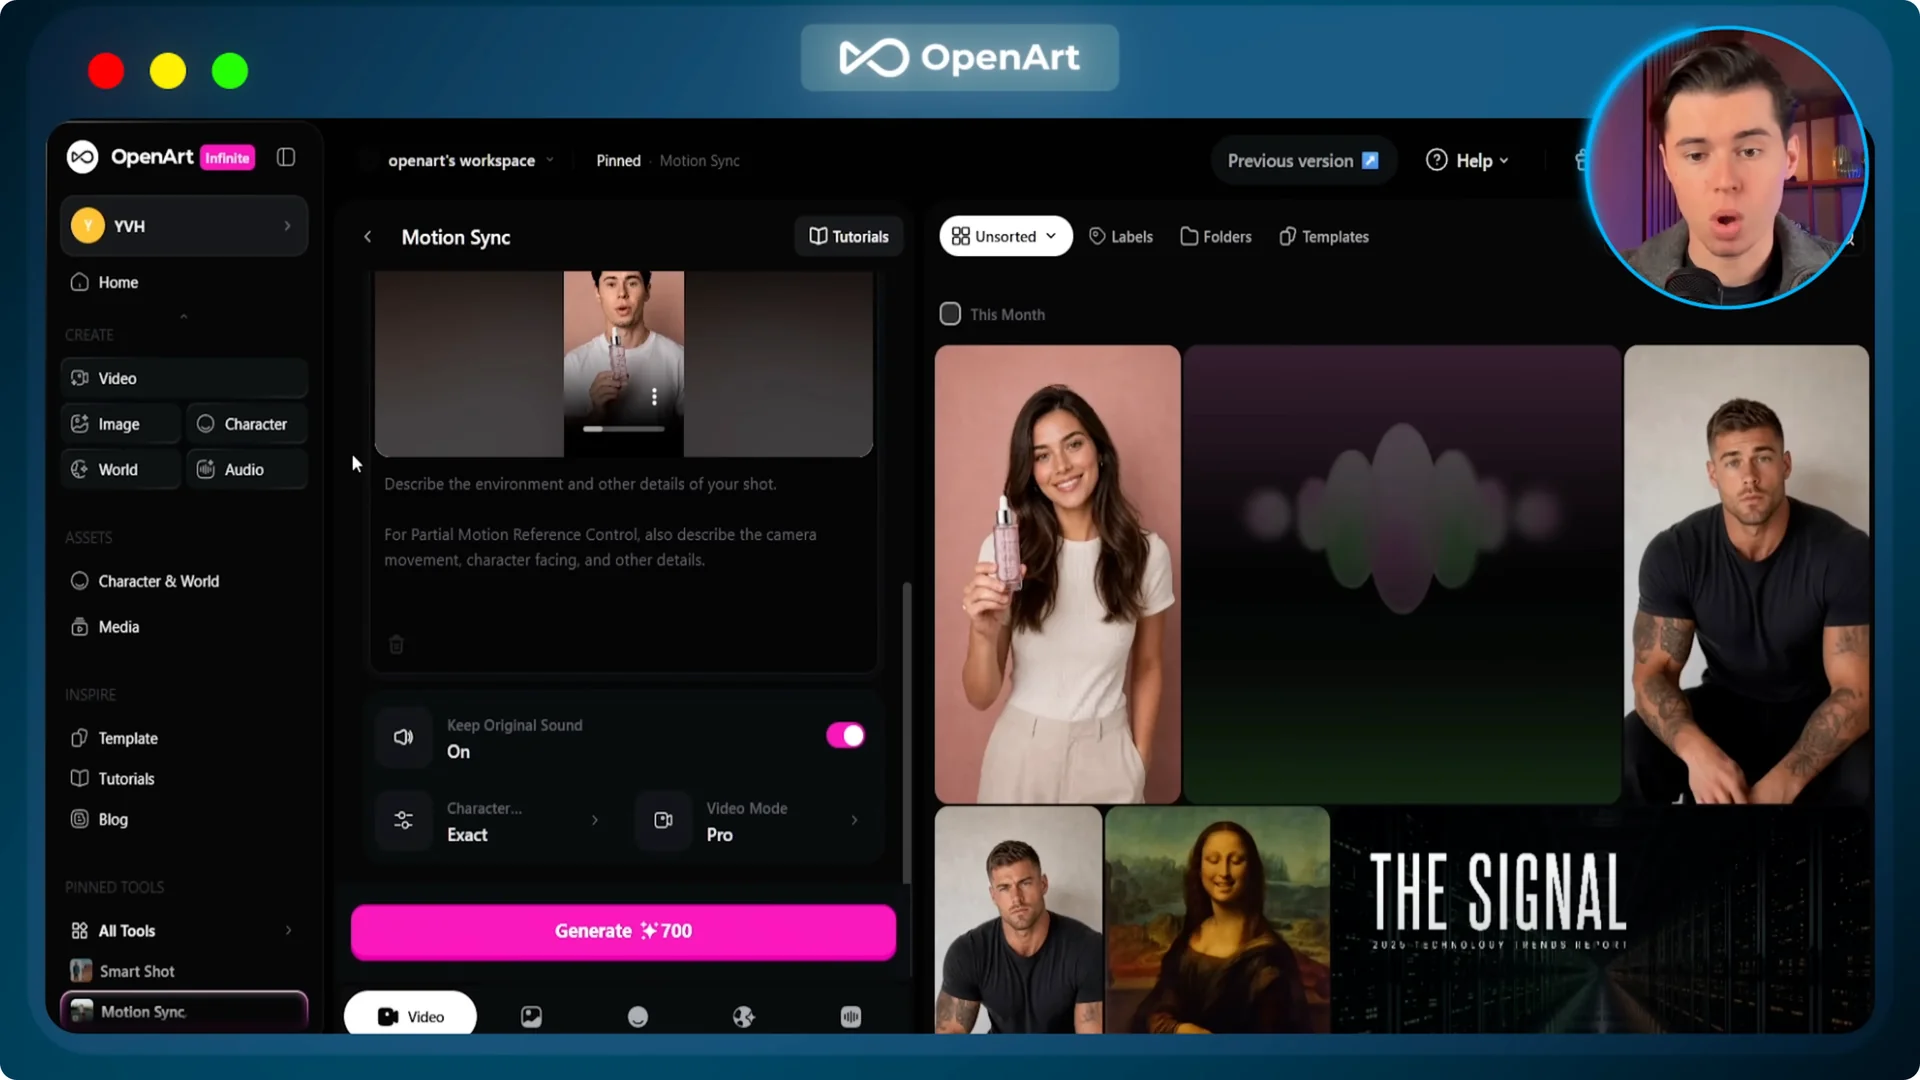
In the second UGC clip, I am holding the Lumikai scalp serum on a dusty pink background, speaking with expressive body language. This time, I am getting swapped out for a female beauty creator, but the Lumikai bottle has to stay exactly where it is. I take a clean screenshot from that clip and upload it into GPT Image 2 on OpenArt.
The prompt replaces me with a beautiful woman in her mid to late 20s while keeping the Lumikai pink scalp serum bottle in exactly the same hand position with the label facing the camera. Everything around the person stays exactly as it was. The only thing that changes is who is standing there.
What comes back is the skin influencer character image with everything locked in place except the person. That image goes into Kling Motion Control. The character image is our skin influencer and the motion reference is my original Lumikai clip.
Make sure orientation is set to Exact and mode is set to Pro, then generate. She is now presenting Lumikai with my exact body language and expressive motion.
Same product, same dusty pink background, just a completely different person moving naturally in the frame.
For audio, head to OpenArt voice changer again. Select American for accent, female for gender, middle age for age, and choose the voice Bella, then export.
Replace the audio in CapCut and export the final video.
“Okay, I have been using this for literally 3 weeks and my scalp has never felt this good.”
“The dryness, gone. I put three drops, massage it in, and it has become my favorite part of my routine.”
“Lumify key is not playing around.”
Both UGC videos are now done. Gym influencer and beauty creator, both moving with natural motion, both with matching voices, neither of them filmed, both built from two inputs and one workflow.
Category one is about swapping the person while keeping everything else.
Kling Motion Control 3.0 for Rebuilding the World
Category two goes in a completely different direction. Instead of keeping the world and changing the person, this time we keep the person exactly as they are and rebuild the entire world around them.
I used videos inside a plain empty white room for this.
A plain white room gives GPT Image 2 a clean canvas to work with. I have two videos for this.
In the first, I am standing arms crossed, staring at a blank white wall, and in the second, I am leaning over an empty table with both hands flat on the surface.
Investigation Board Setup
I take a screenshot of my blank wall video and drop it into GPT Image 2 on OpenArt. The prompt tells GPT to leave me completely untouched but rebuild all the things around me.
It is me in the exact same position, inside a dressed cinematic detective room with the entire world built around me.
Put that image back into Kling Motion Control.
Set the character image to be the detective and the motion reference to my original video.
Set orientation to Exact, mode to Pro, and generate.
It takes the subtle motion from the video and applies it inside the new investigation room.
All that just comes to life. The entire environment completely shifts.
If you plan to coordinate background props, lights, and subjects, see this guide to working with Multi Elements. It helps you set up complex scenes without breaking motion continuity. Keep it in mind for larger storyboard shots.
War Room Setup
I take a screenshot of the empty white table video and drop it into GPT Image 2. The prompt again tells it to leave me exactly as I am and rebuild everything else. The result is just as cool.
Drop it back into Kling Motion Control with the same settings and generate.
This one looks even better than the last one. All the details pop a lot more and the whole scene looks rich.
Kling Motion Control 3.0: Quick Step Guide
Enter the workspace in OpenArt and switch to Motion Control. Select Kling 3.0 for cinema level consistency. Upload a clean character image and a motion reference between 3 and 30 seconds.
Pick Character Orientation Matches Video if you want framing aligned to the source clip.
Pick Character Orientation Matches Image if you want independent camera moves around the still.
In 3.0, use Bind Facial Element with extra face angles to keep identity locked during heavy turns.
Set quality to Professional for best detail. Add an optional text prompt to nudge style or lighting if needed. Click generate and review the output.
If your project focuses on motion mapping and scene control from start to finish, you can also check this step by step AI guide for Kling Motion Control. It covers practical setup choices that pair with these workflows. Bookmark it for quick checks.
Final Thoughts
Kling Motion Control 3.0 reads a motion clip and copies every beat onto a character image with strong identity lock and native audio carry over. Category one swaps the person while keeping the world, and category two keeps the person while rebuilding the world. With clean screenshots, precise prompts, and the right orientation and mode, the outputs look and feel right.