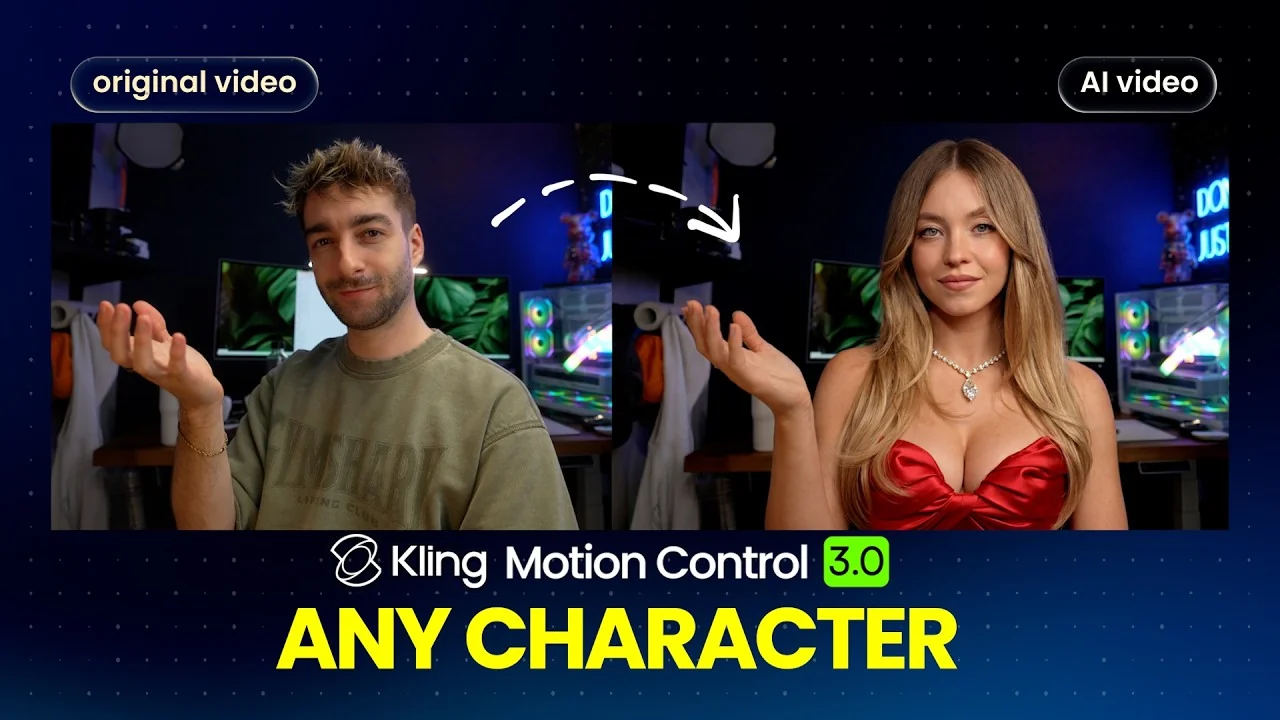
AI has reached a point where you can turn yourself into any character. Put yourself in any movie scene and perfectly recreate videos.
Kling just dropped Motion Control 3.0 with real lip sync, expressive faces, and full body movement.
You can create some crazy videos just like this, or finally become a viral TikTok dancer. It is genuinely fun to play around with.
For a broader overview of the update and key features, check out this Kling Motion Control 3.0 overview.
Kling Motion Control 3.0 Tutorial
What changed from 2.6
Short answer is not much because it already was incredible to use. The major upgrade is facial consistency and quality. The movement is better, the facial expressions are more accurate, and the system handles more complex motions while maintaining face quality.
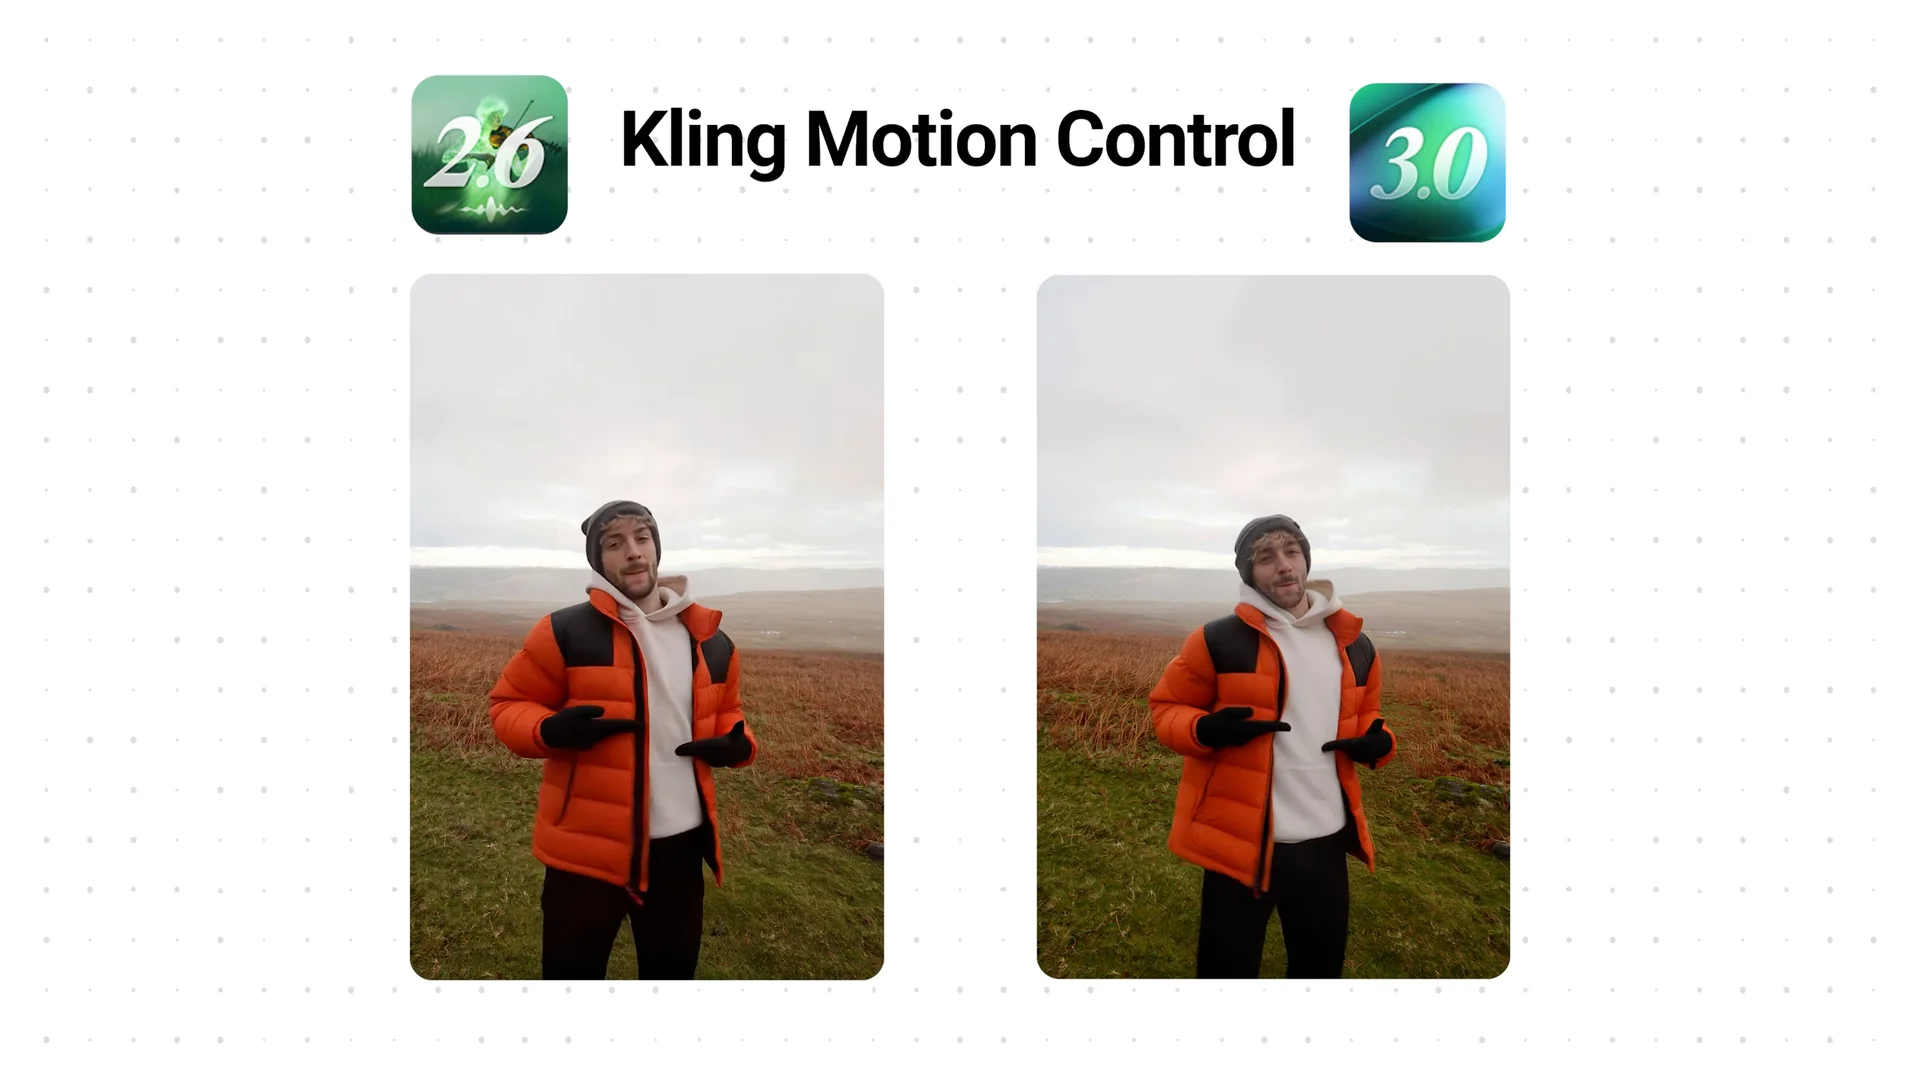
The update might sound small, but it is a massive upgrade in practice.
That is what improves results on tough clips and quick head movements.
Method 1 on Kling.ai
There are two main ways to use it.
The first way is via Kling itself, though load times can be long right now, sometimes up to 20 minutes.
Step 1: Head over to Kling and open the Generate tab.
Step 2: Swap to Motion Control and select the new 3.0.
Step 3: Upload any video, then upload an image, and hit Generate.
Elements for character consistency
If you are using complex scenes, Kling has a new Elements tab to help with character consistency. Add your image and click the button to create three new angles.
Give it a name, auto load a description, and you have more data to help with movement around a scene. For simple videos, you will not need it most of the time.
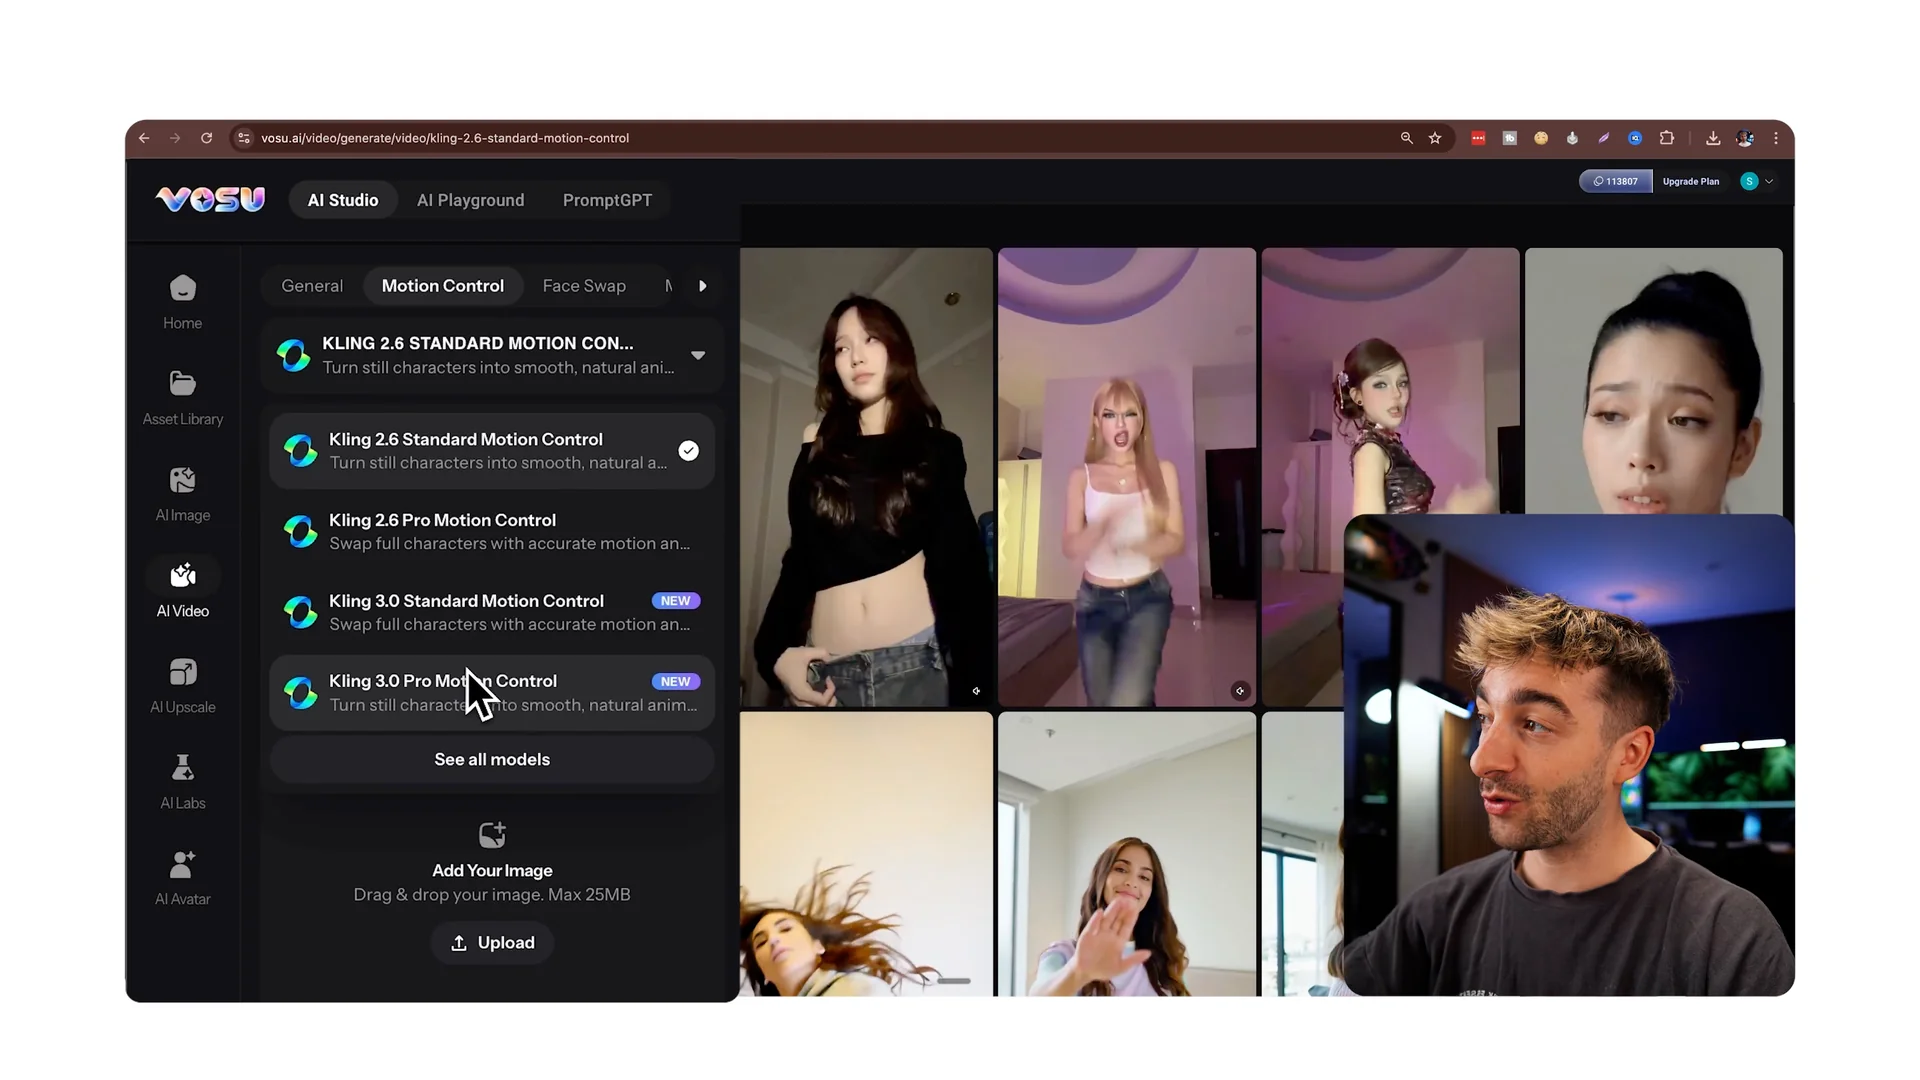
Method 2 on Vosu.ai
The best method I have found so far is Vosu.ai because it is fast and an all in one tool. The three main reasons are price, speed, and usability.
On the homepage, open Motion Control. Inside Vosu you get two Motion Control 3.0 types. There is Standard for simple videos with light motion, and Pro for more complex movements at the same resolution.
Standard vs Pro
Both output 1080p. Standard is for clips where the motion is not too complex and the head is not moving too fast.
Pro handles fast, complex motion and uses a bit more compute. Pick Pro when you want the safest results on tougher motion.
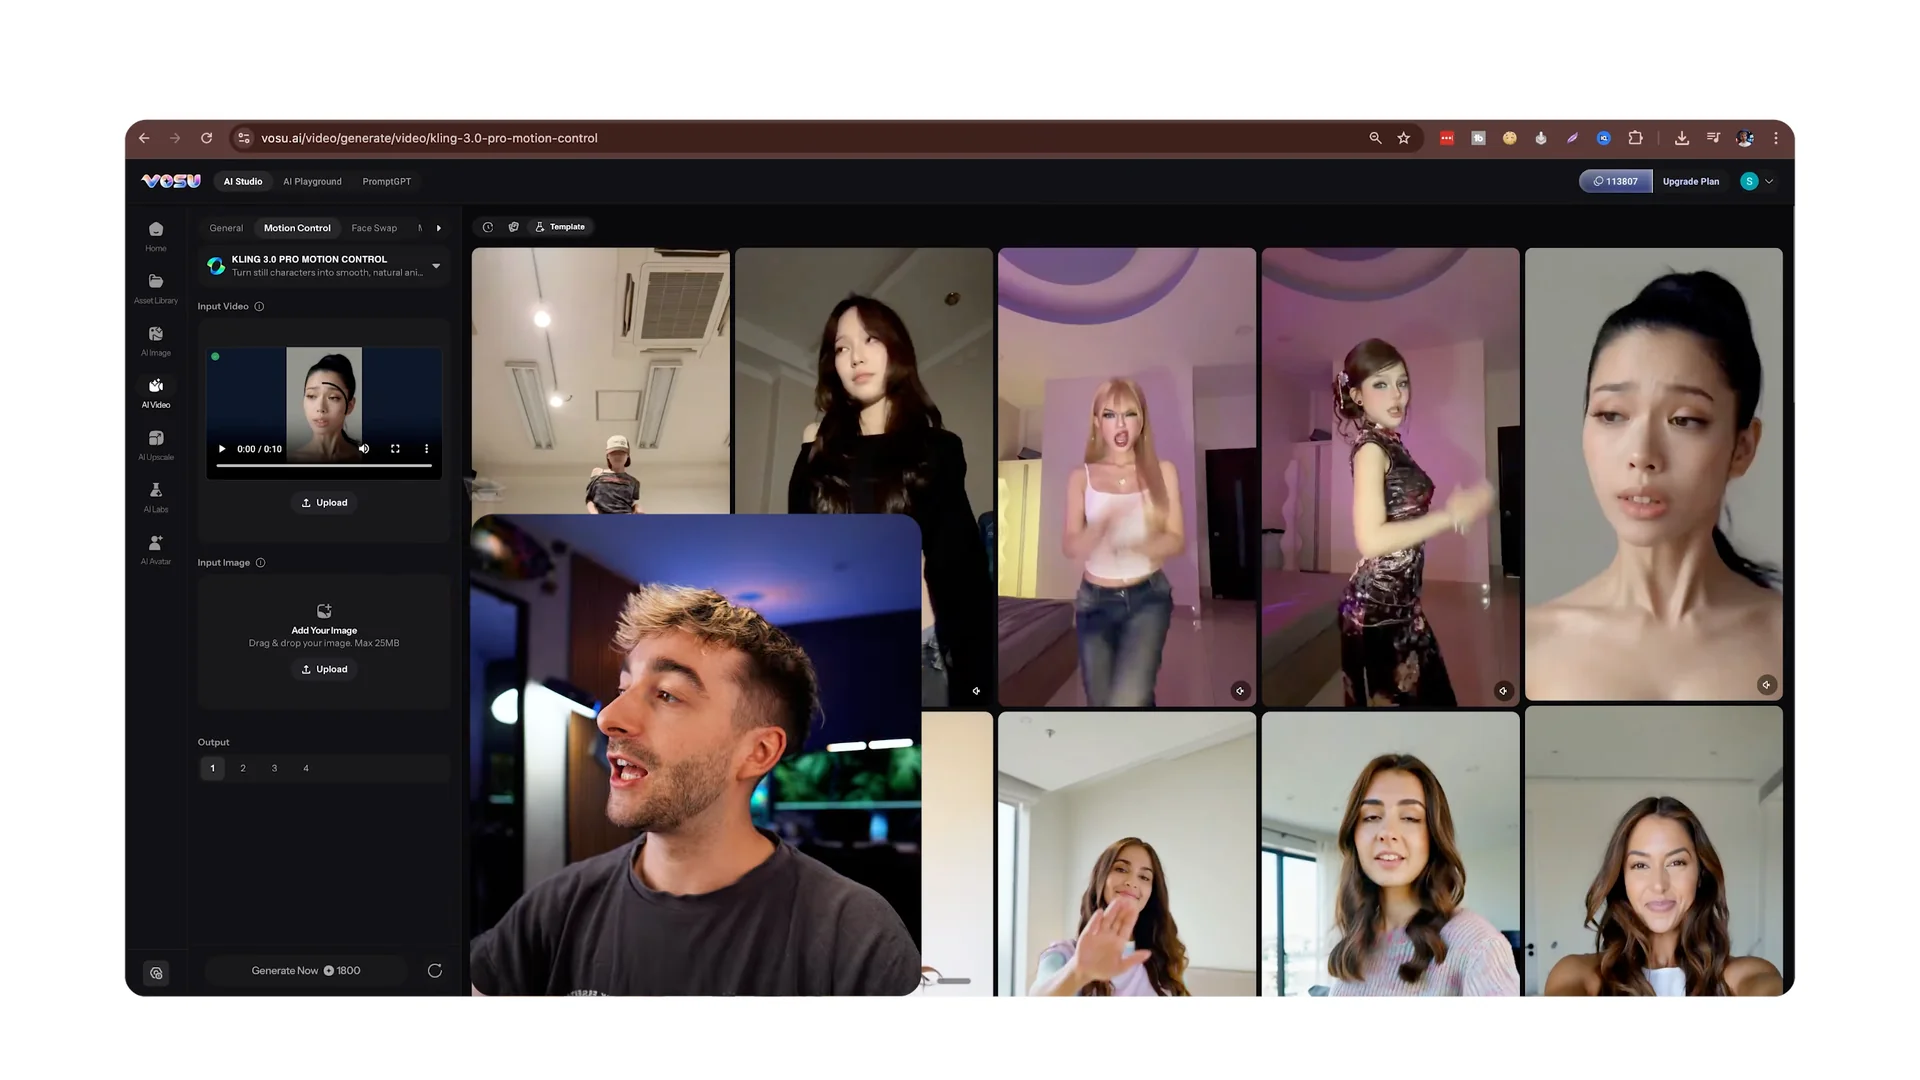
Step 1: Upload your video.
Step 2: Upload your image.
Step 3: Choose how many outputs you want.
Step 4: Click Generate.
Use templates
Vosu also has templates you can preview. These are trending dance or viral clips you can recreate.
Click a template and it auto imports as the input video.
Drag in any image, set outputs, and generate.
I added a clip of me looking at the camera with some hand gestures. Then I used a special image of Tom Holland in my studio and generated the result.
It copies the exact same movements and makes your video ultra realistic.
For a deeper walkthrough of settings and options across both tools, see this practical Kling AI Motion Control guide.
Upscale your results
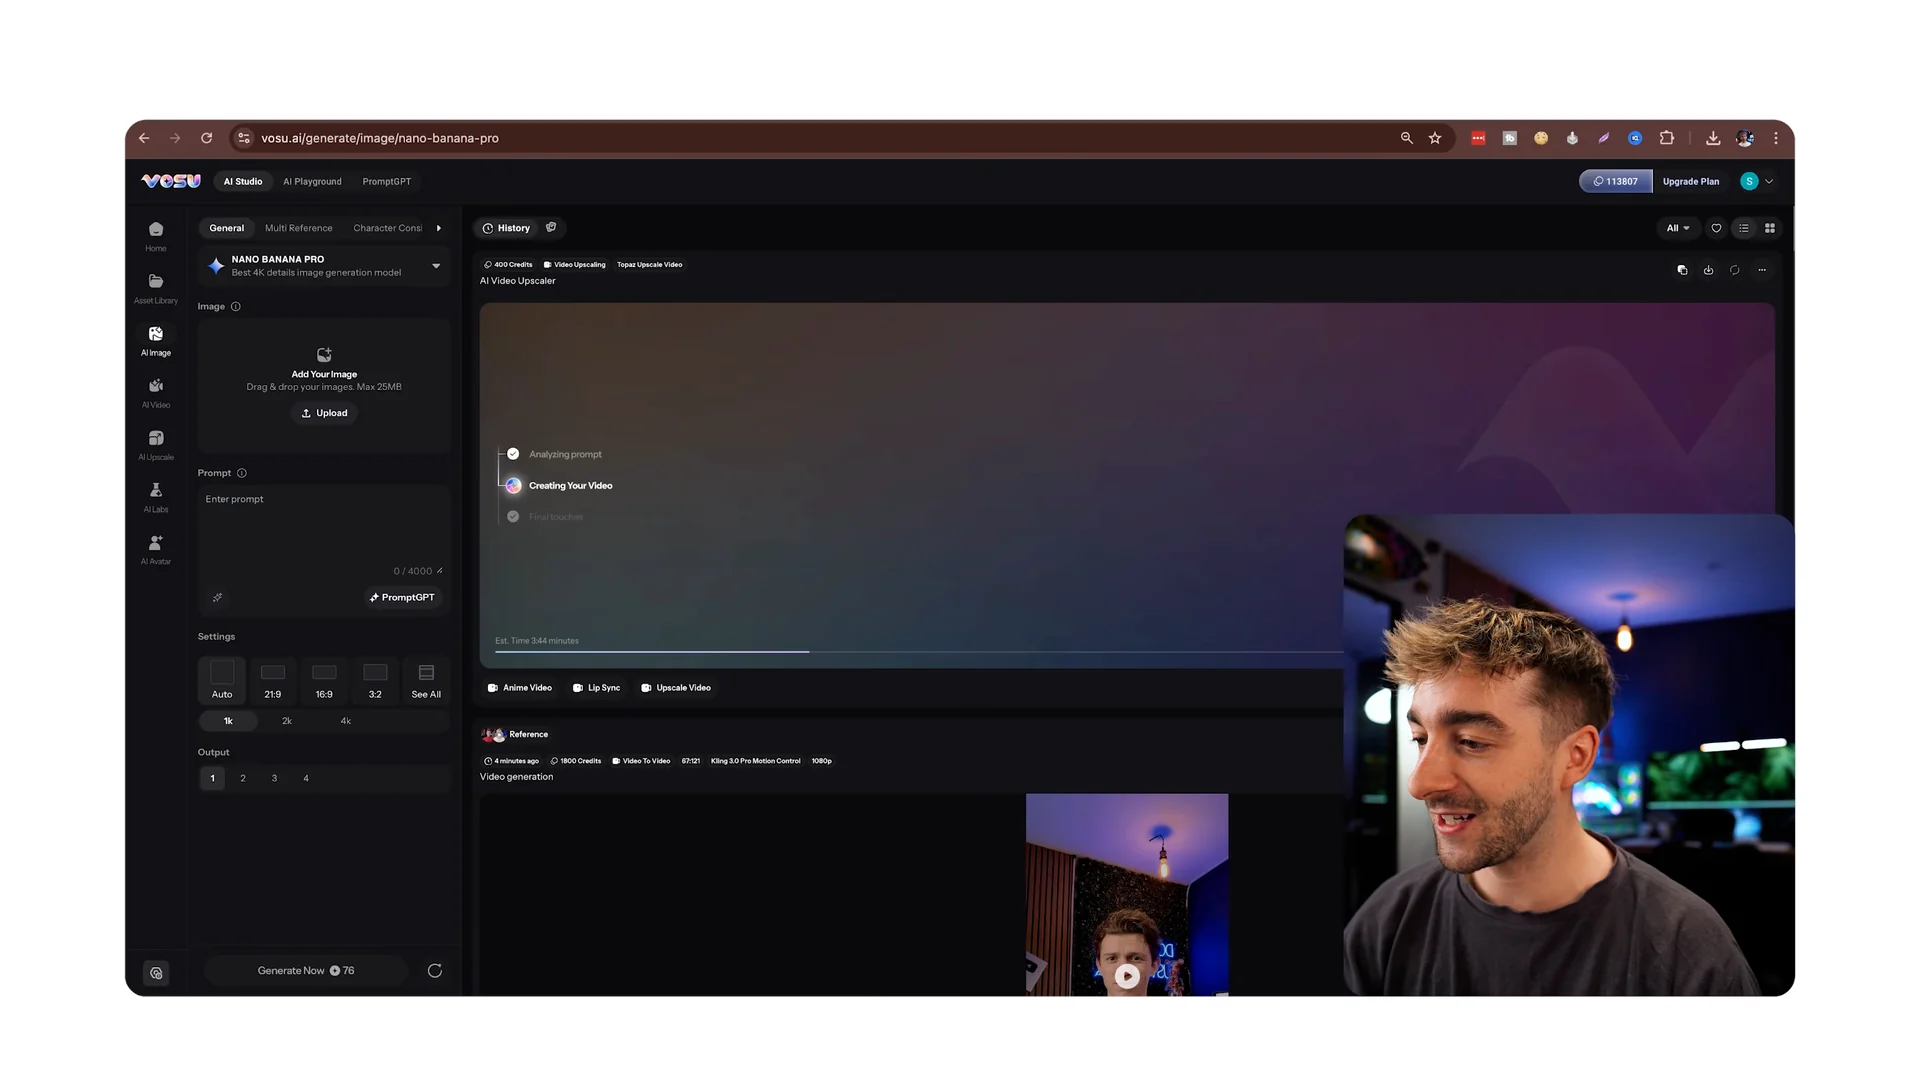
Once you have a video you are happy with, you can upscale it. Click the Upscale button, select your favorite upscaler, and it automatically imports your video without needing to download.
I like Topaz Video for this step. You can also open the AI Upscale page directly, bring in any video, pick outputs, and click Upscale.
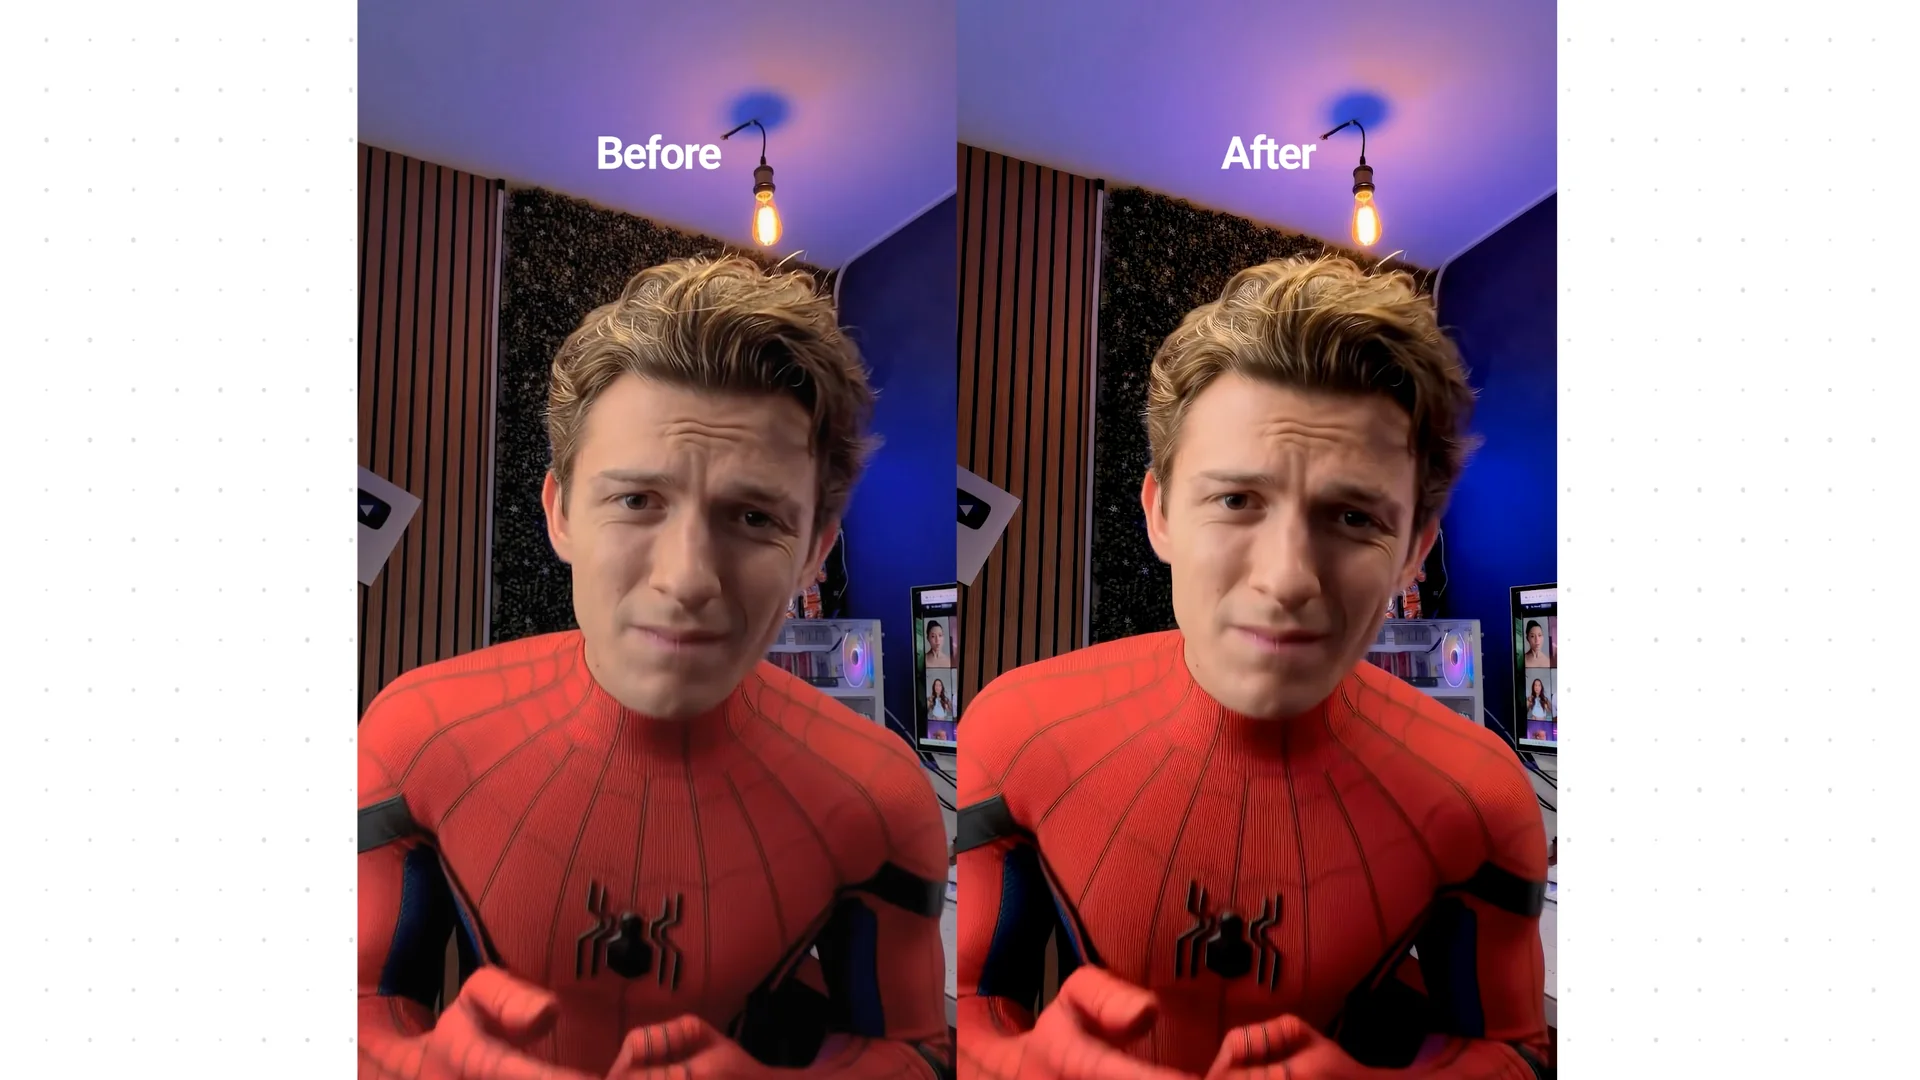
This also works for images. The before and after difference is clear and it looks a lot better.
If you want slow motion enhancements in post, here is a helpful tutorial on creating smooth slow motion with AI tools in Filmora: turn any video to slow motion.
Create images for better results
If you want images like the ones I used, it is easy to create them in Vosu. Step 1: Grab your source video, pause on a frame you like, and take a screenshot.
Open AI Image in Vosu and make sure Nana Banana Pro is selected. Drop in the screenshot and paste a simple prompt.
I used: Ultra realistic, extremely high detailed, no smoothing, no CGI look, no stylization. Replace the man to Tom Holland as Spider Man with no mask.
Must look like a real cinematic behind the scenes photo of Tom Holland in Spider Man suit inside the original scene.
Leave the aspect on auto or set 9×6. Select 4K, choose four outputs for variation, and generate.
Pick your favorite result.
Click Create Video, then Kling Motion Control 3.0, upload your video, and hit Generate.

Final thoughts
Kling Motion Control 3.0 brings better facial accuracy, stronger movement handling, and more consistent characters. You can run it directly on Kling or use Vosu for a faster, all in one flow with templates and upscaling.
If you want a working overview plus setup tips before you start, this short guide helps align expectations and options: Kling Motion Control 3.0 overview.