I am going to show you how to enable or use lookup tables, also known as LUTs, in Filmora. Basically this is almost like color grading, a little bit different and, in my opinion, a lot more simplified compared to traditional color grading. The result can look just as amazing.
I am using Filmora version 14 and the default layout mode. I was transitioning from Filmora 13 to 14 and that is why I was still using Classic mode. For this tutorial I am using the default layout which is a bit different.
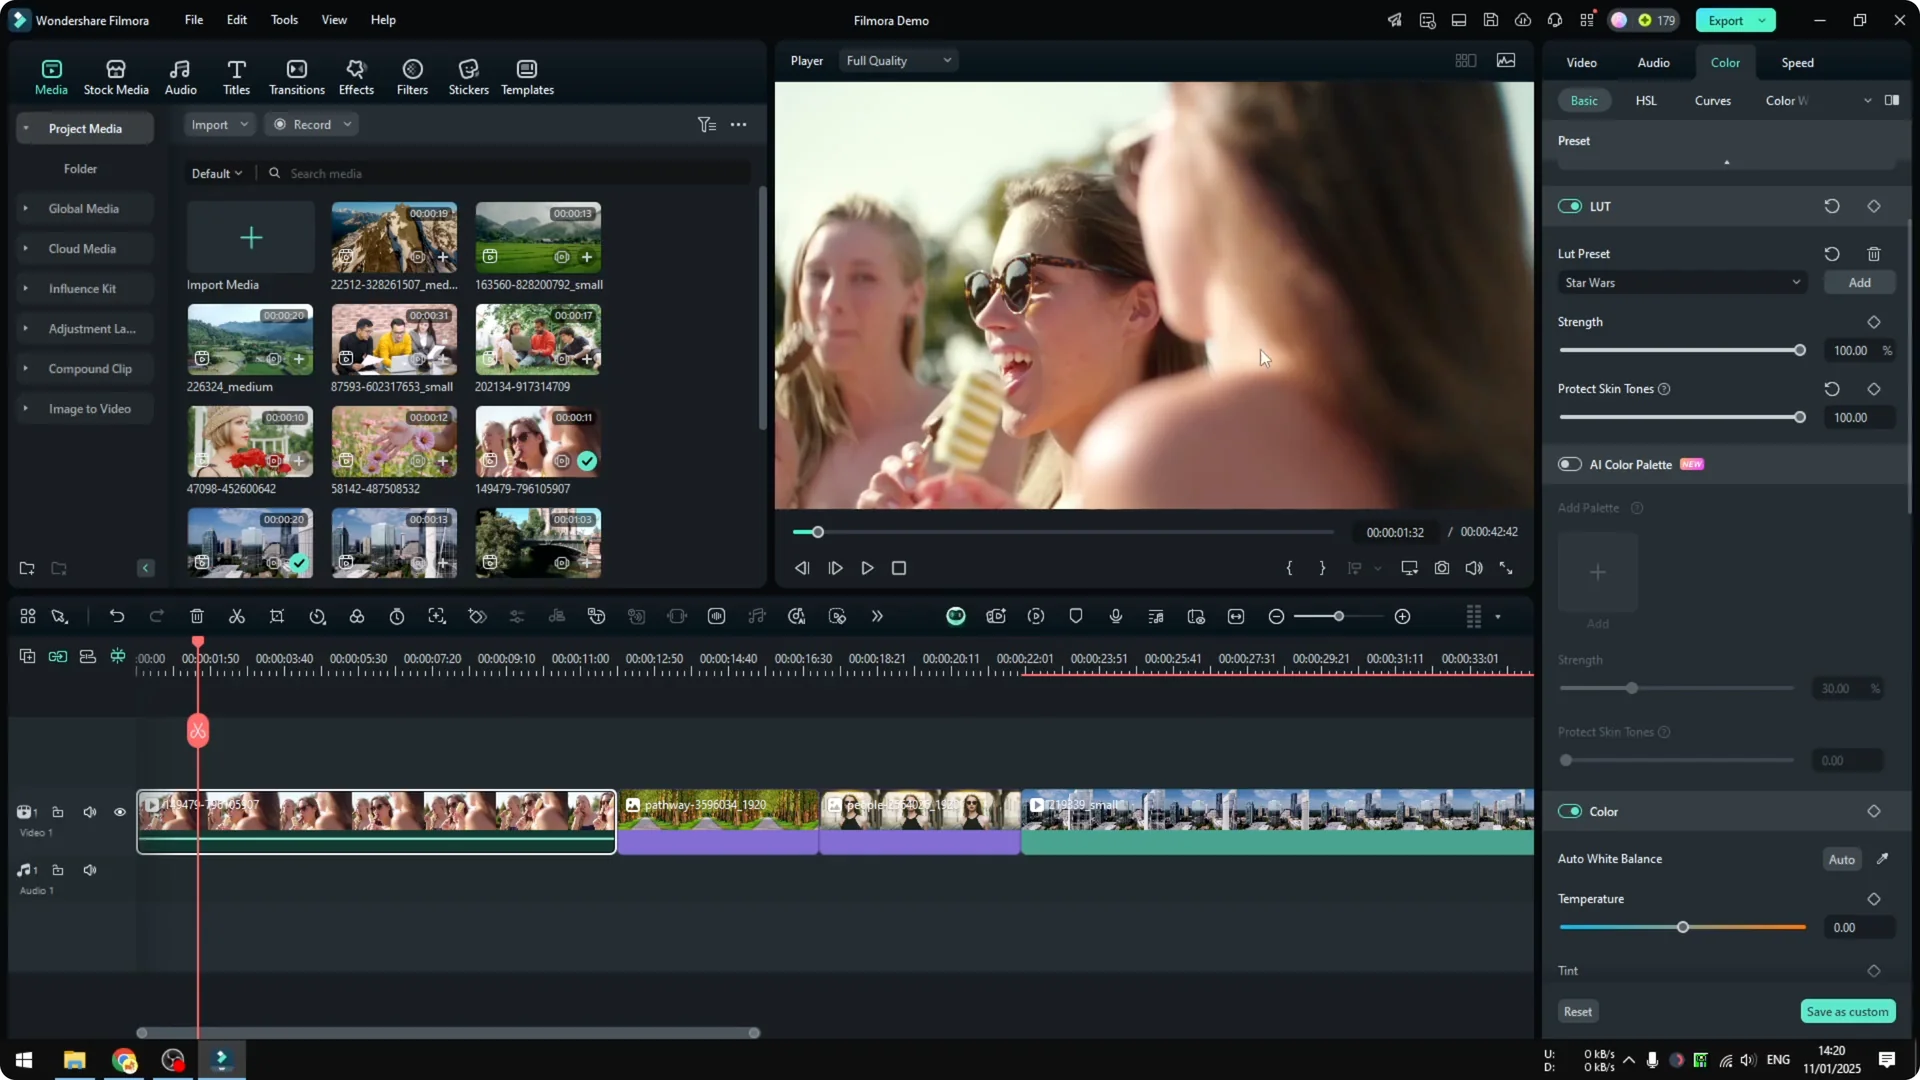
The Edit menu appears on the right side, but everything else is the same regardless of the layout mode you are using. For this demonstration I have a video clip with a group of people eating ice cream. I did not apply any color settings and I want to apply a LUT to this clip.
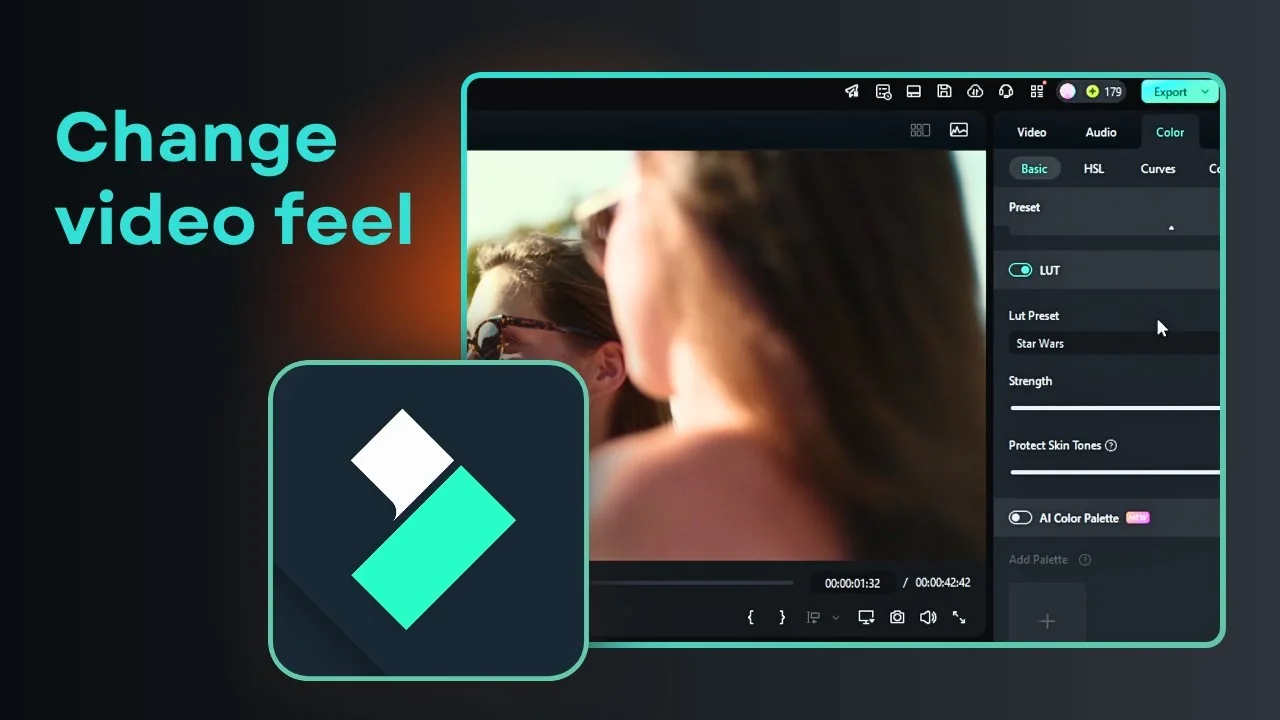
Using LUTs in Filmora
Open the Edit and Color panels
Open the Edit menu. If you are using the Classic version, click the Edit icon and go to the Color section. In the default layout, go to Color on the right side and open Basic.

Read More: How To Use Speed Ramping In Filmora To Make Video More Cinematic
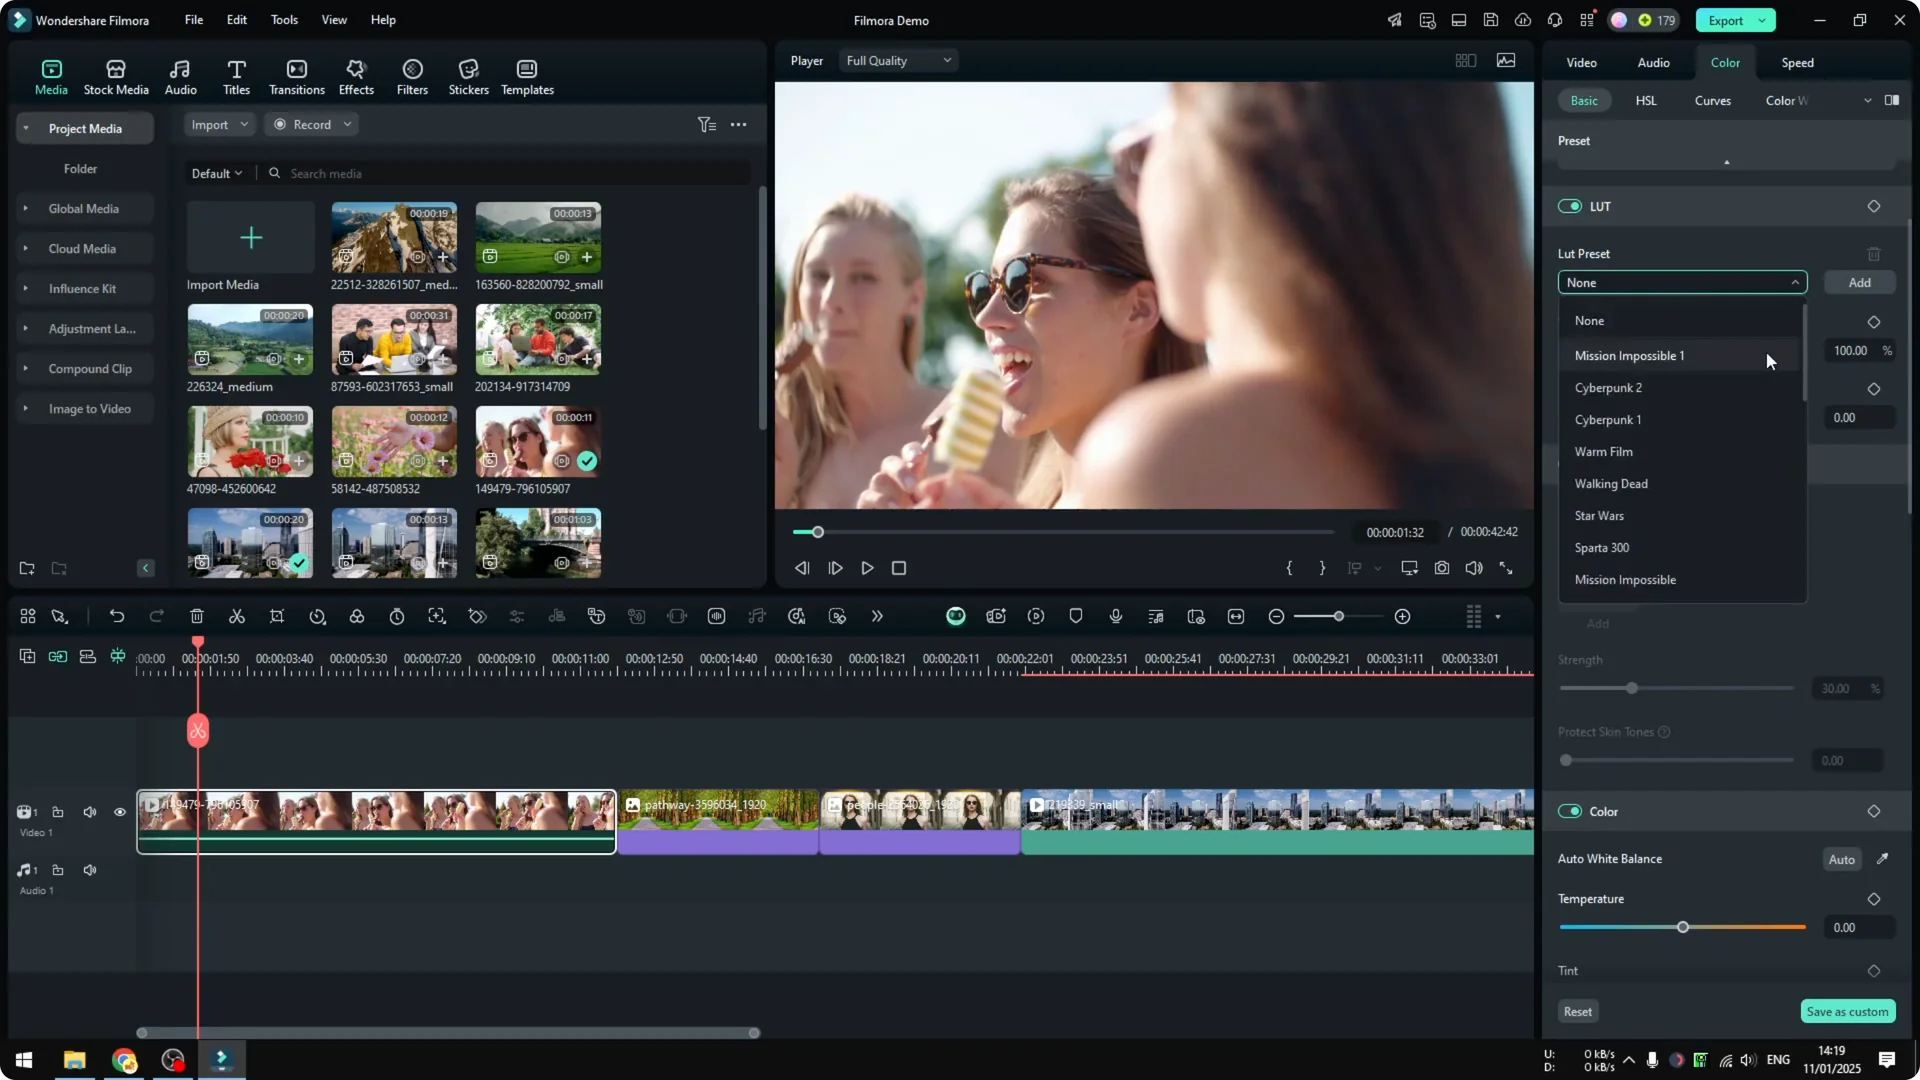
Choose a LUT preset
In Basic you will see the Look LUT option is enabled. Open LUT Preset and you will see many options. I tried Star Wars, which is interesting, but it makes everything less saturated and some colors are lost.

Read More: How To Add Cool Glitch Transition Effect In Filmora
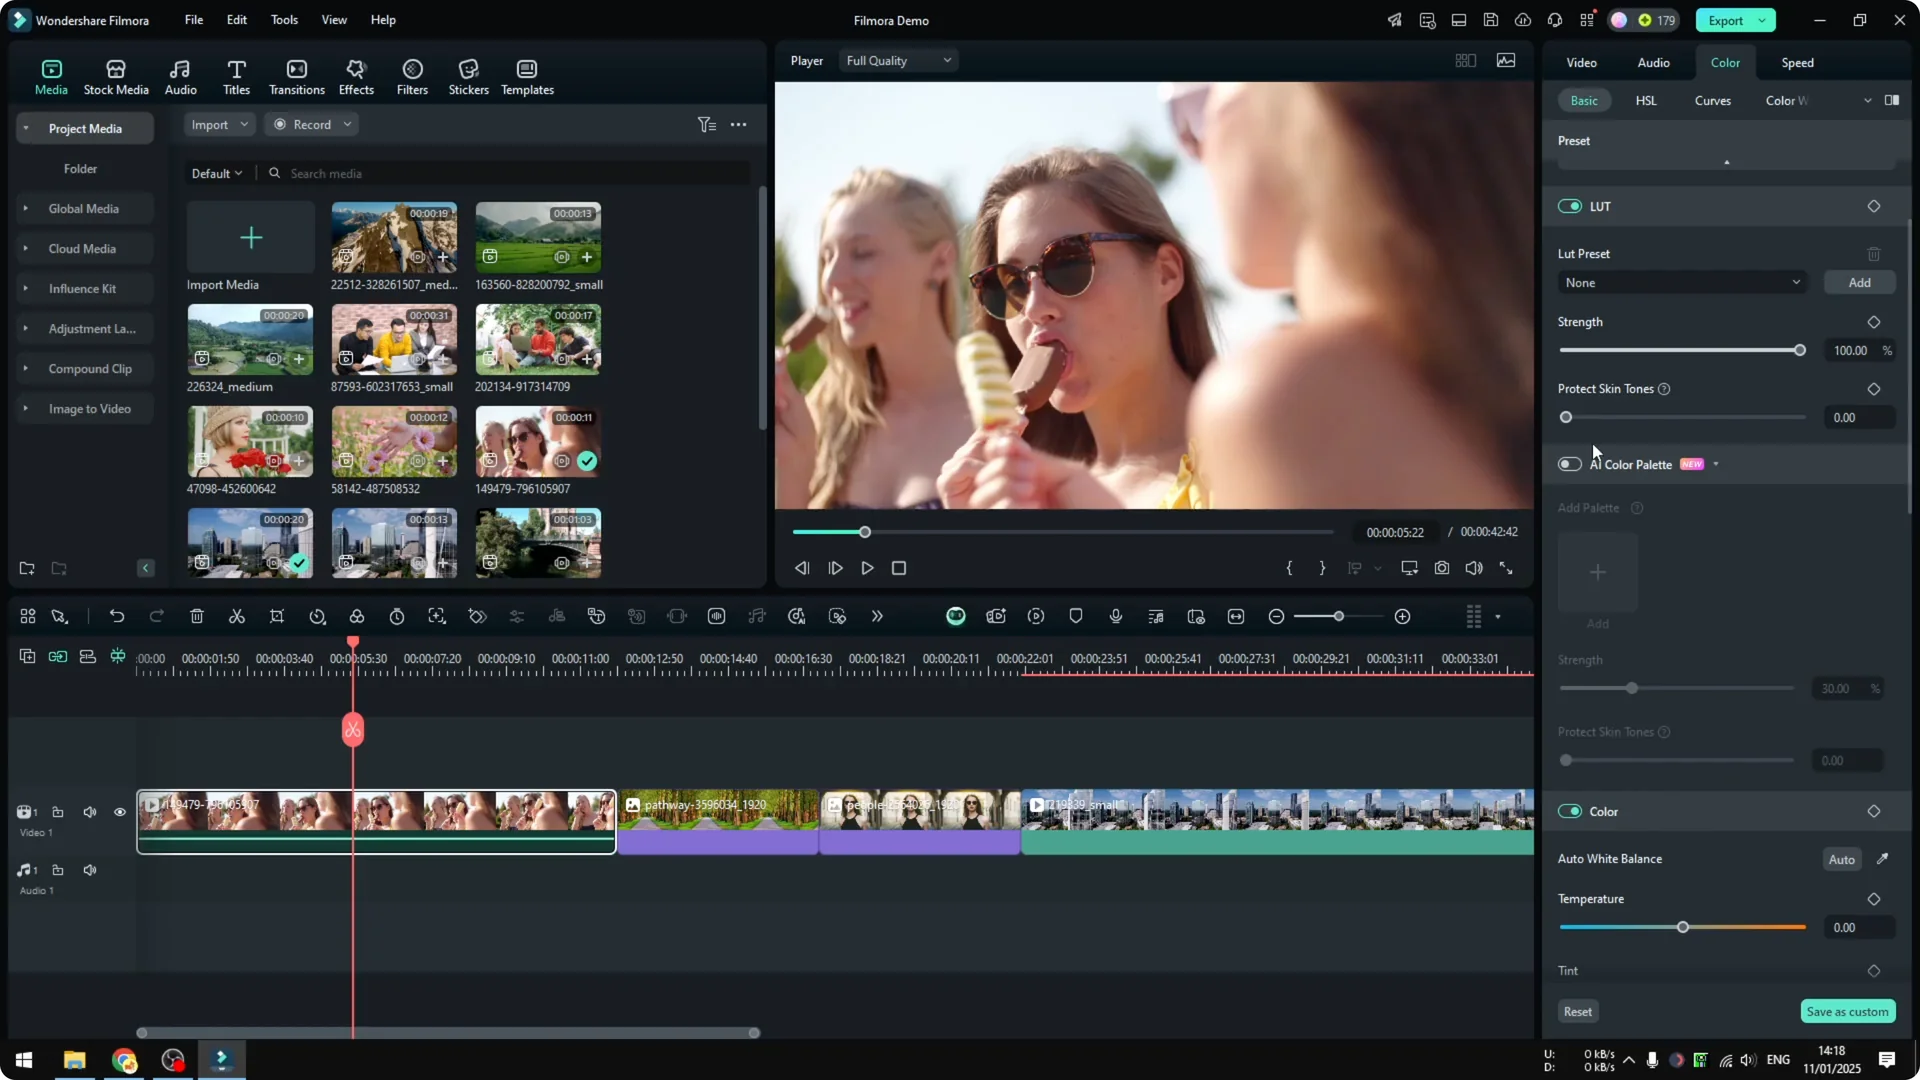
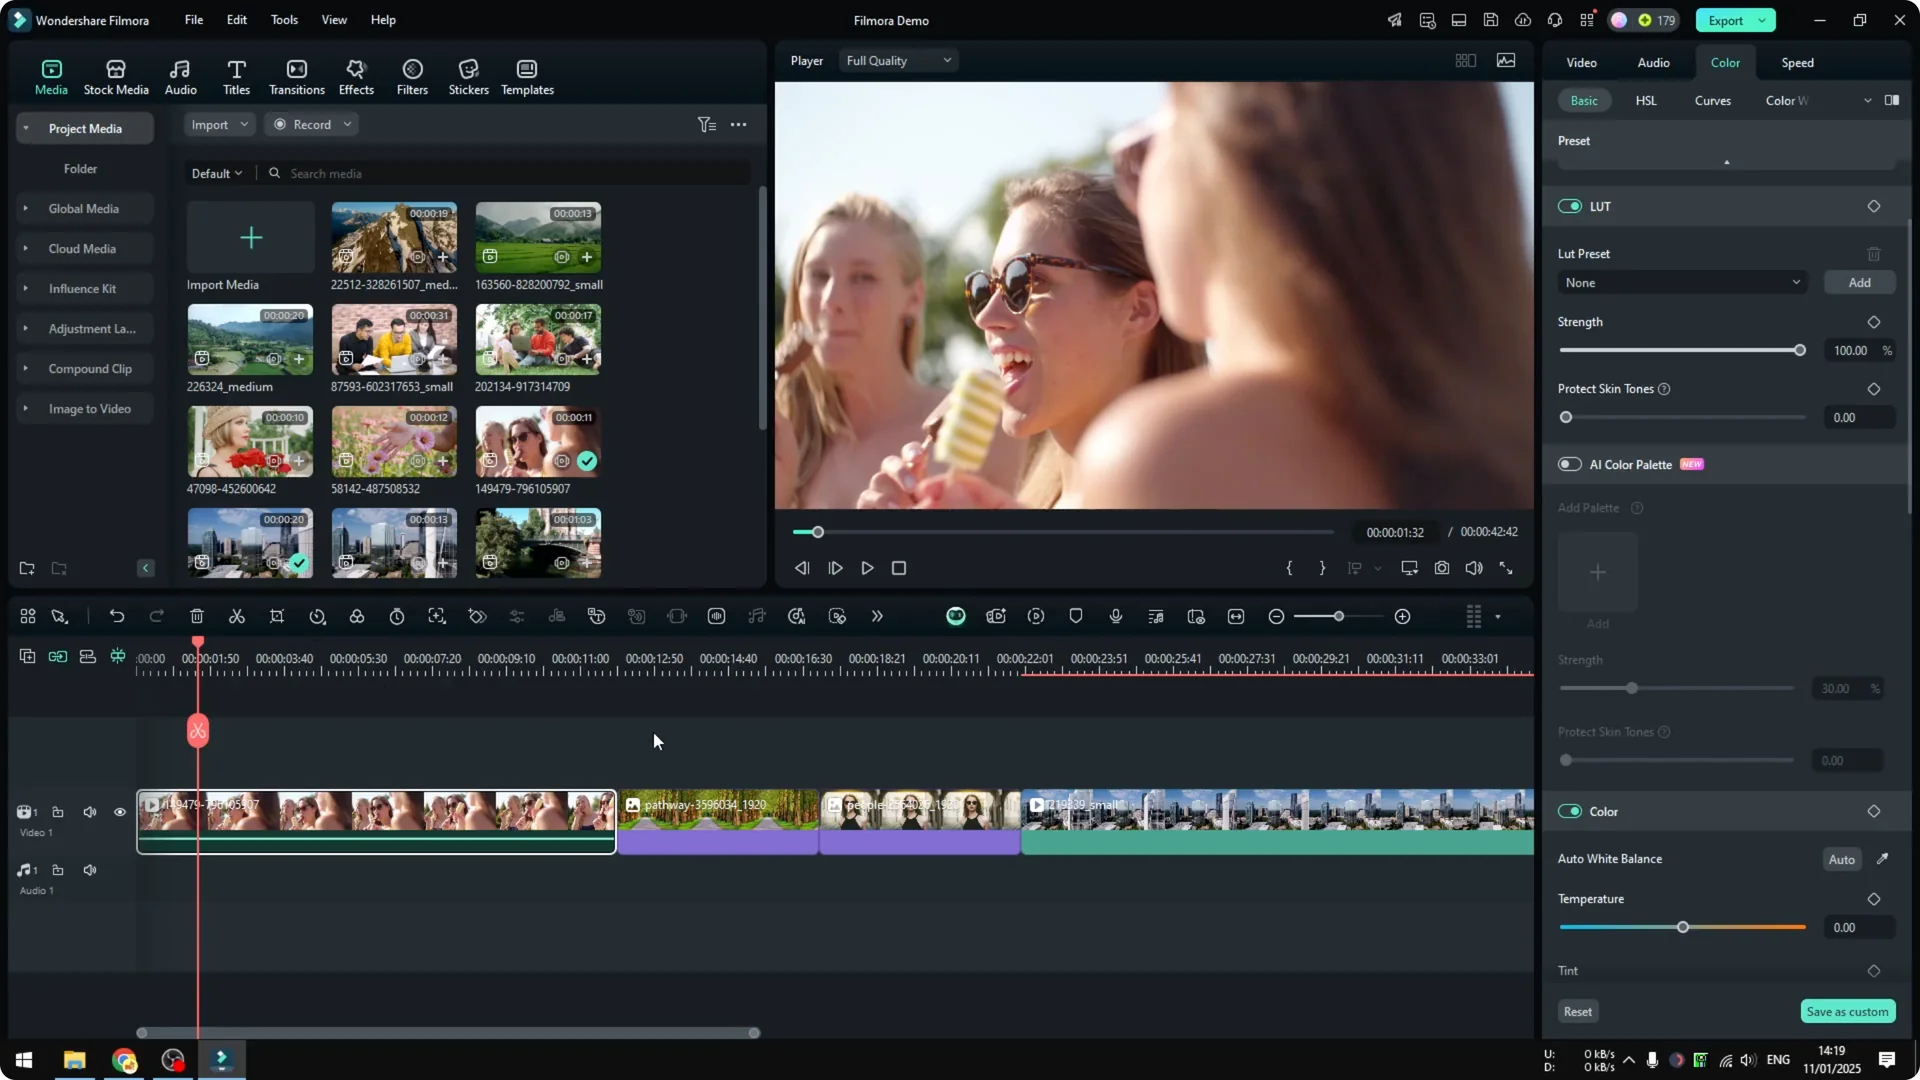
Adjust strength and protect skin tone
You can always adjust the strength. You can make it a bit weaker or you can make it to the maximum.

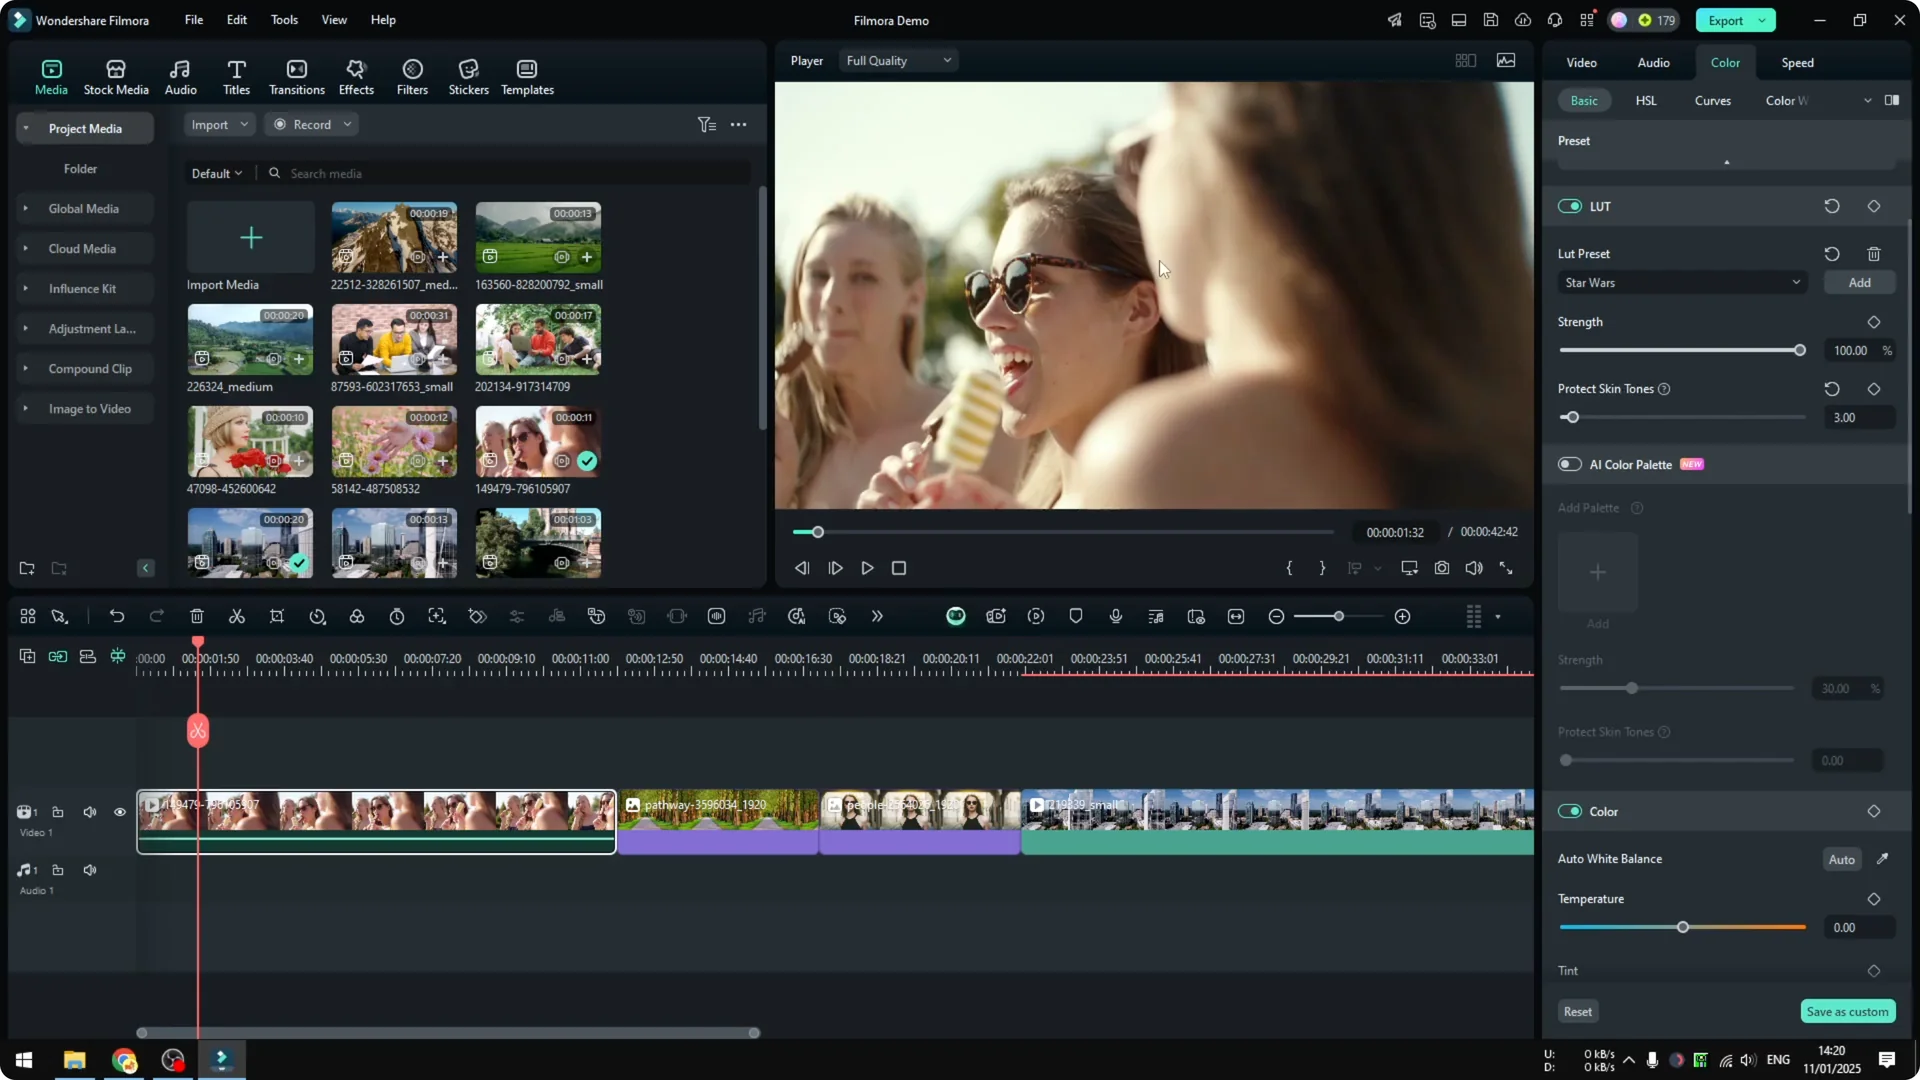
One setting that I really like is Protect Skin Tone. This is very useful if you apply the LUT to the surrounding but want to make sure the skin color of the people remains consistent. Enable this and increase the strength of the setting.

With the example preset it looks very warm and not very vibrant at first. Increase it and you will see the skin color change while the surrounding still follows the preset. Skin color becomes a lot more vibrant.
More color tools beyond Using LUTs in Filmora
There are other settings like HSL, curves, and color wheels. Honestly a lot of them are very advanced. For a lot of people, for casual editors, the LUT setting is good enough to make your video more engaging and attractive.

Read More: How To Add Animations To Text In Filmora
Final Thoughts on Using LUTs in Filmora
LUTs in Filmora work almost like color grading and feel more simplified. Choose a preset, adjust strength, and protect skin tone for consistent people shots. For many projects this is all you need to get an attractive look.